

Quick start guide
This quick start guide walks you through setting up and integrating Contentful Personalization. The exact setup procedure for each step varies based on your front-end framework, and the mechanism by which you retrieve content, so each step will reference further documentation.
Introduction
Installing Contentful Personalization into an application requires a few essential steps. These steps require modifying both your content model and application. We strongly recommend you create a development instance of both and perform these steps there.
- Create a Contentful account.
- Install and configure Contentful Personalization.
- Extend your application with Contentful Personalization SDKs.
- Configure Insights and/or other Analytics.
- Publish an Audience and Optimization.
Step 1: Create a Contentful account
To create a Contentful account:
- Open the sign-up form.
- Enter the required details to set up your account.
- Select the CAPTCHA check box.
- Click Sign up. Your account is created.
Step 2: Install and configure Contentful Personalization
You must have a paid license to use Contentful Personalization. If you don’t have a license yet, reach out to sales.
To install and configure Contentful Personalization:
- Log in to the Contentful web app.
- Click Apps, and select Marketplace.
- Search for Contentful Personalization, and click on its name. The “App details” page is displayed.
- Click Install. The “Manage app access” modal is displayed.
- Select the environment in which you want to install the app.
- Click Authorize access. The Contentful Personalization configuration page is displayed with an overview of the upcoming steps required to correctly configure the app.
- Click Install. The app is successfully installed and the configuration page is displayed.
- Select the data bucket you want to connect to: Main or Development. For more information about data buckets, see the Data buckets page in the Help Center.
- On the “Personalizable content types” tab, select the content types you want to extend with Contentful Personalization. Each content type you select will include an additional field for personalization.
- Click Save.
Step 3: Extend your application with Contentful Personalization SDKs
Contentful Personalization integrates in your application using our SDKs. Contentful Personalization SDKs are responsible for storing a profile that represents the state of a user and communicating with the Experience API using events to update it. The SDKs also provide methods and components so you can declaratively render the correct optimization content according to the current profile.
Install a suitable version of the Experience SDK for your application and install the Insights Plugin.
This installation process can be broken down into several steps, as follows:
a. Install packages
You have to install at least two dependencies in your project:
- An SDK for your library or framework.
- A utils package responsible for mapping content source data to a format consumable by SDK components.
For more information of what dependencies to install, see the Installation and Utility Libraries docs.
b. Create a Contentful Personalization instance
A Contentful Personalization instance holds the profile, provides callable events, updates the profile in response to called events, and provided several configuration options. It is instantiated by providing the API key and environment, and can be further configured through optional parameters.
The API key is the Client ID field value displayed under the “SDK Keys” section, on the Optimization tab.
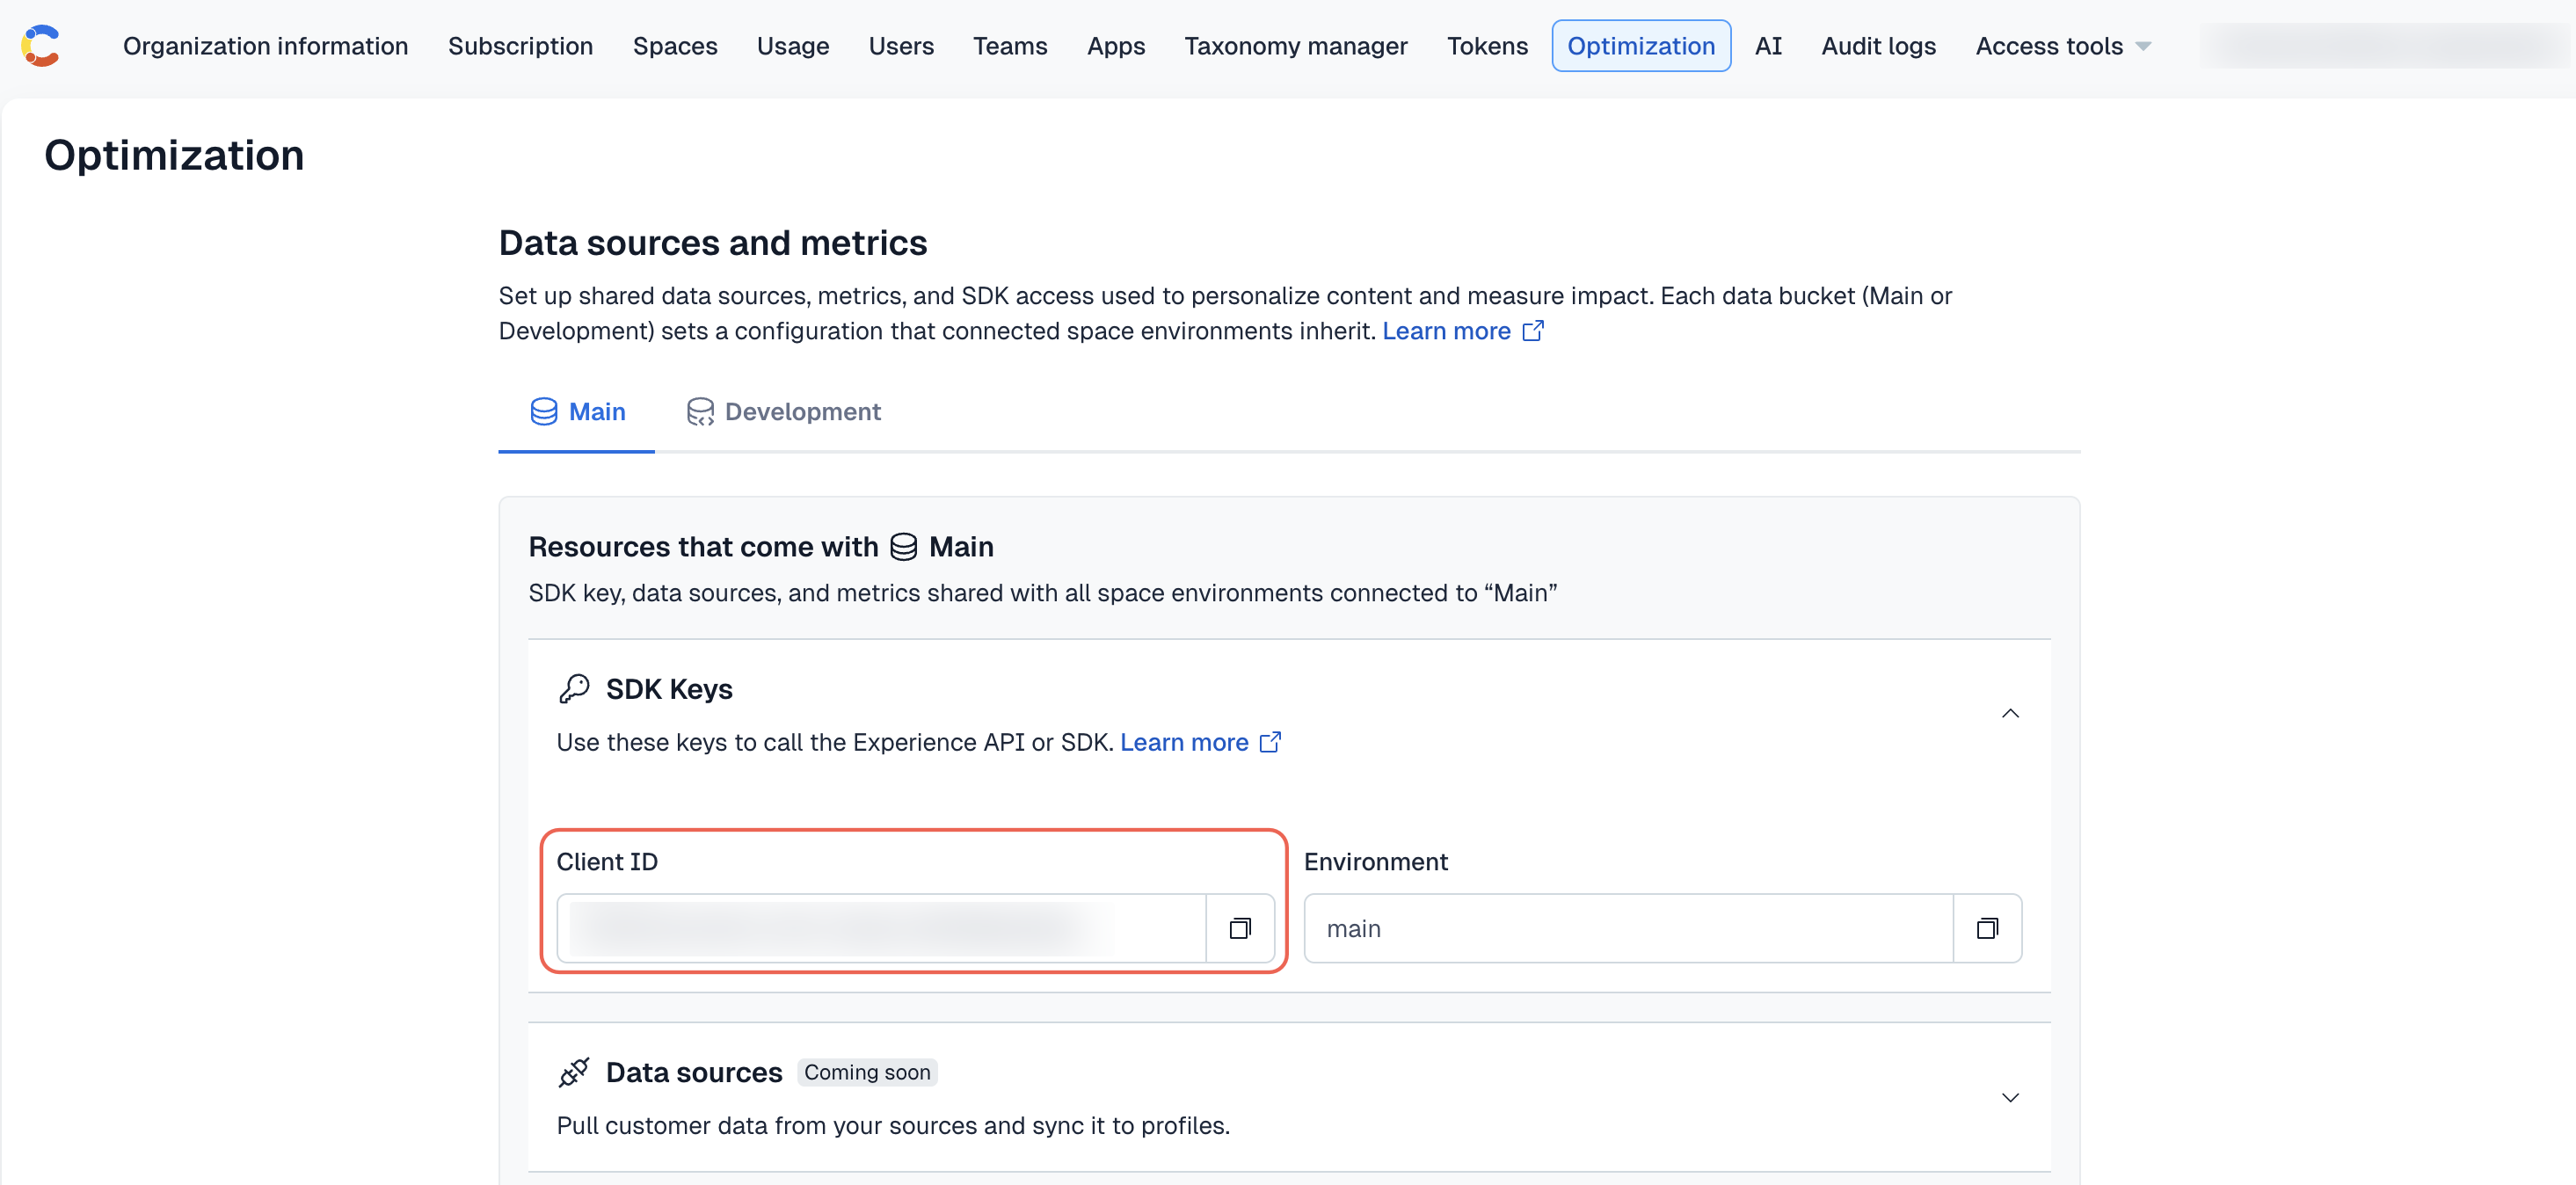
Your environment will be either main or development.
If you’re using the JavaScript SDK, you have to ensure the rest of your application can access your created instance. Our React, Next.js, and Gatsby SDKs do this through a React context provider.
For more information about the steps specific to your front-end, see Create an instance.
c. Create and update profiles with events
Profiles are objects that indicate the Audiences to which they belong. They are created and updated via page , track , and identify events that are sent to the Experience API from your web application.
Your application should call page on every route change so that it receives a profile from the Experience API on first page visit and so content authors can use most Audience rules right away.
Integrate your application with Contentful Personalization by ensuring that the application:
- Sends a
pageevent when a user views a page. - Sends a
trackevent when a user performs an action that you want to measure. - Sends an
identifyevent when a user performs an action that identifies them as a user who has visited the application before. - Sends a
componentevent when a user views a Contentful entry.componentevents are automatically sent by the SDK.
The Experience SDK provides an <EntryAnalytics /> component for wrapping React components. A wrapped component will automatically send a component event to the Experience API if a user views it.
Sending events directly to the API is possible, but using the Experience SDK is much more convenient. For more information on integrating your application with the Experience SDK, see the Send events section of its documentation.
d. Validate your integration
We recommend using Live Events to validate your setup and confirm that Contentful is receiving the event types required for analytics.
To access Live Events:
- Log in to the Contentful web app.
- Navigate to the “Optimization” tab.
- In the left sidebar, click Live Events.
- Enable the Live event streaming toggle.
- Load a page that contains tracked content, and trigger a user action that sends a
trackevent. For example, clicking a button on the page.
If your setup is working correctly, you should see at leastpage,track, andcomponentevents displayed in the event stream on the Live Events page.
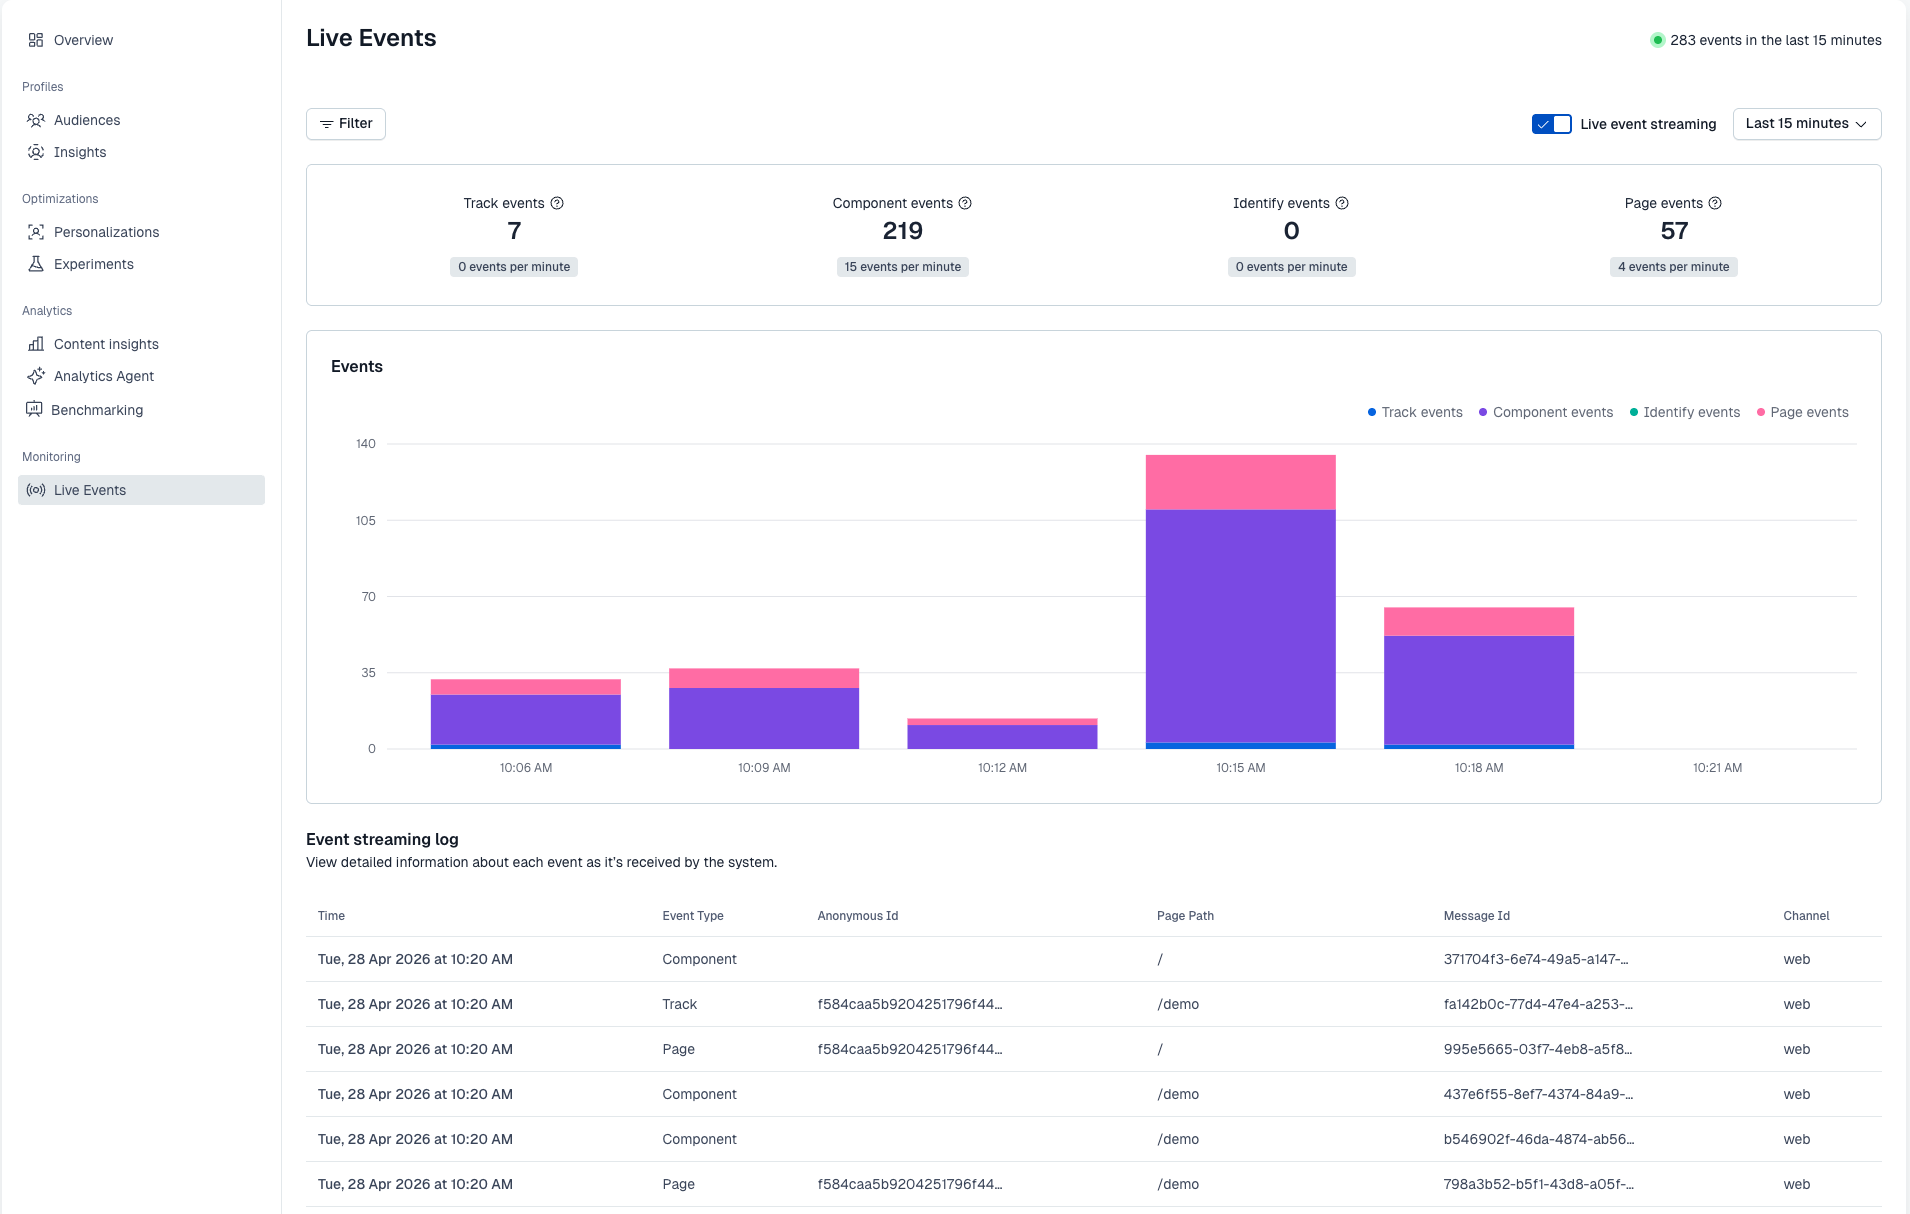
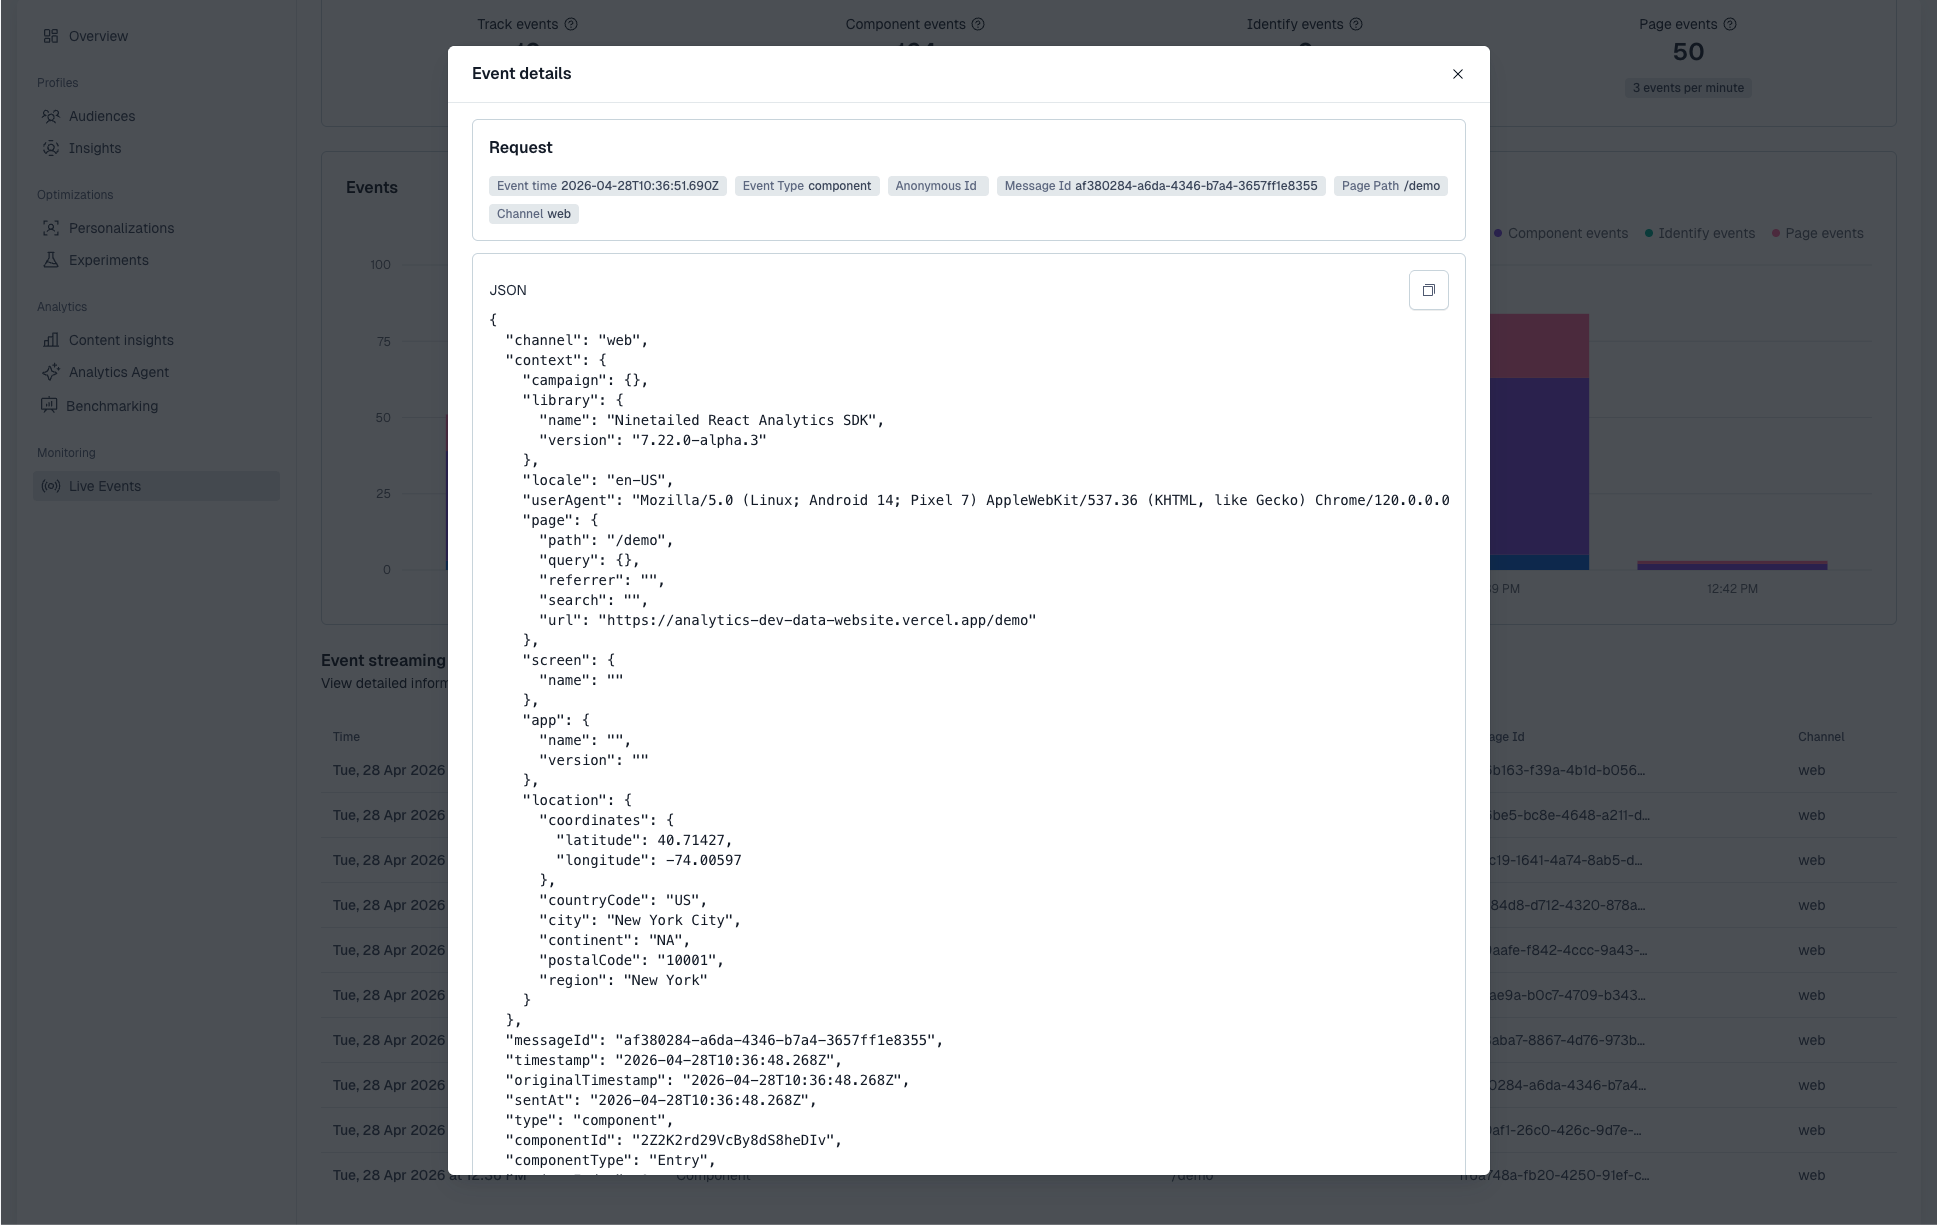
The Events dashboard displays the type of events that Contentful Personalization receives over time, and the Event streaming log lists individual events. If you want to inspect an event more closely, open its event details and review the JSON payload.
Only organization admins can access the Event streaming log and the event details.
When checking the JSON payload for component events, confirm that the payload identifies the viewed component correctly. If the component was rendered as part of a personalization or experiment, also confirm that the payload includes the associated experience metadata, such as experienceId. This is especially important for sticky variant persistence, where experienceId and variantIndex must be present.
Troubleshoot
If no events appear
If no events appear in Live Events, check that your setup is sending events at all. The most common issues are:
- An incorrect SDK API key
- The wrong environment
- Not triggering any events in the application.
Make sure the Live event streaming toggle is enabled, then reload a tracked page and trigger a user action that should send a track event.
If component events are missing
If only page and track events are displayed, but no component events, the most common cause is that your components are not being tracked correctly.
e. Render optimizations
React-based Contentful Personalization SDKs provide an <Experience /> component that wraps the React component you want to use to render out the selected content variant. It ingests formatted content from your connected content source to determine what optimization and variant to render.
The <Experience> component requires your content source data to be mapped to a specific format. You have to use a Contentful Personalization Utility library to ensure that your optimization data is mapped correctly.
For more information, see Render Experiences.
Step 4: Configure Insights and/or other Analytics
Contentful Personalization displays analytics of your Audiences, the content entries your Audiences have seen, and the performance of your optimizations. These are Audience Insights, Component Insights, and Experience Insights, respectively.
Audience Insights are automatically populated after publishing an Audience. Component and Experience Insights require installing the Insights Plugin, which sends impression events of Experiences to Contentful Personalization. You also have to send at least one track event to log a conversion event you’re interested in for Experience Insights to provide meaningful data.
Additionally, you can send optimization impression events to destinations like Google Tag Manager and Segment with Contentful Personalization plugins. In combination with your existing conversion event data in your systems, you can get started with analysis of experiments immediately using tools you’re already familiar with.
Step 5: Publish an Audience and Optimizatiom
Now that a connection is established and your codebase can support rendering optimizations, it’s time to create content. The segments (Audiences), experiments and personalizations (Experiences), and variations of content are all content entries that you create.
Your content entry structure will look like this:
- Your baseline content entry will be an entry using one of your existing content types.
- It will reference a list of optimization entries.
- Each optimization will reference an Audience, indicating to whom to show the optimization, and a list of components that will show different content when the optimization is active.
- Each component will show the baseline and variant content.
- Variants are simply content entries within your content source based on your existing content types.
Next steps
This guide suggested extending one content type with Contentful Personalization. You can extend additional content types so they can also be personalized or experimented with.
Plugins are useful for extending the capabilities of Contentful Personalization. Many Contentful Personalization users choose to instrument the Preview Plugin to allow their content authors to preview Experiences before they are published. The Preview Plugin also integrates with CMS live preview product features for powerful auditing workflows.