Set up content preview
What is content preview?
Content preview allows you to preview content created in a Contentful space either in a local or an online version of your website or app. This feature makes it possible to add single or multiple content previews, preview draft and published entries, and select which content types can be previewed.
There are the following preview modes:
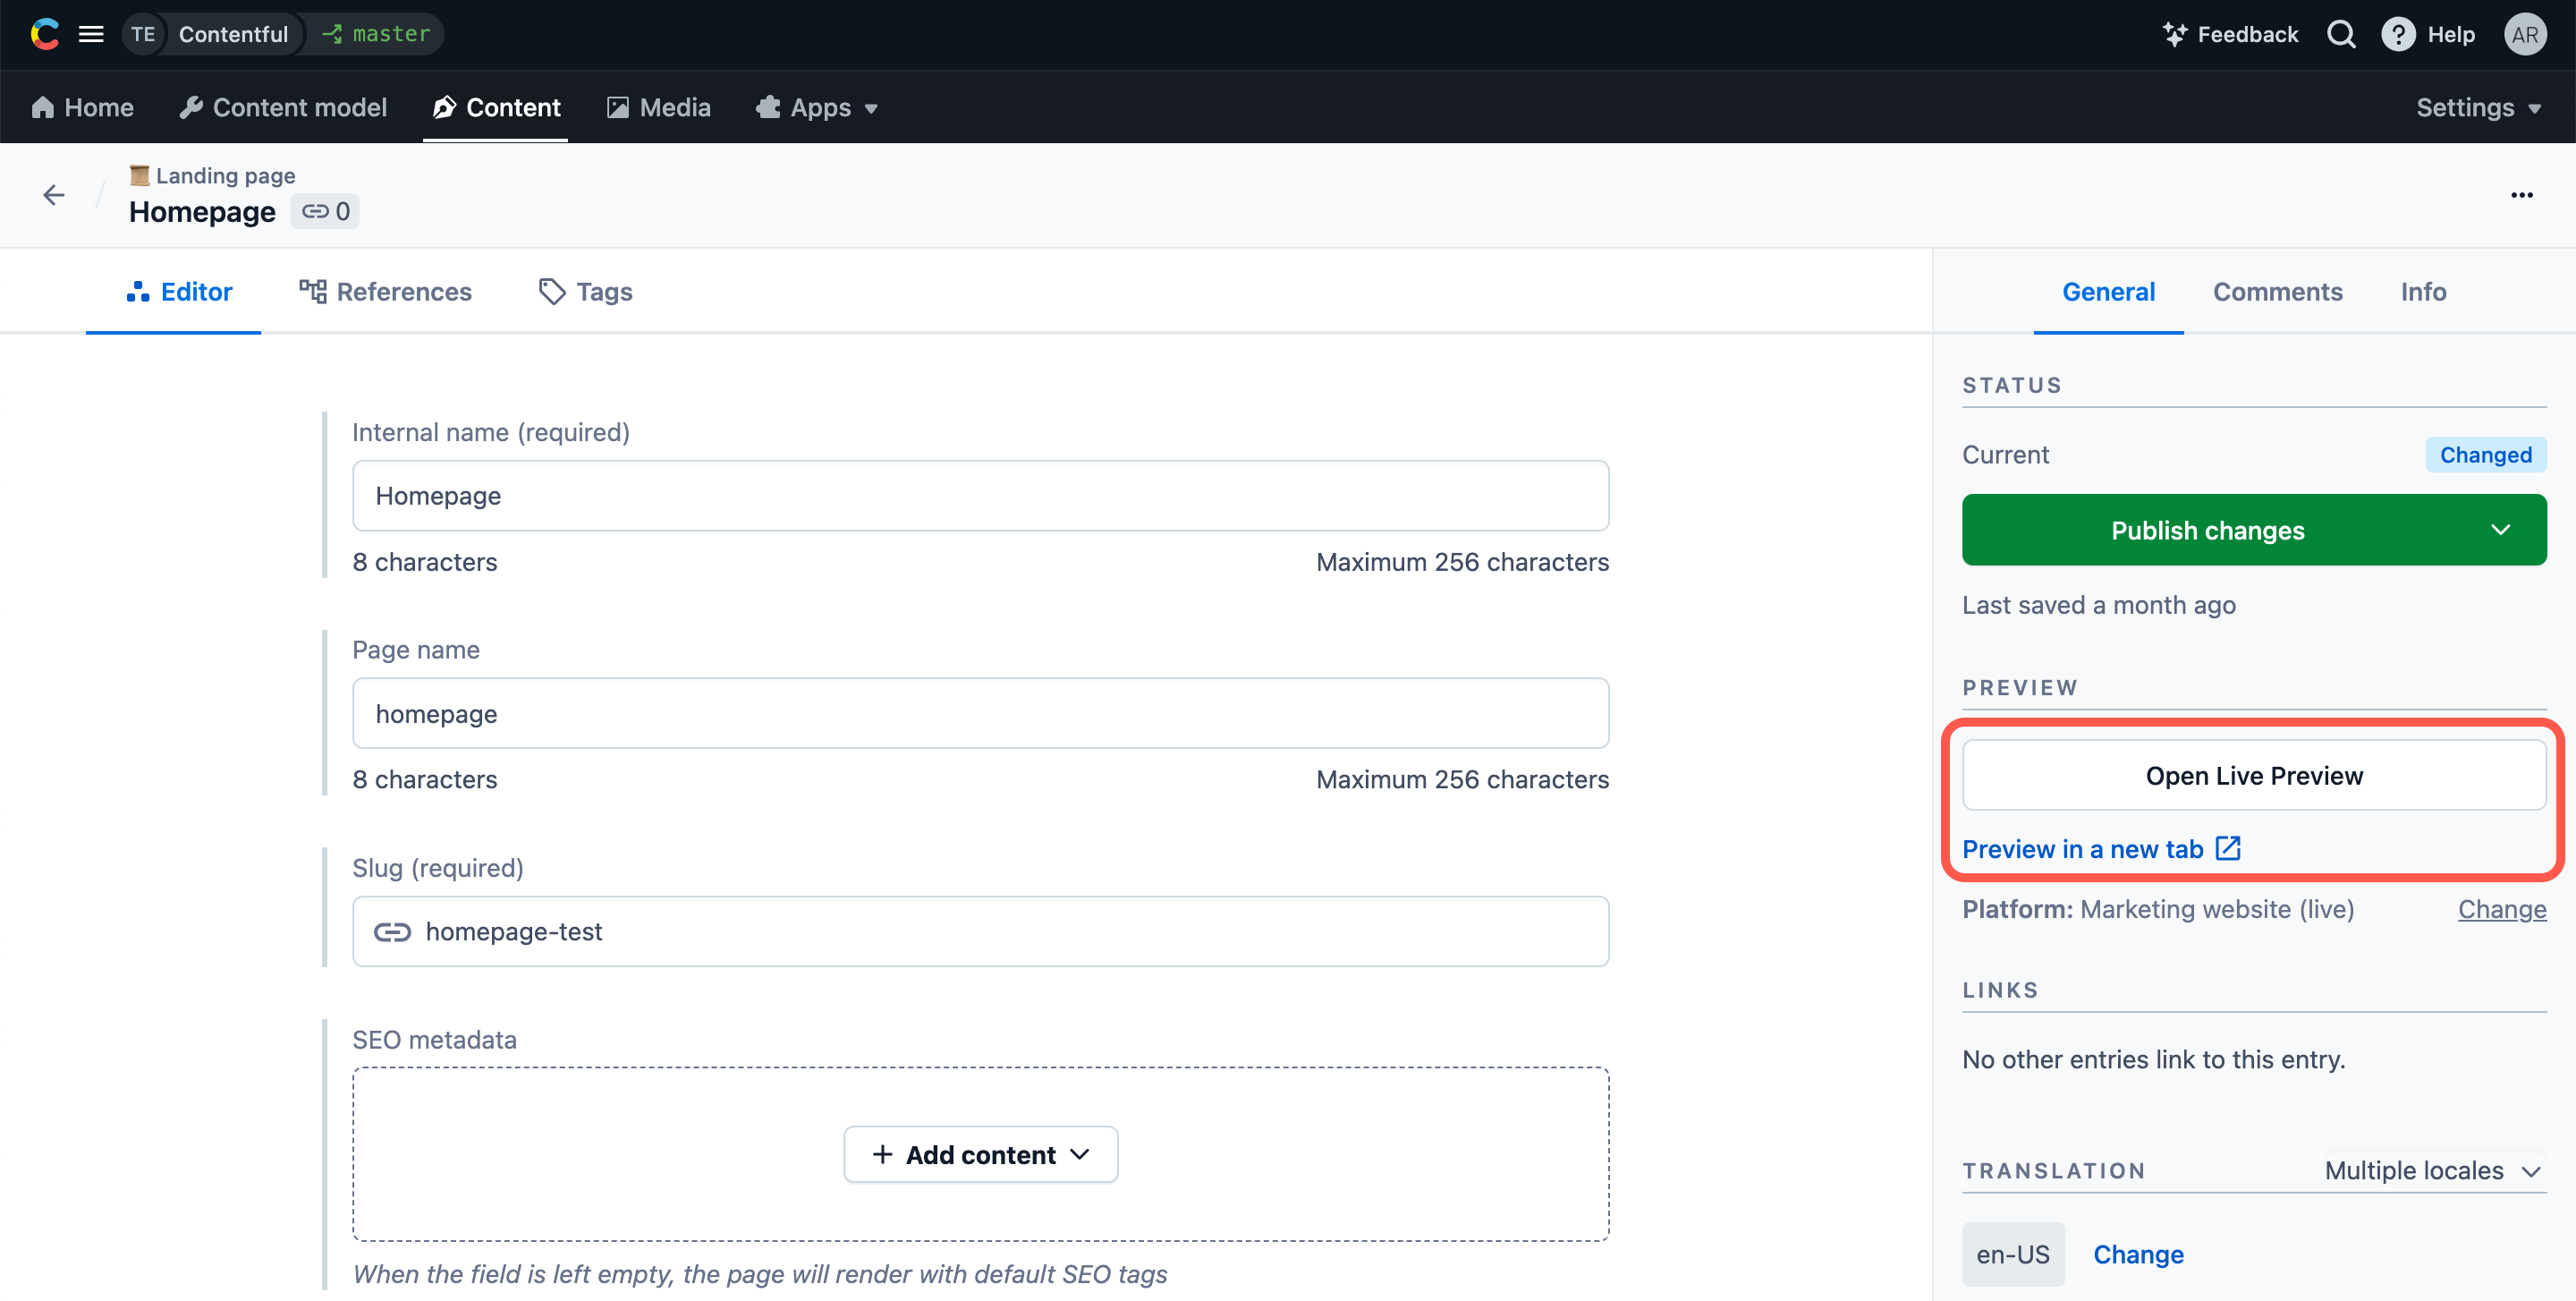
- Live preview — Recommended: Allows you to preview your content in the same page with the entry editor, view your changes live as you type, and quickly go to editing of a specific piece of content.
- Preview in new tab — Your content preview opens in a new tab.
You can switch between the preview modes in the “Content preview” window in the web app. The selected preview mode applies to all of your content previews.
Create a content preview
To set up content preview:
- Log in to the Contentful web app.
- Click Settings tab and select Content preview from the drop-down.
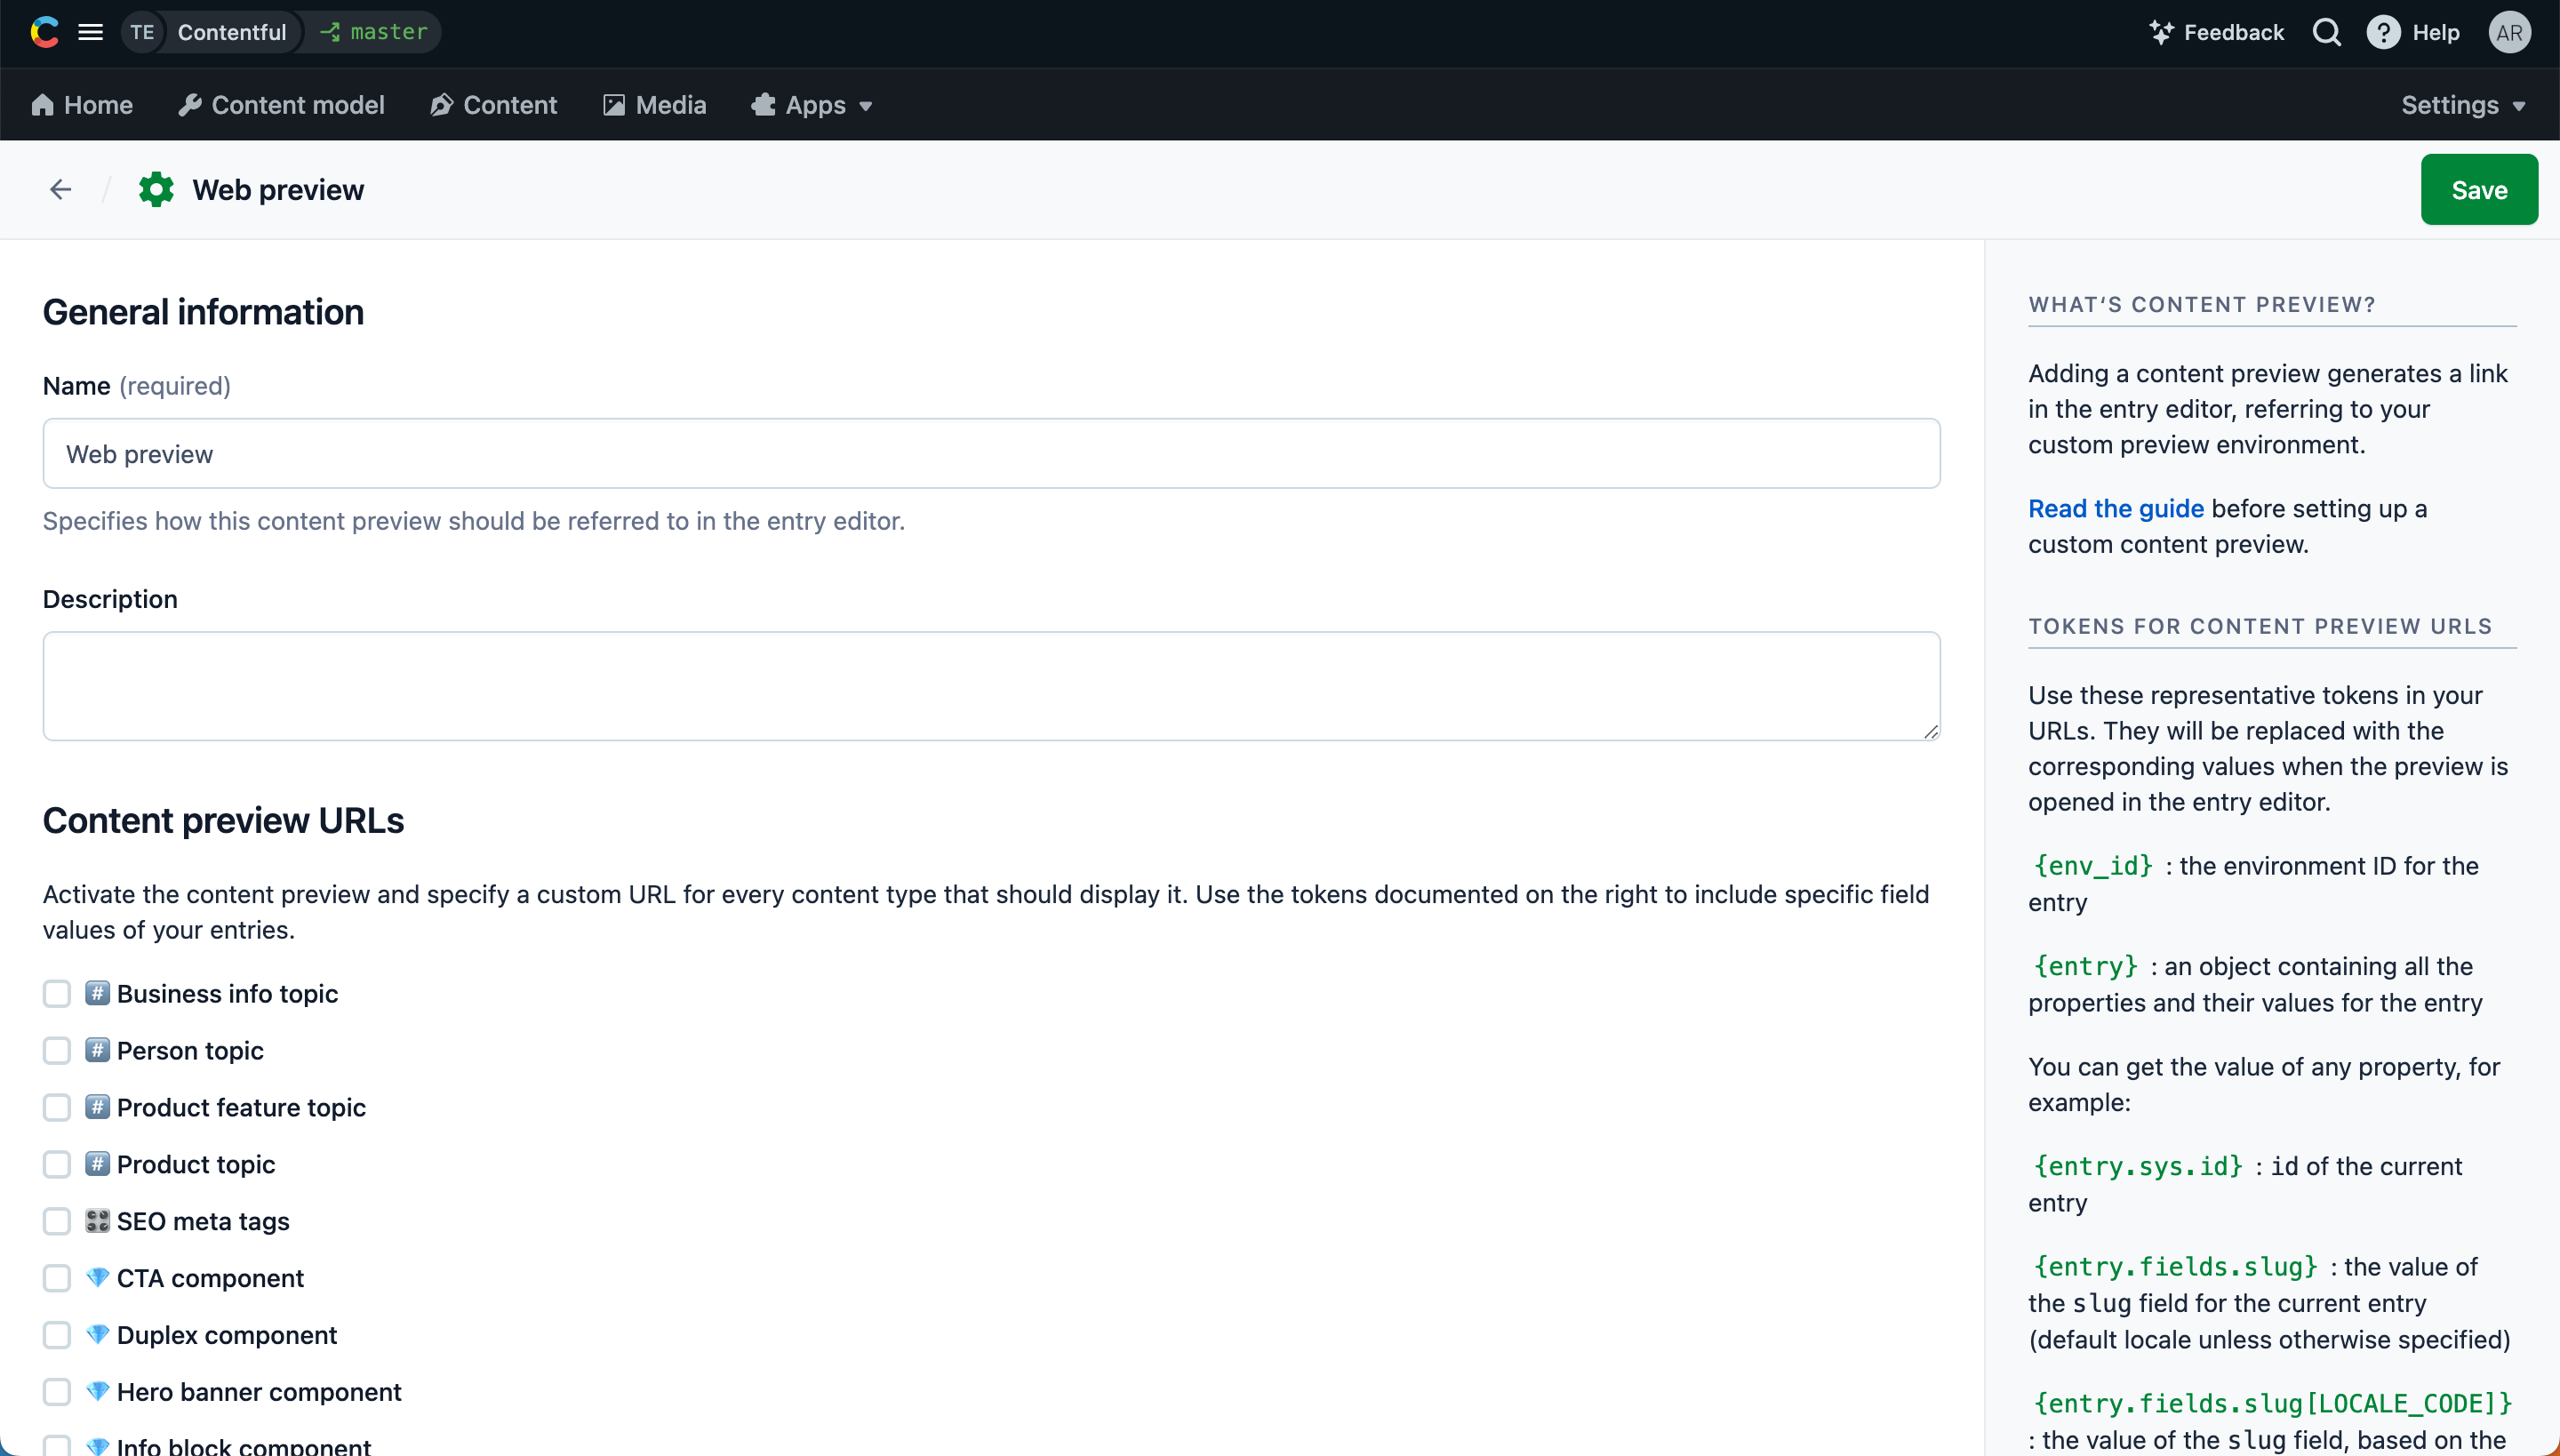
- Click + Create preview platform. The Content preview editor is displayed.
- In the Name field, enter a custom name for your content preview.
- Optional: In the Description field, enter a description for your content preview.
- Under the Content preview URLs area, select the checkbox against a content type you would like to have content preview for.
- In the Preview URL for content type… field, add a URL according to the following template:
https://[YOUR_PREVIEW_DOMAIN]/[PLACEHOLDER_TOKEN]where:YOUR_PREVIEW_DOMAIN— The base path of your preview website or app (e.g.https://myapp.com/entities/).PLACEHOLDER_TOKEN- A token that is resolved into an actual value when a user clicks on the preview link. You can add one or multiple tokens according to the table below:
For security reasons, never include an access token in the preview URL. Instead, implement the authentication process in your client app.
https://{domain[{locale}]}/products/{entry.fields.slug}- Click Save. Your content preview is saved. The entries of the selected content type can now be previewed.
Custom preview tokens
You can create custom preview tokens that resolve to locale-specific URL strings and parameters. This allows your content editors to more quickly and easily switch between locales in live preview as they edit.
To create a custom preview token:
- Log in to the Contentful web app.
- Click on Settings and select Content preview. The preview settings page is displayed.
- Go to the Custom preview tokens area at the bottom of the page.
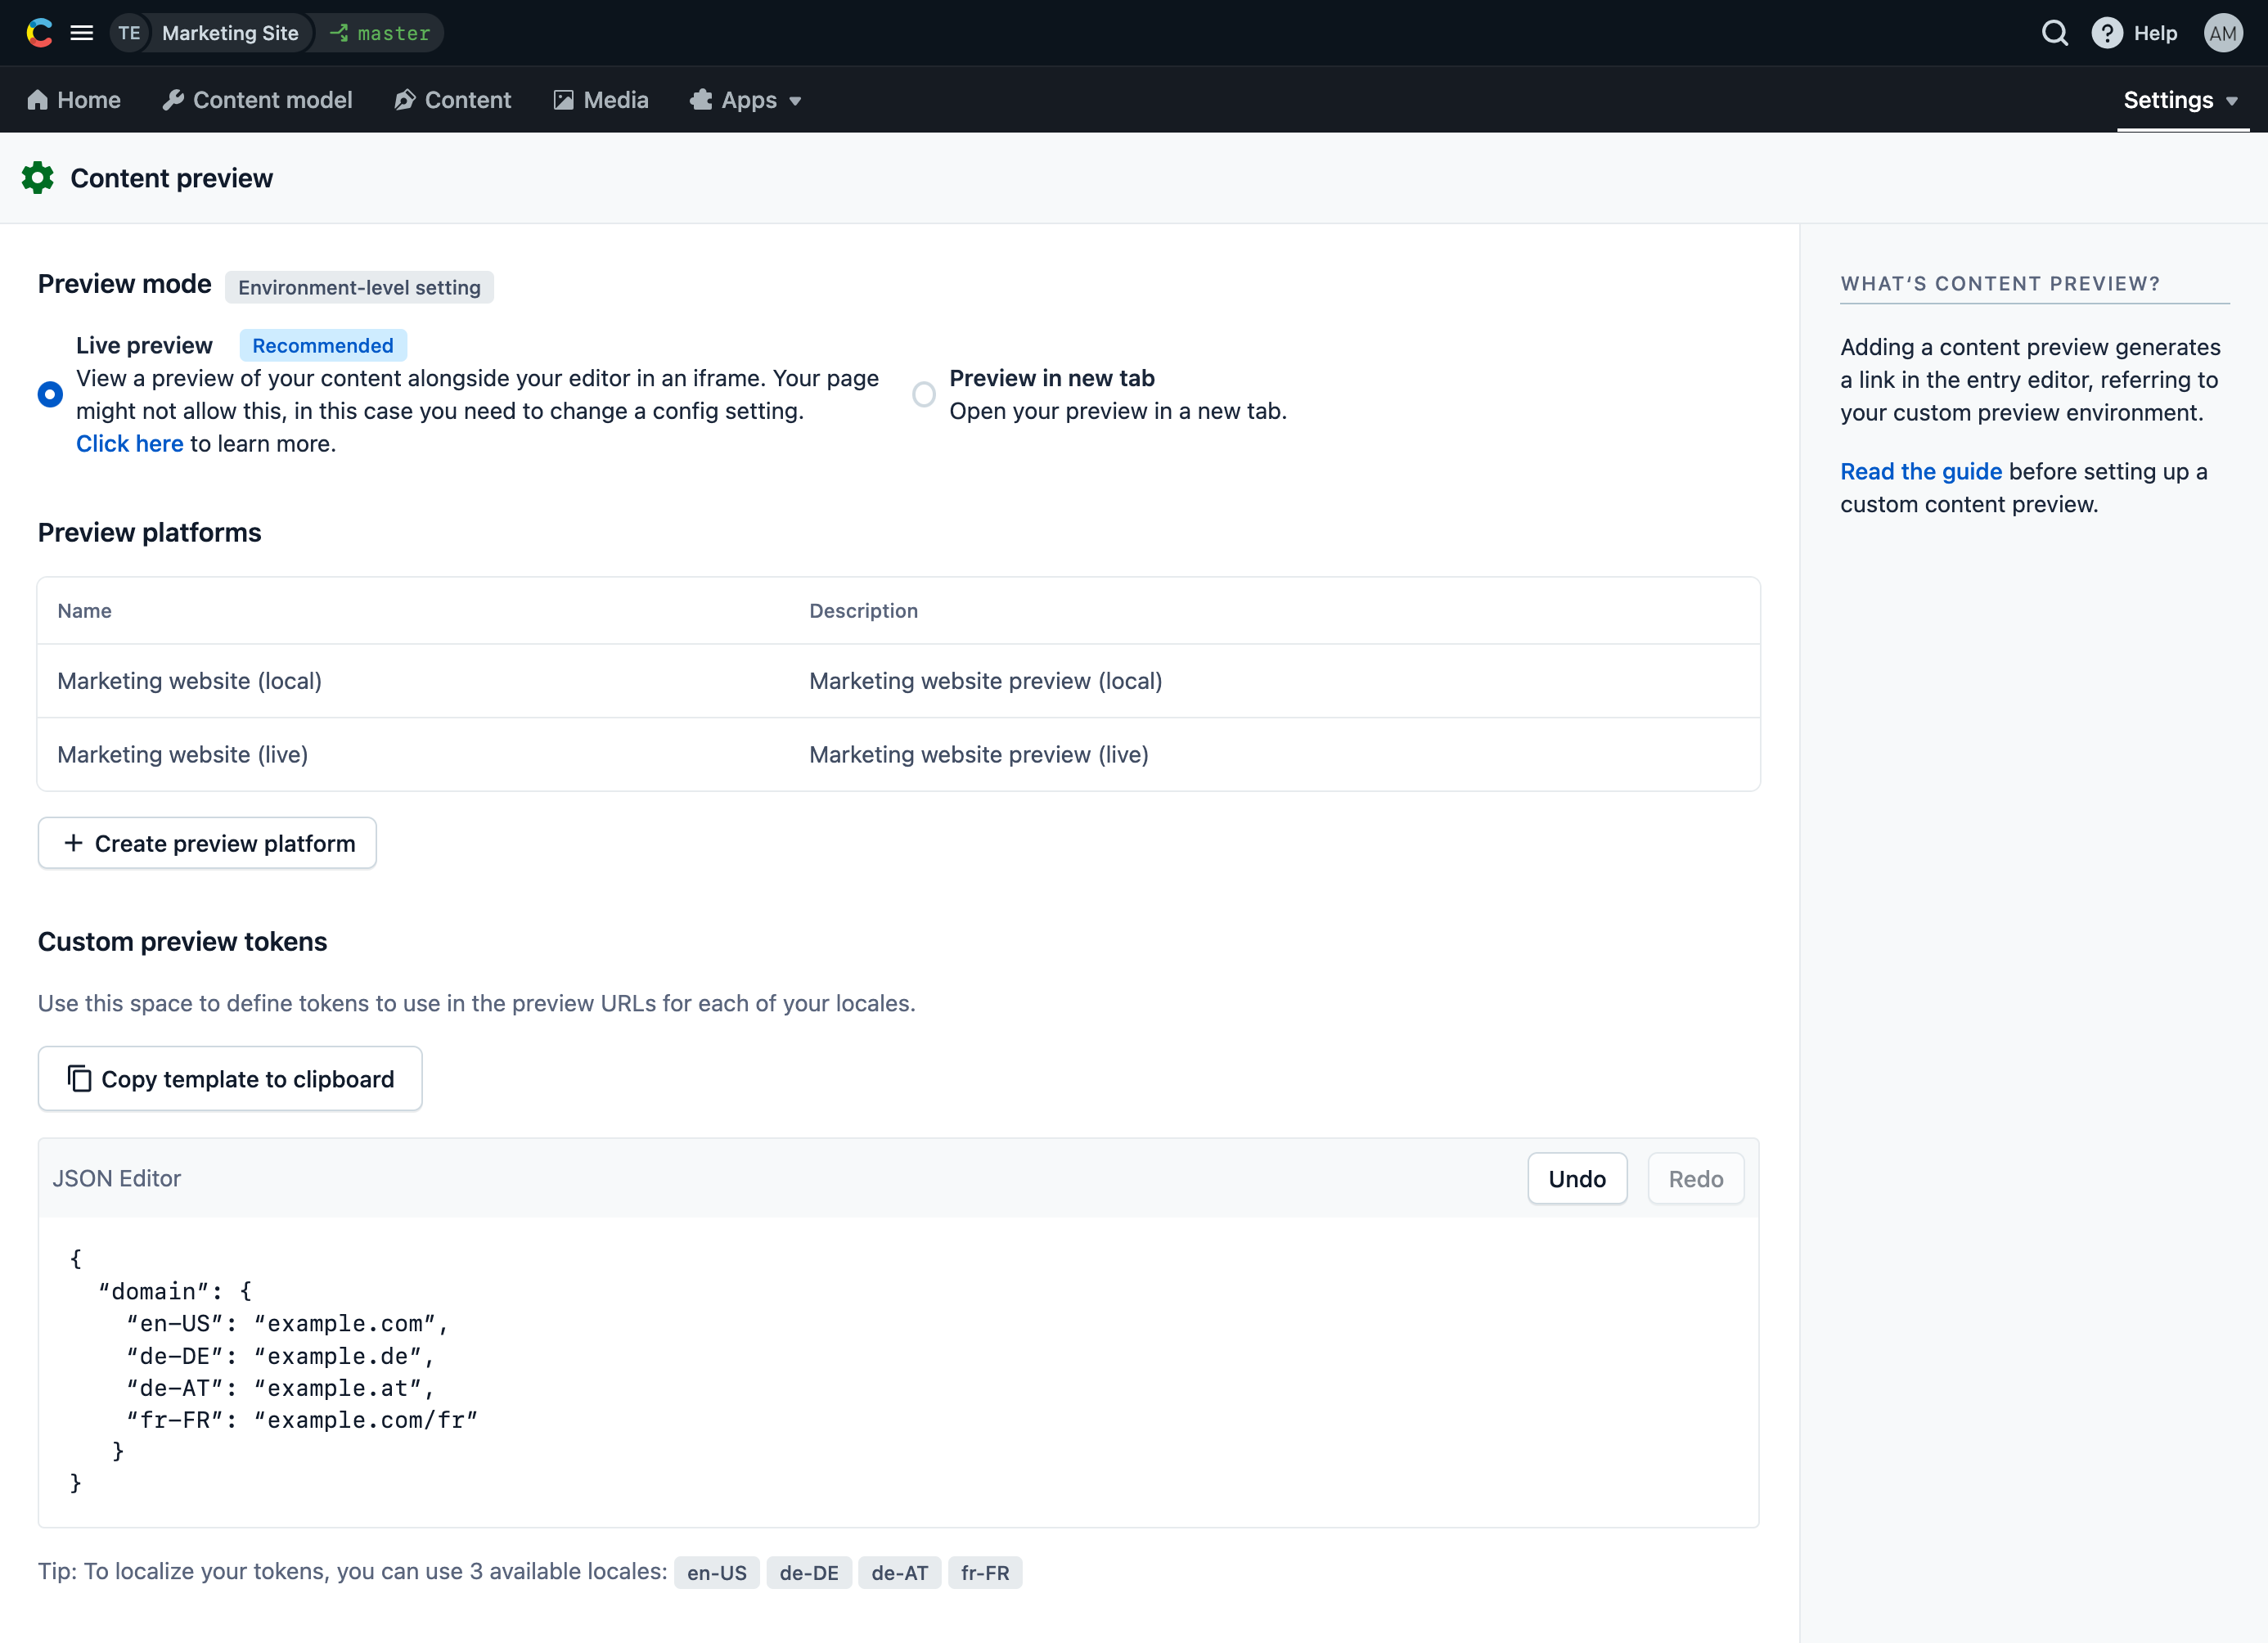
- Click Copy template to clipboard to copy an example JSON template with all of your locales listed to your clipboard.
- In the JSON Editor field, paste the copied template.
- Adjust the token and each locale setting to your needs. The table below includes some examples that might be relevant to your setup:
- Repeat the process for any other custom tokens you’d like to use in your preview settings. Be sure your JSON is valid and properly formatted, or the tokens won’t resolve properly in the preview URLs.
- Click Save to save your custom tokens, so that they can be used for the preview URLs of a new or existing preview platform.
Additional resources
- Live preview - Learn how to set up live preview to preview your changes in the same page with the entry editor, see them simultaneously with the editing, and quickly go to editing of a specific piece of content.
- Setting up and configuring preview - Take the training course in our Learning Center to learn more about setting up a content preview.