A beginner's guide to building a static site with Contentful, according to an artist
Published on June 10, 2020


Inspiration for your inbox
Subscribe and stay up-to-date on best practices for delivering modern digital experiences.
Like many of my creative peers, programming doesn’t come to me naturally. I’m not a developer; I’m an artist interested in the web as my medium. With the introduction of terms like “immersive websites” and “creative coding,” more and more people like me want to use the internet in unconventional, exploratory ways.
We’ve all had ideas in the pipeline that we can’t seem to find the time to tackle. For me, that’s augmented reality (AR). I’ve wanted to create an AR project entirely on the web for a while, and now I’m using Contentful to finally start that project.
This is the tutorial that I wish I had while setting up a static site. I spent several days tearing out my hair so that you don’t have to. You can read through the tutorial here and follow along with my video tutorial. Please keep in mind that this is just one approach. If you have a different one, let me know!
How to build a static site
1. Figure out what you want your site to include and choose your tools
I began by sketching out what I wanted the site to include. This plan helped me to clarify the purpose of the project, its audience and its aesthetic. It also guided me when choosing what tools to use.
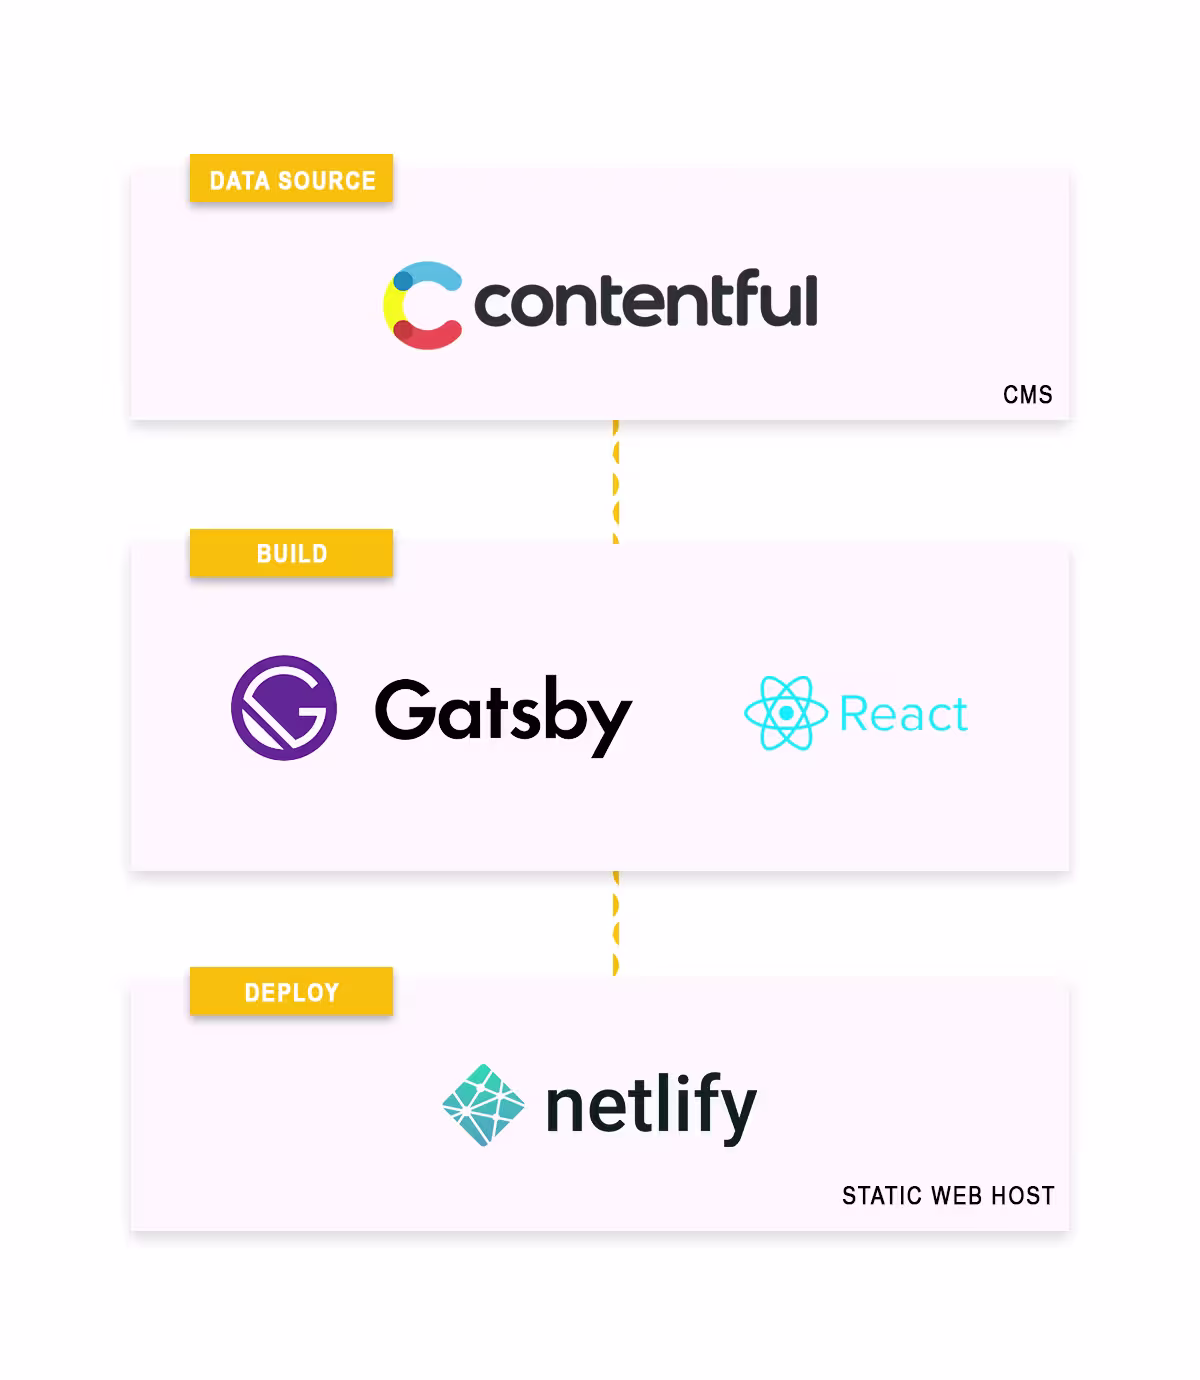
My list of criteria was rather short. I wanted to develop a static website to securely and reliably host a blog and my AR web project. After researching my options, I decided to go with Contentful’s suggestion to use Node.js and Contentful. I used these with React and Gatsby, a static site generator and JavaScript library for building user interfaces. To deploy and host the site, I used Netlify because it easily integrates with Contentful and Gatsby.
2. Download the necessary programs to your computer
Download Node.js (you’ll need Node.js 10.13.0 or higher), along with the text editor Visual Studio Code (VS Code).
3. Set up Contentful
Open your Contentful account. Contentful is free for small projects, as is their help center. You can find answers to any of your Contentful questions there.
4. Prepare to build your static site
Create a Gatsby Cloud account.
Log into Gatsby and follow this path: Create a new site > I don’t have a Gatsby site yet > Blog with Contentful > Name your project > Connect to your Contentful account > Start my site
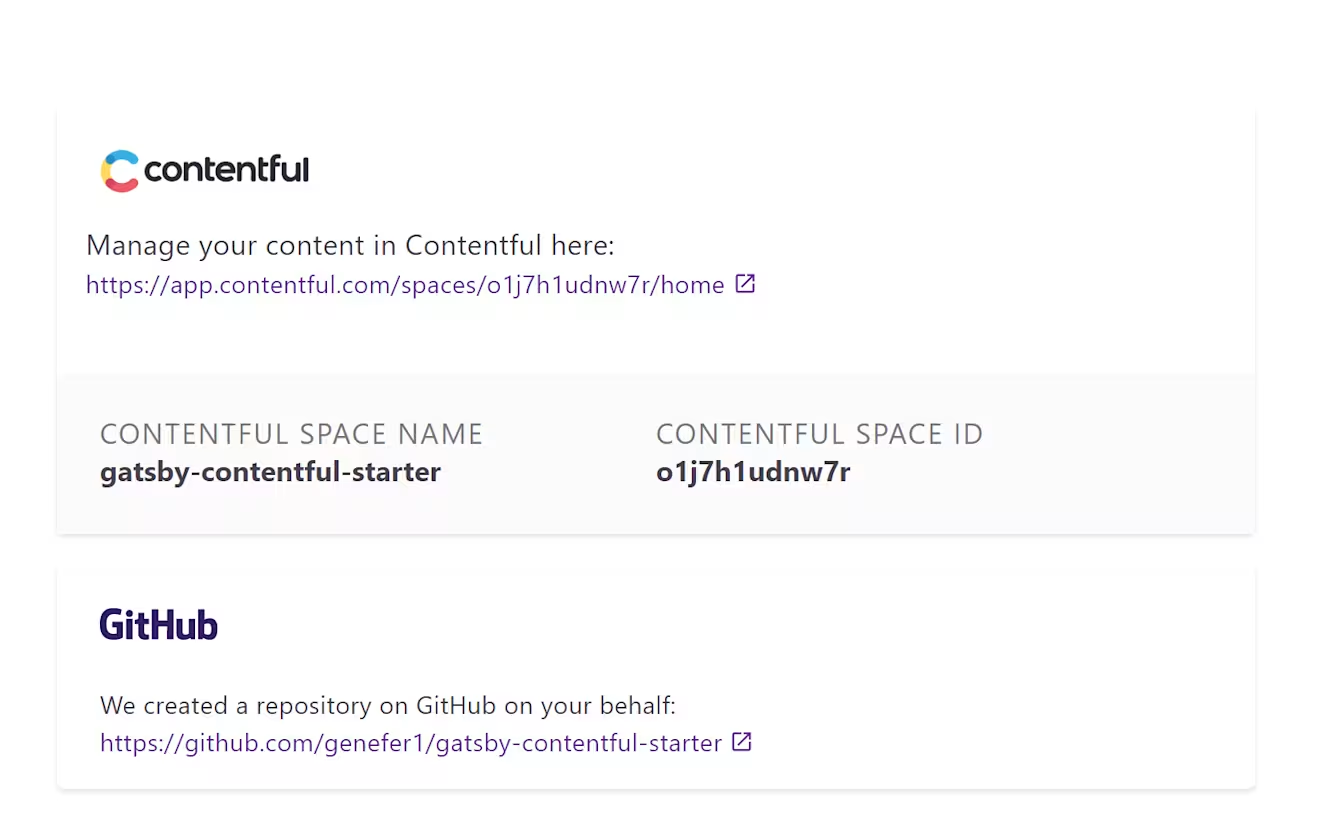
Your new site will appear in your Contentful space and in your GitHub repositories.
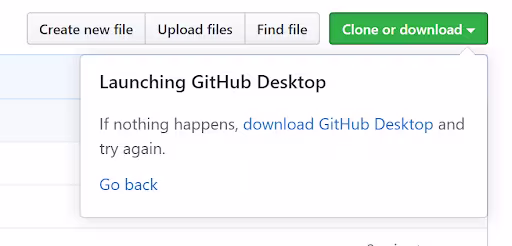
The easiest next step is to go to your new GitHub repository and clone it to your computer via the GitHub Desktop App. This automatically puts all of the project files onto your desktop so that you’re ready to build. If you do not already have the app, you will be prompted to download it.
5. Enter your Contentful credentials
It’s time to open your terminal! If you’re unfamiliar with it, search “terminal” (for Mac) or “command prompt” (for Windows) in your computer’s search bar.
“Change directory” into the new folder you created by typing cd [your folder name].
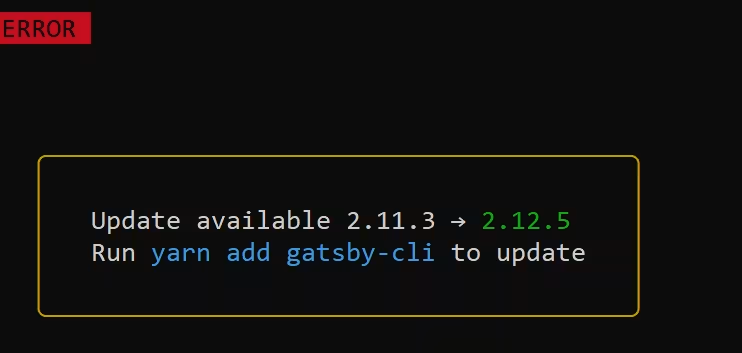
Install Yarn by typing yarn run setup.
If your terminal returns an error message like the one in the image below, make sure you are running the latest version (Run yarn add gatsby-cli to update).
You will then be prompted to input your SpaceID and API access tokens. You’ll find this information in your new space.
Go to Settings > General Settings to get your Space ID.
Next, go to Settings > API Keys > Content Management tokens to generate a personal access token.
In the same window, switch to the “Content delivery / preview tokens” tab. You’ll see your “Gatsby Preview — API Keys” and can copy your delivery API token. This, your SpaceID and personal Access Token should be pasted in your Terminal/Command prompt.
6. Run your static site
Start development server
cd new directory
yarn run dev
You are now able to open your development environment at http://localhost:8000 and see your project! You can now create and edit content directly in Contentful.
Try out your new skills by adding a blog post under the “Content” tab in the space you created. Once you’ve published it, you’ll be able to see your new blog post at the local host above (to do this, be sure to start your development environment again first using yarn run dev).
7. Deploy your build
As a newbie, I highly recommend deploying your site using Netlify, as it easily integrates with Contentful. You can log into your Netlify account, which is now connected to your GitHub account. Add a new site and follow the instructions.
Change “gatsby build” to “yarn build” in basic build settings. The publish directory should remain “public/”.
Press Show Advanced and define env variables. Note: if this does not work, you can always define env variables later under Settings > Build and deploy > Environment.
CONTENTFUL_SPACE_ID=’your-space-id'
CONTENTFUL_ACCESS_TOKEN='your-access-token'
Click Deploy Site.
8. Connect Netlify to Contentful
Connecting Netlify to Contentful cuts the developer headache out of the workflow altogether, which is great for our purposes. Since Netlify has a hook for Contentful, we can see updates immediately.
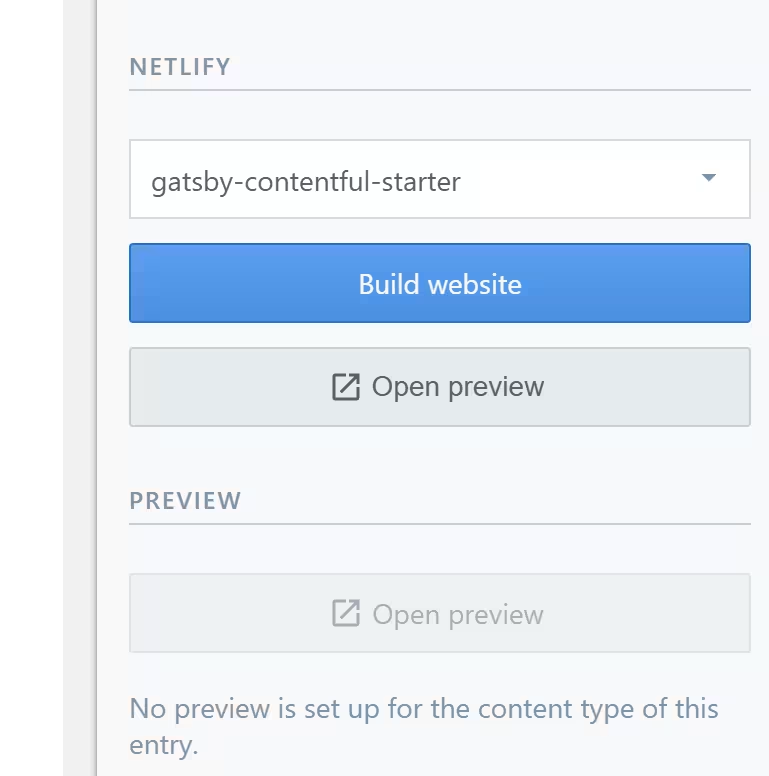
To connect the two, go to your Contentful account and click on Apps. Click on Enable apps and install the Netlify app and follow the directions. The new connection you created will add two new buttons in your Content tab. We will use the Build Website button to actually trigger a build and deploy your blog posts to Netlify! How great is that?
This means that you are now able to create and deploy content from Contentful to your new static website without having to type any code or enter the terminal! I found that this is the easiest way to deploy your site from now on.
9. Hosting
You can host your site from most services, including GoDaddy. I purchased a domain name through AWS’s Route 53 and transferred the domain to Netlify, but you can also simply purchase your domain name directly from Netlify.
Conclusion
My overall experience using Contentful and Netlify to build a static site has been great. The Contentful community is very helpful, and the Contentful team has responded quickly to several of my questions in the community Slack. It’s also nice knowing that building with Contentful will let me grow my site in the future with paid options. Being able to scale and control everything at a granular level makes Contentful a better option than other popular tools.
My hope is that my static site will develop into a platform for future web projects. I encourage you to try out my tutorial, and let me know if it works for you. I’d love to check out your own web projects if you decide to give it a go.
In the following weeks, I will be building my first web-based augmented reality project, and I would love for you to come along for the ride.

Inspiration for your inbox
Subscribe and stay up-to-date on best practices for delivering modern digital experiences.
Meet the authors

Genefer is a writer, illustrator and founding member of IMRSV Arts, a creative studio that builds interactive data-driven experiences. She uses animation, illustration and installation to explore the creative process and self-actualization. You can read more on her blog about creative development, [Art Theorie](https://arttheorie.org/).
Related articles

Best VS Code extensions for developer productivity
July 10, 2025

Integrate Contentful with Next.js 16 Cache Components
April 28, 2026

Micro segmentation in marketing: A practical guide
June 17, 2026
