Powering a Telegram channel using bots and webhooks
Published on April 11, 2024

Inspiration for your inbox
Subscribe and stay up-to-date on best practices for delivering modern digital experiences.
Raise your hand if you're subscribed to a public or private Telegram channel. A Telegram channel is a one-way communication feature on the Telegram app for broadcasting messages to many subscribers without allowing them to interact. So if we're subscribed to a channel, we receive messages.
This post is not aimed at those who receive messages but at those who want to send them. Let's imagine a business of any kind that wants to inform its customers about the launch of a new product, a delicious new recipe, or a new travel offer: you get the idea. Having a Telegram channel for communication is an additional option beyond the traditional channels.
Here's where Contentful comes into play. This is a tutorial to demonstrate how a Telegram channel can be powered by operations we perform on Contentful, using the magic of webhooks and bots. All of the source code used in this tutorial is located here.
1. Set up your Telegram channel
To create the channel, we need to open Telegram on our phone and follow these steps.
Click on the square icon on top right corner.

Click on New Channel...

...and then on the Create Channel call to action button.
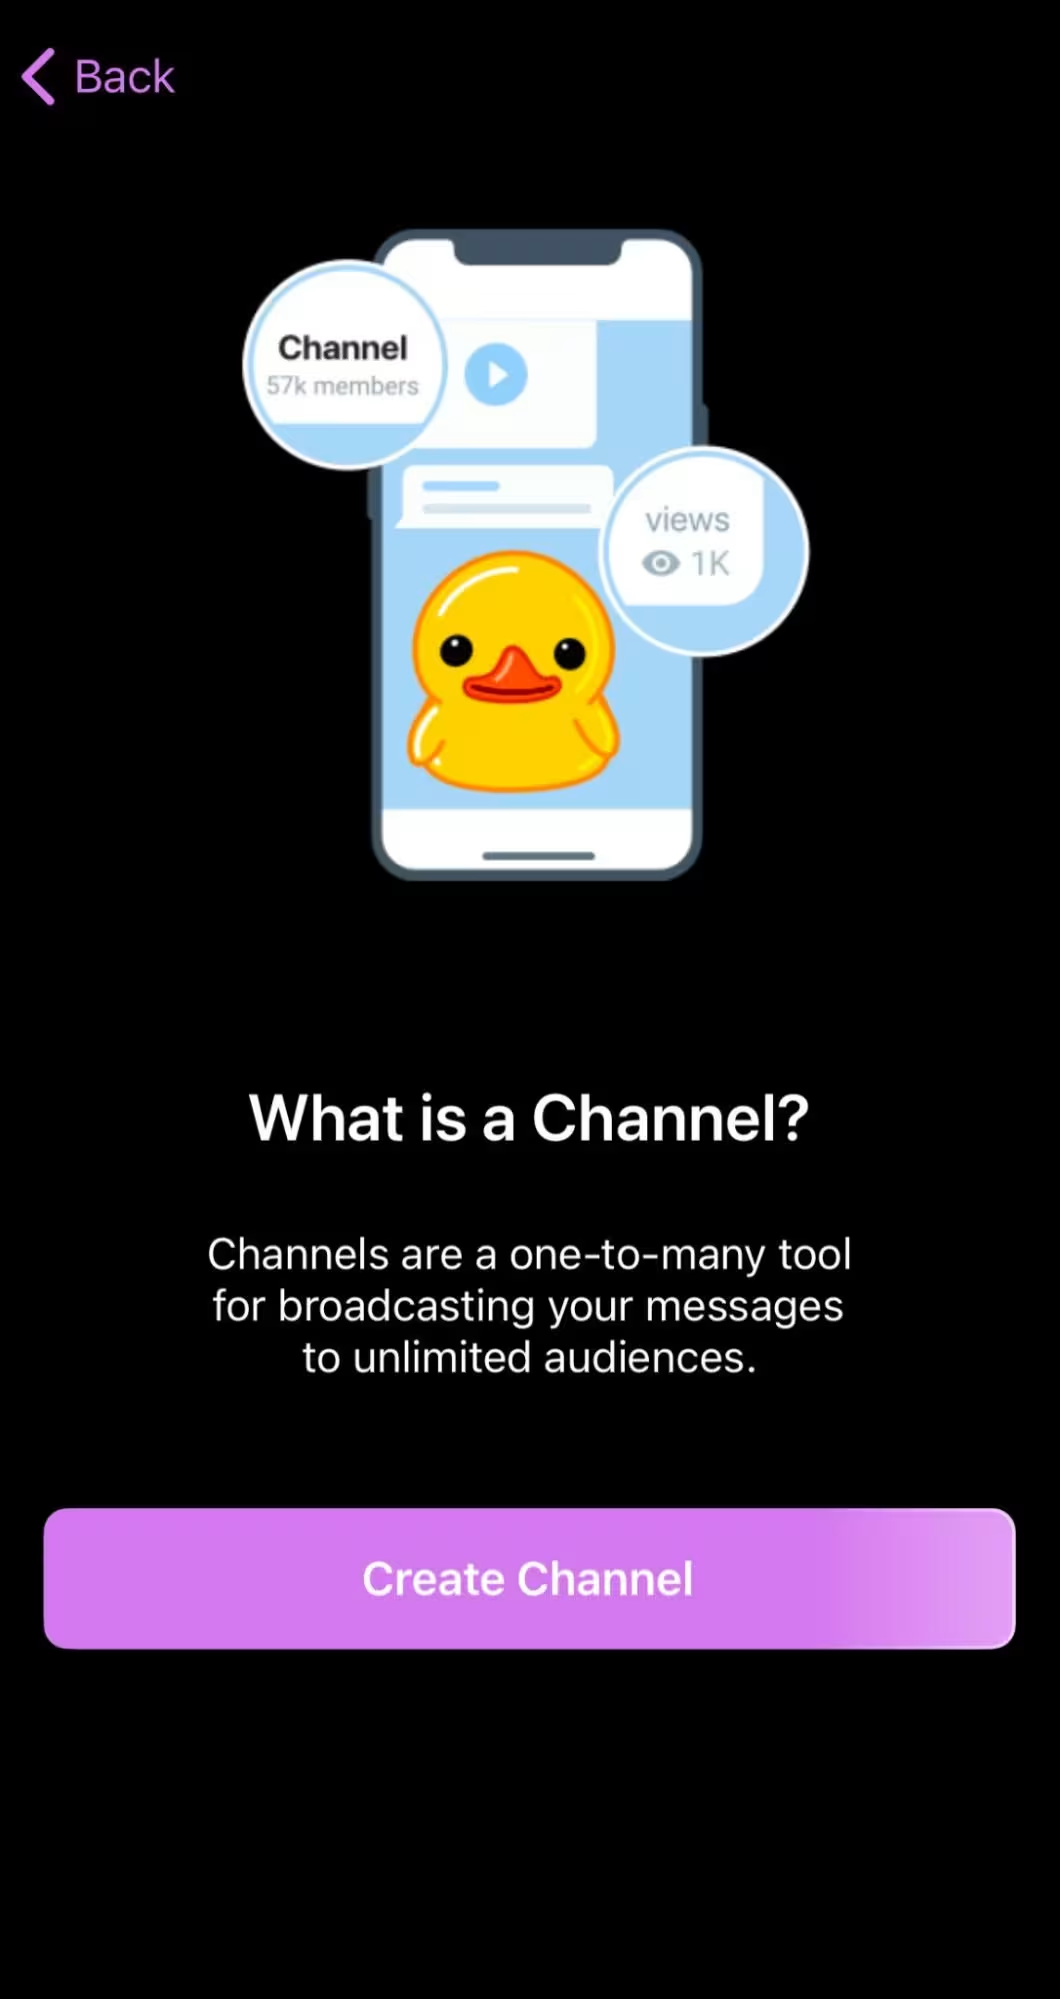
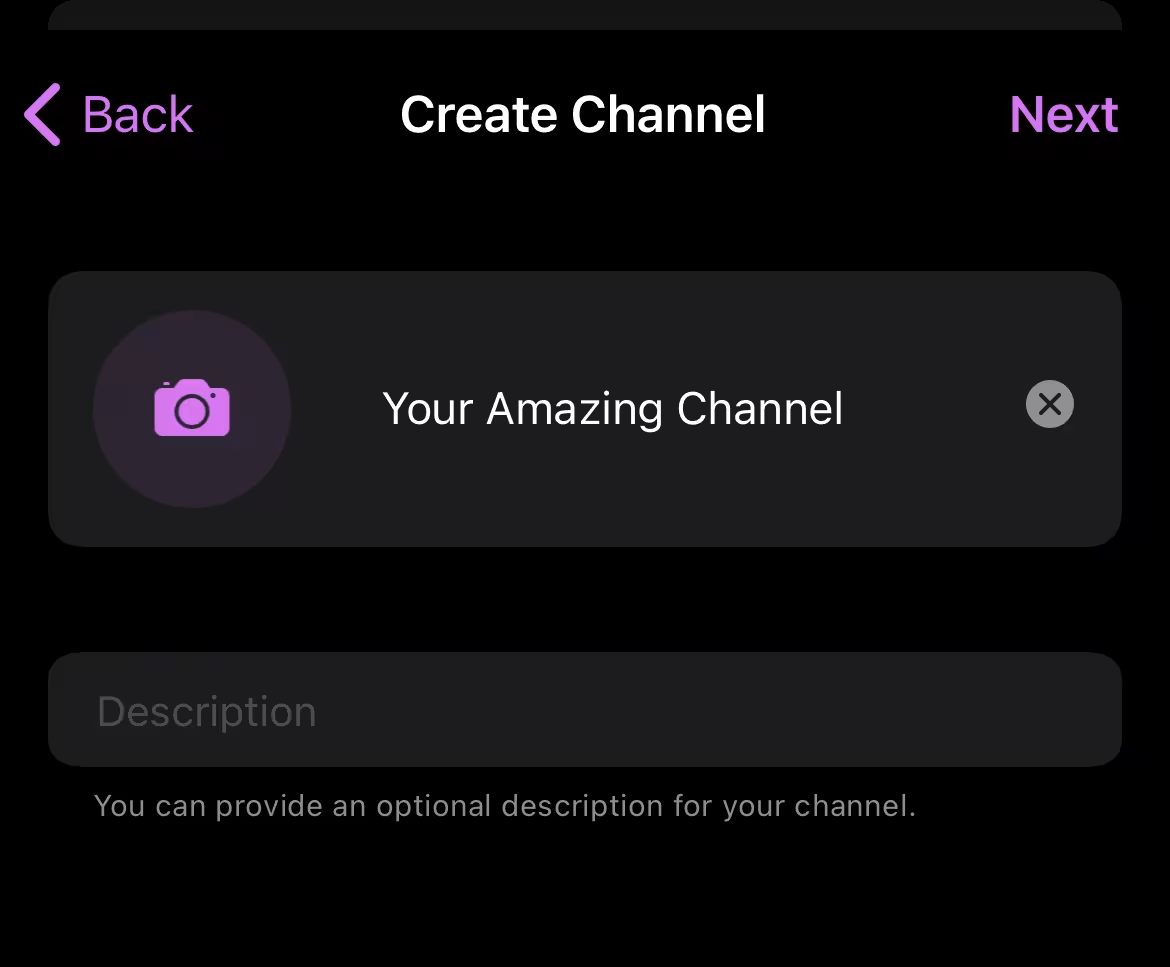
Give a name to your channel (you can add a picture and a description too) and click Next.
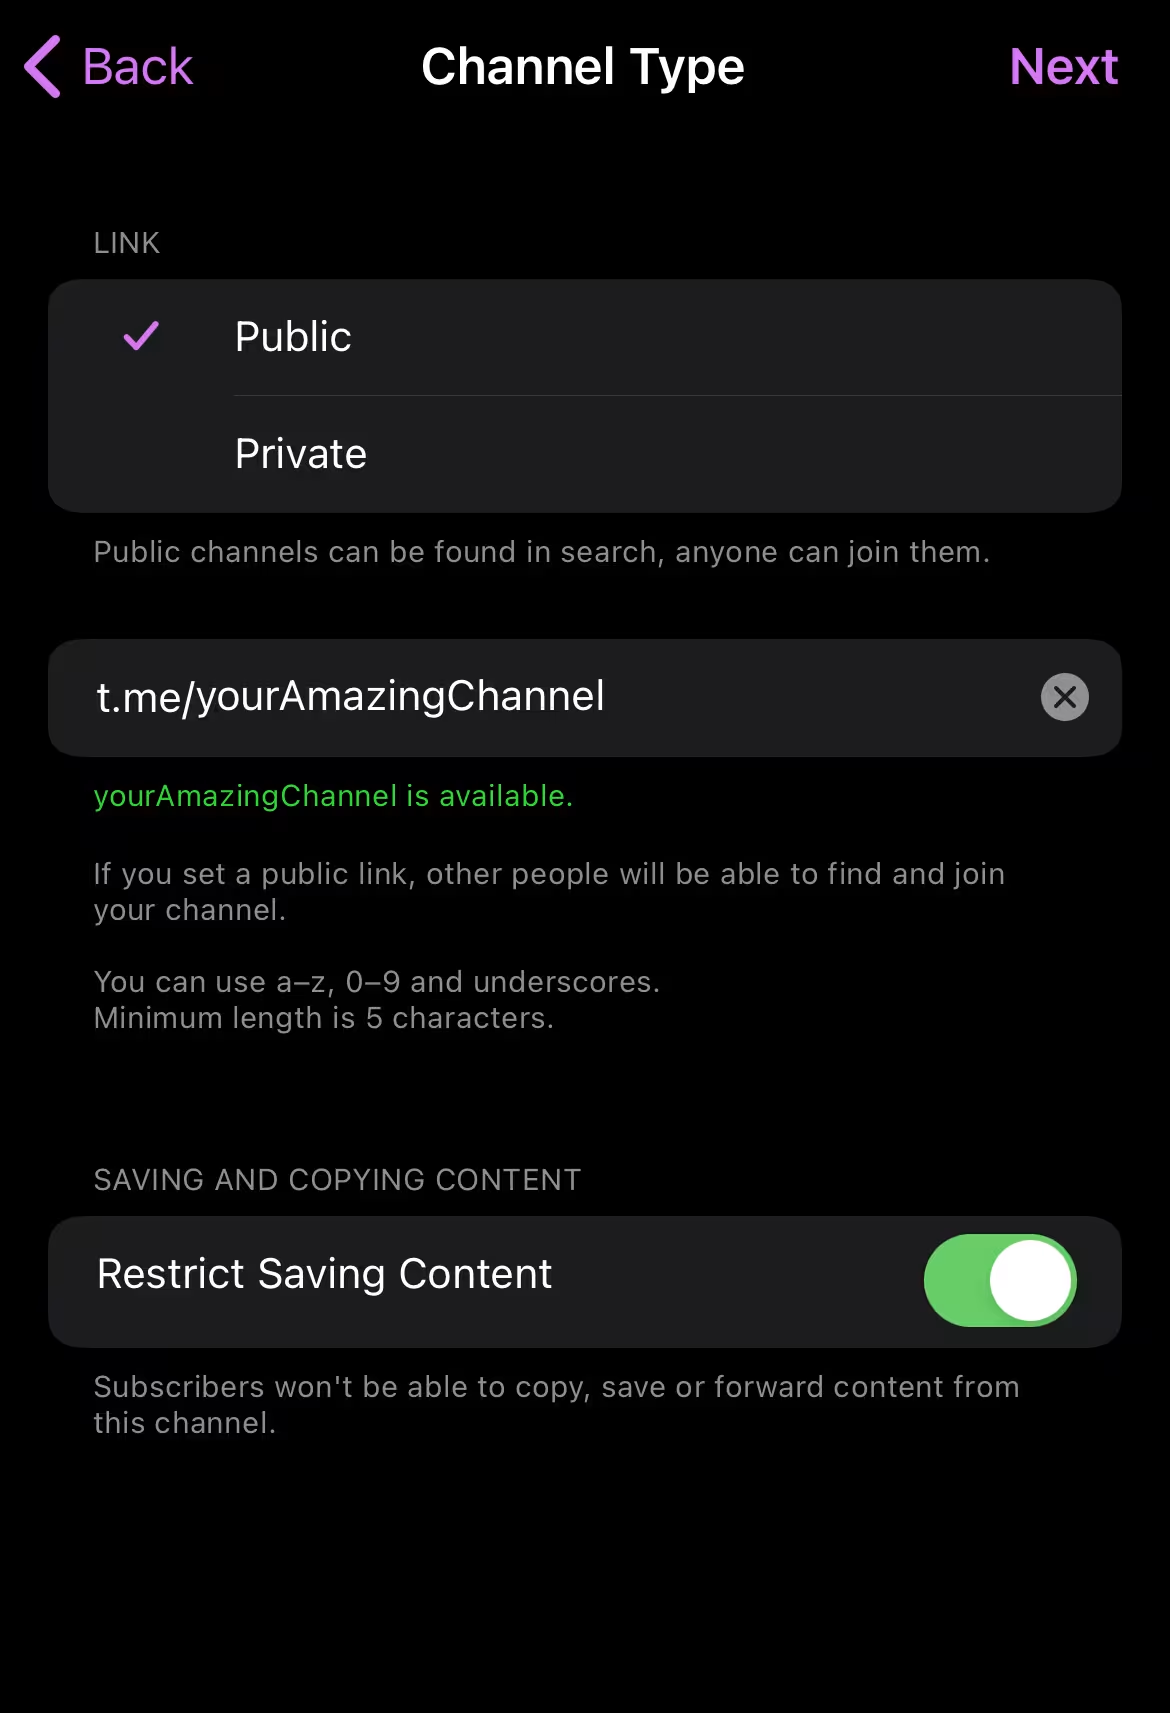
Make your Channel Public, giving it a unique ID (in our case, it's ‘yourAmazingChannel’) and click Next.
Skip the Contacts and click Next.

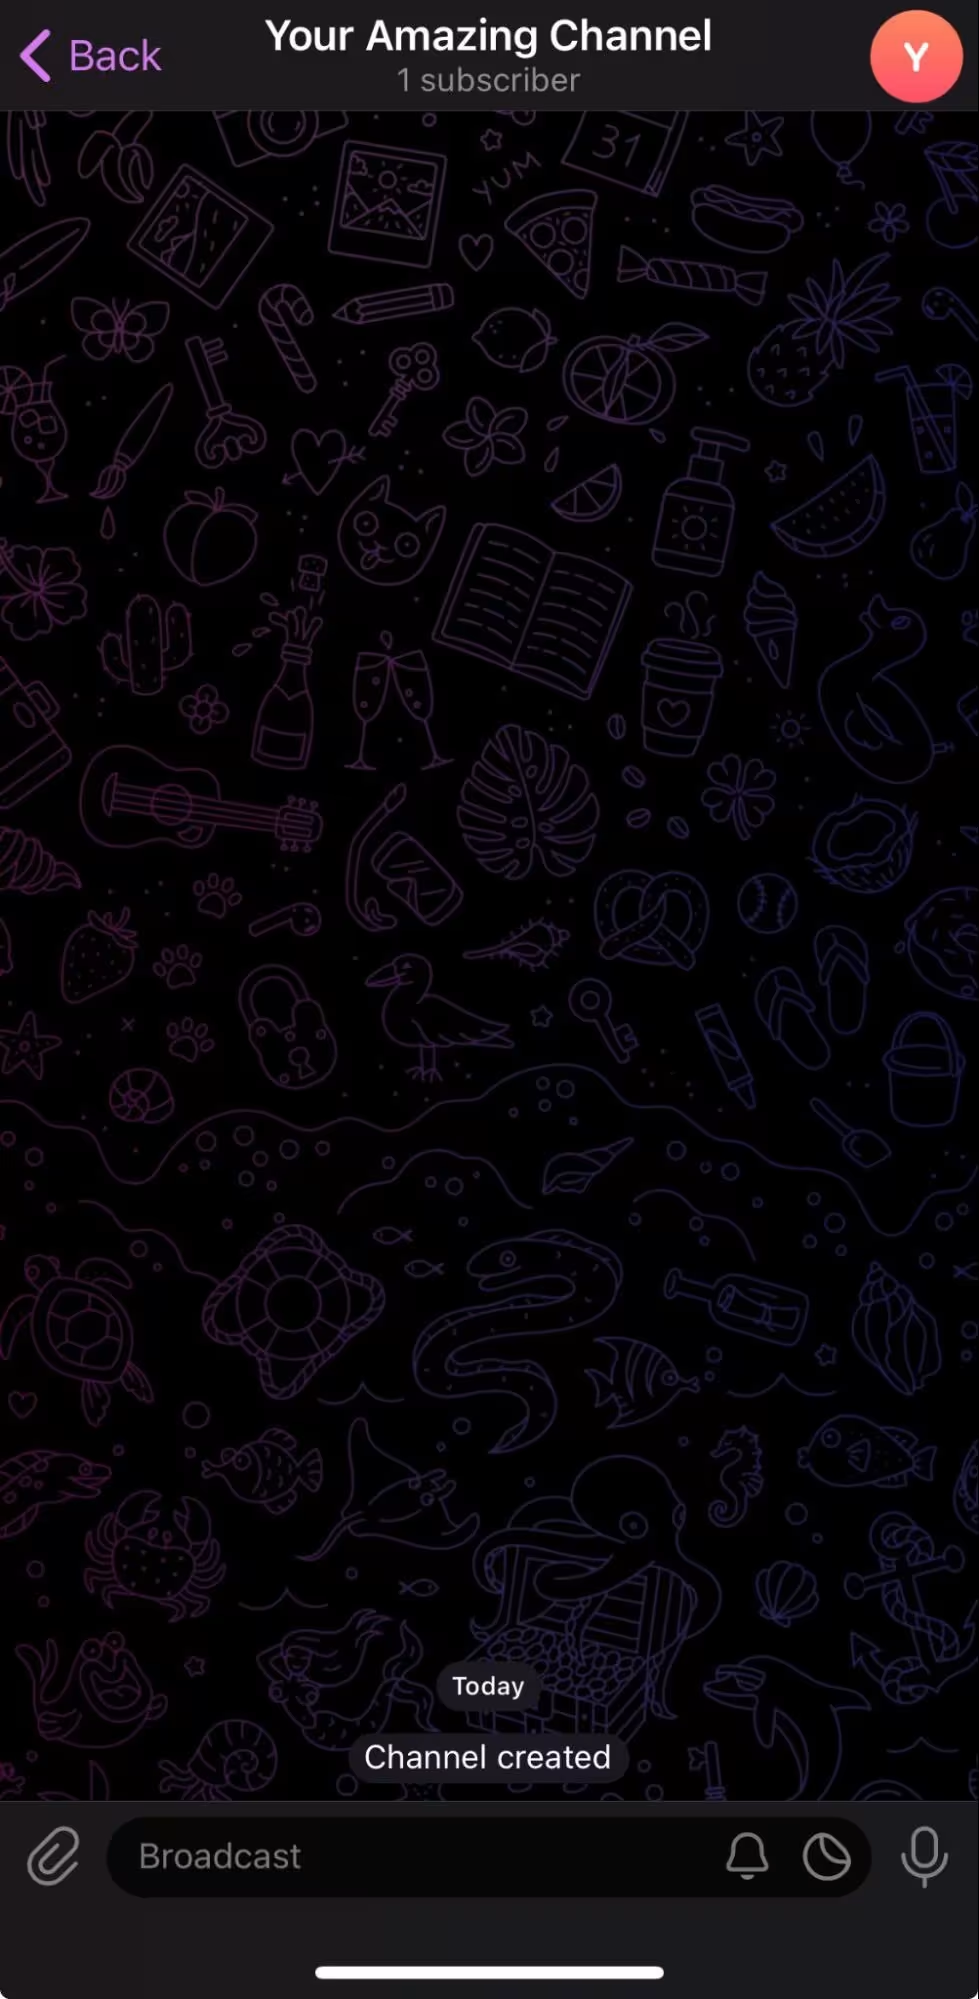
Our (Your) Amazing Channel is ready. 🥳
Telegram bot
Now we need to create a bot and make it an administrator of our channel.
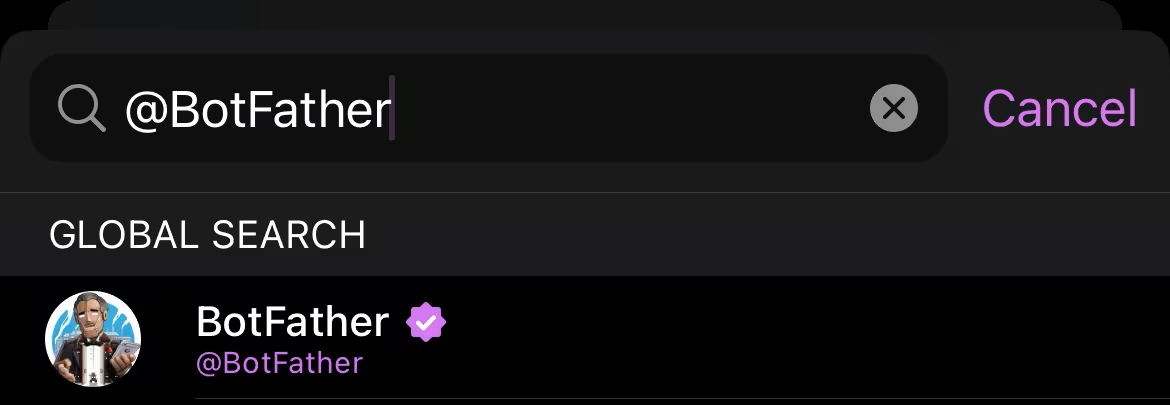
To do this, we'll rely on a bot that allows us to perform all these operations directly from the Telegram application. We're talking about @BotFather.
You can access it by clicking on the previous link or by searching directly in the application, selecting the official bot:
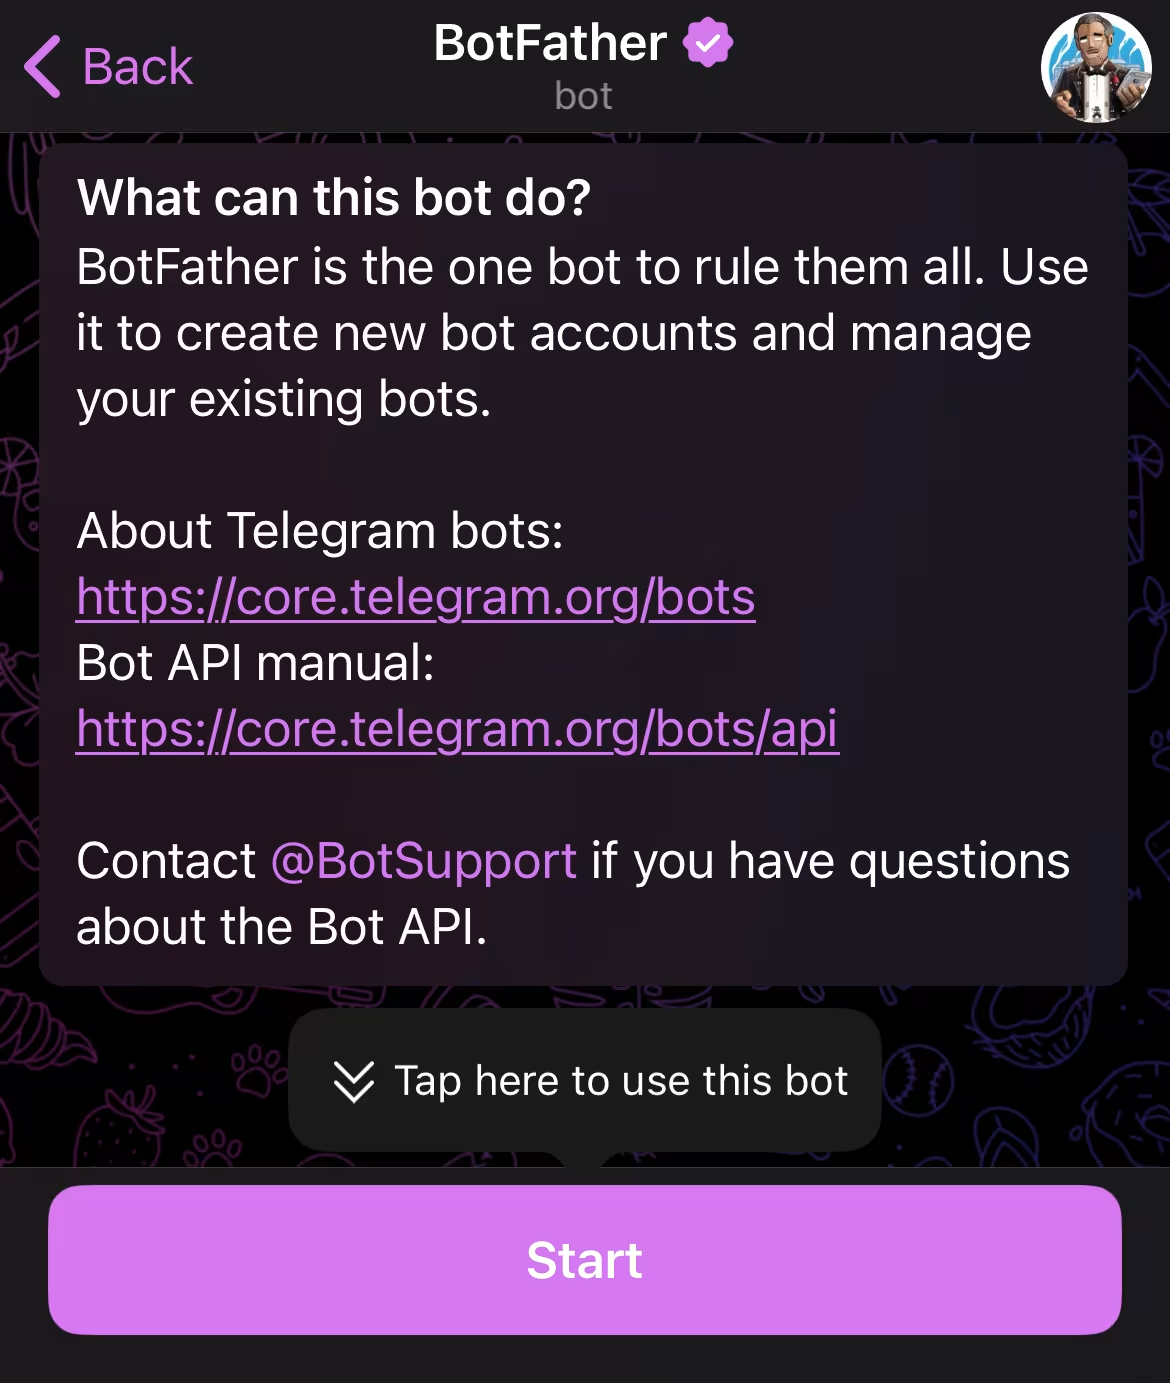
Once selected, we'll need to perform the following operations. If it's the first time accessing the bot, click on the Start CTA.
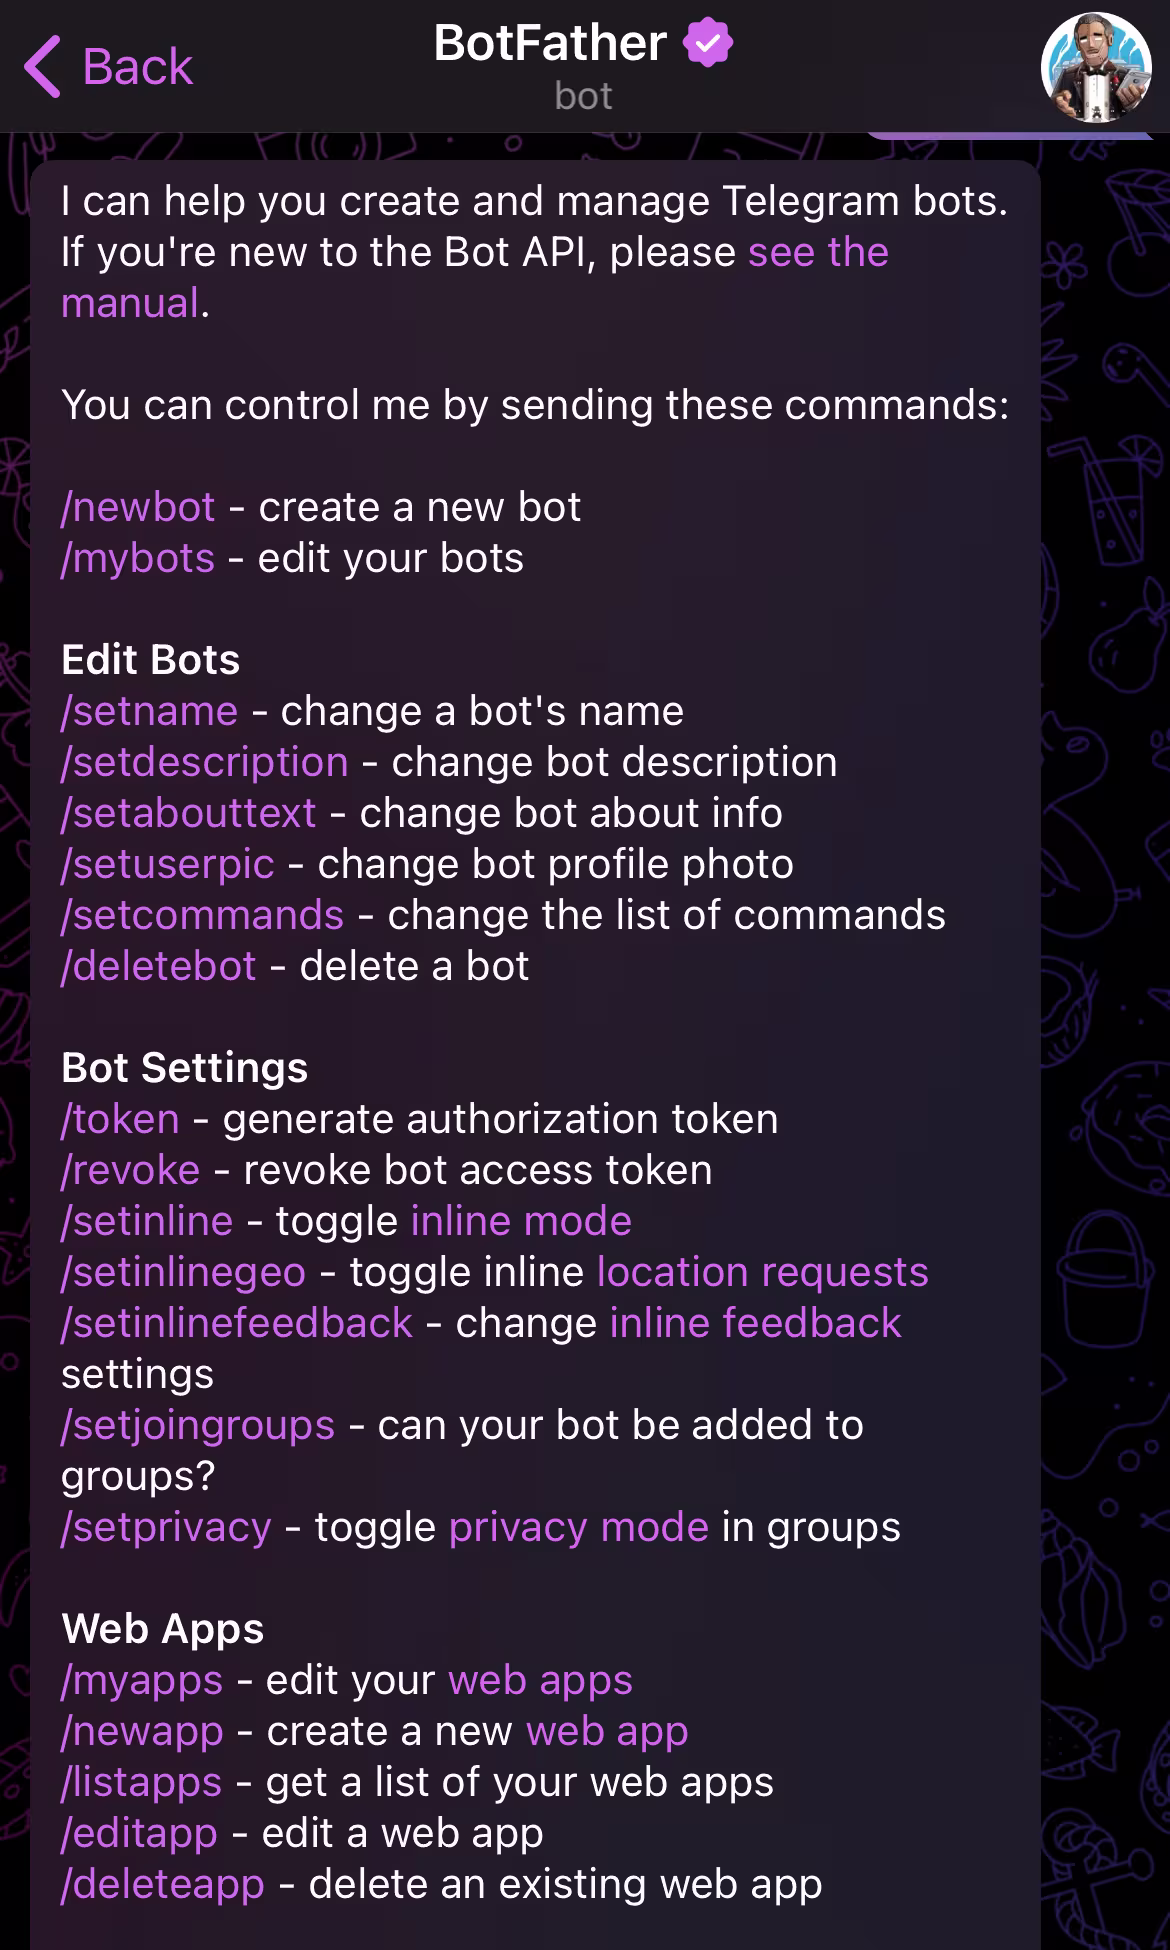
The bot allows the execution of various operations, and we're interested in creating our own bot. Click on the first available command, which is /newbot.
You will be asked to enter a name and a username for your bot:
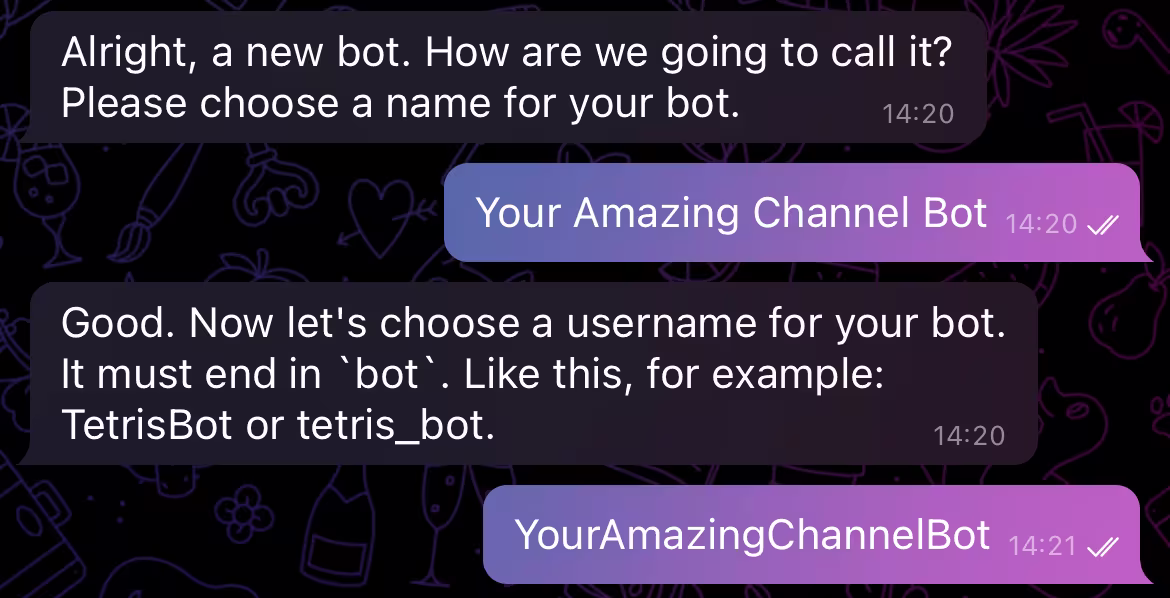
We have successfully created our bot. The username and the generated token are pieces of information we'll need in the near future.

Make the bot an admin of our channel
Now we need to make our bot an administrator of the channel we created earlier. Let's see how to do it.
Open our channel, go to details, and click on Administrators.

Click on Add Admin...
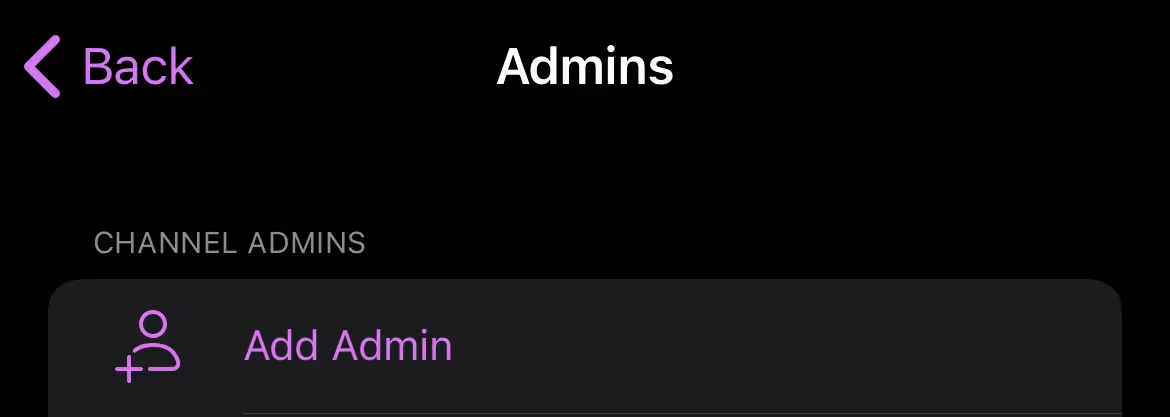
...search for our bot and select it.

On the final screen, we can assign various permissions to our bot and click on Done.

We have successfully completed the operations on Telegram.
2. Creating a webhook in Contentful
Next, we will configure a webhook on the Contentful web app and connect it to our external service.
Webhooks are HTTP callbacks which can be used to send notifications when data in Contentful is changed, allowing external systems to react to changes to do things such as trigger a website rebuild or send a notification to a chat application.
Before we create the webhook, let's define the content type.
Let's assume we have a Recipe model:
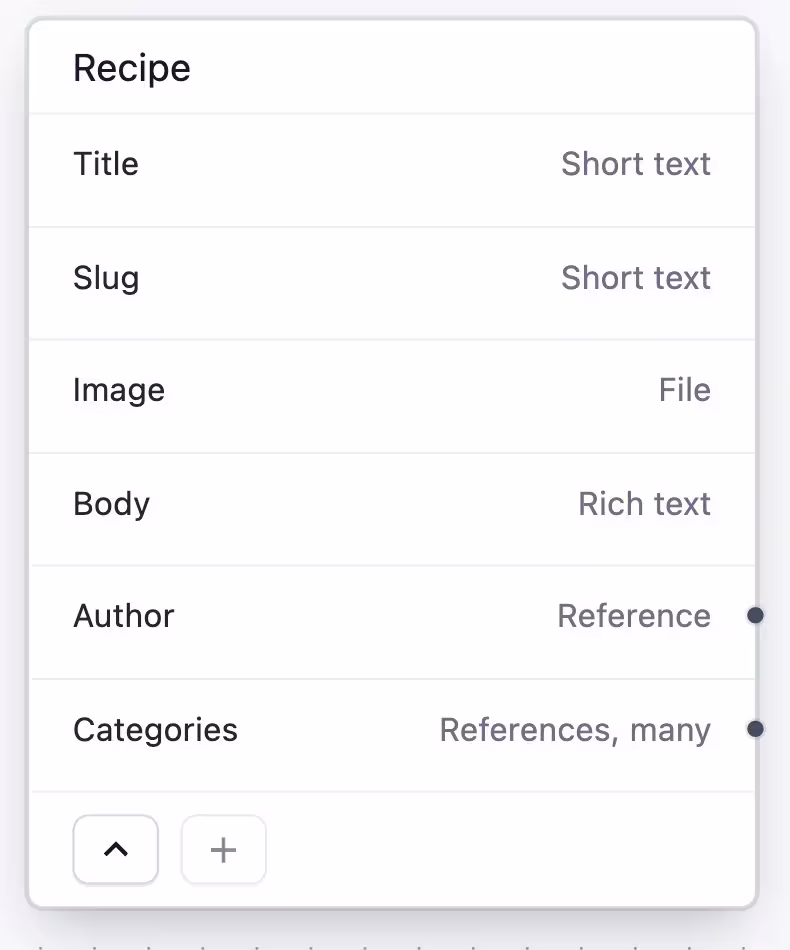
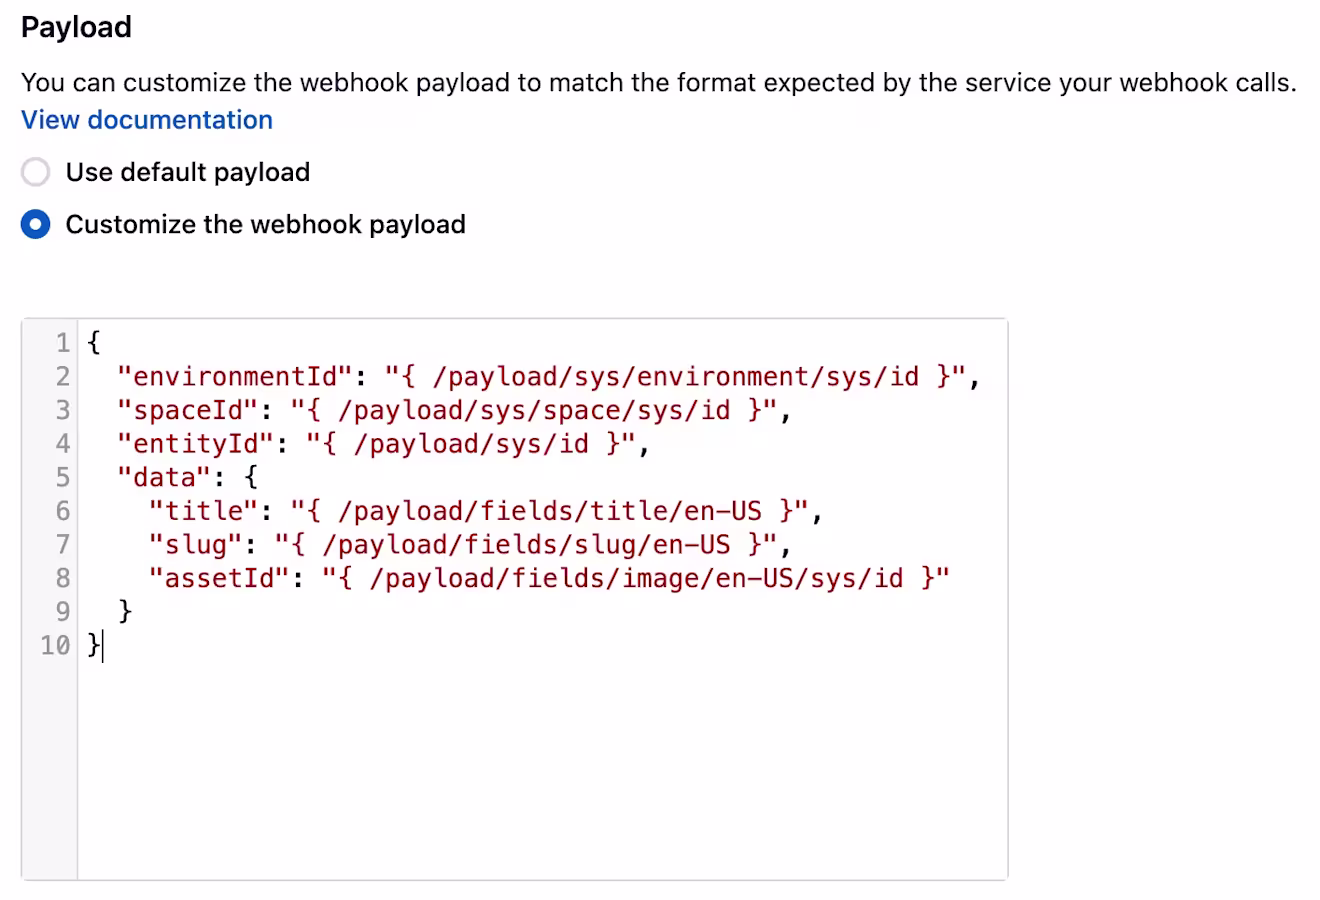
Perfect, what we want to achieve is a webhook that, every time a recipe is published, makes a call to our external service passing the first three fields as the payload: Title, Slug, and Image.
Let's see how to do it!
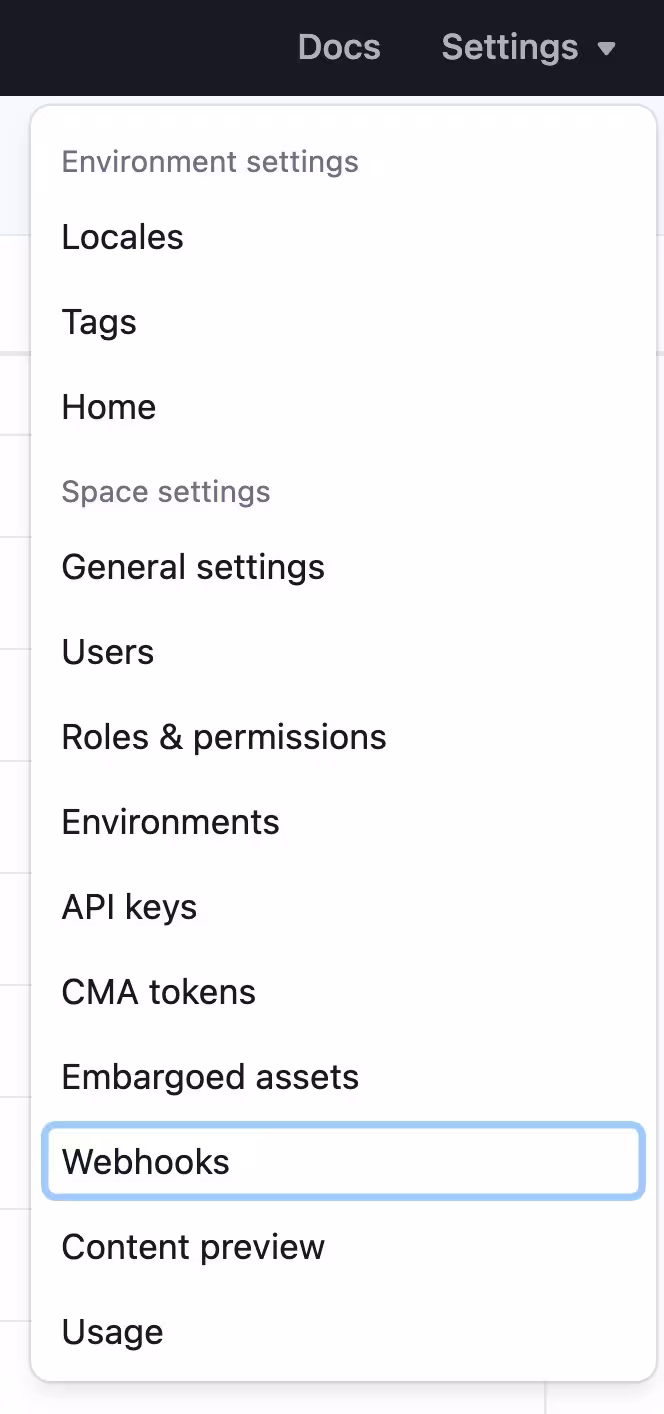
We can create the webhook directly from the Contentful web app by visiting the dedicated menu in Settings:
Next, click on the Add Webhook CTA:

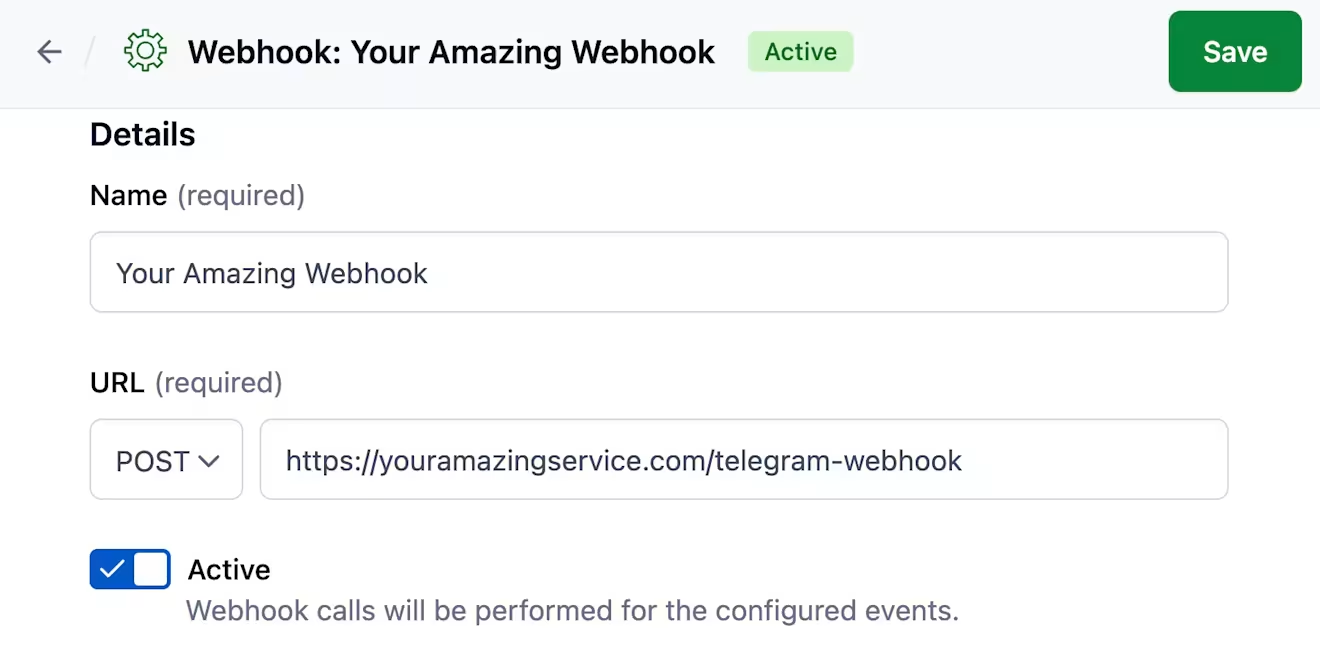
Now, let's follow these steps to create the webhook. Define the name and the URL where our external service is published:
Modify the trigger event. We want the webhook to fire only when the entry is published:
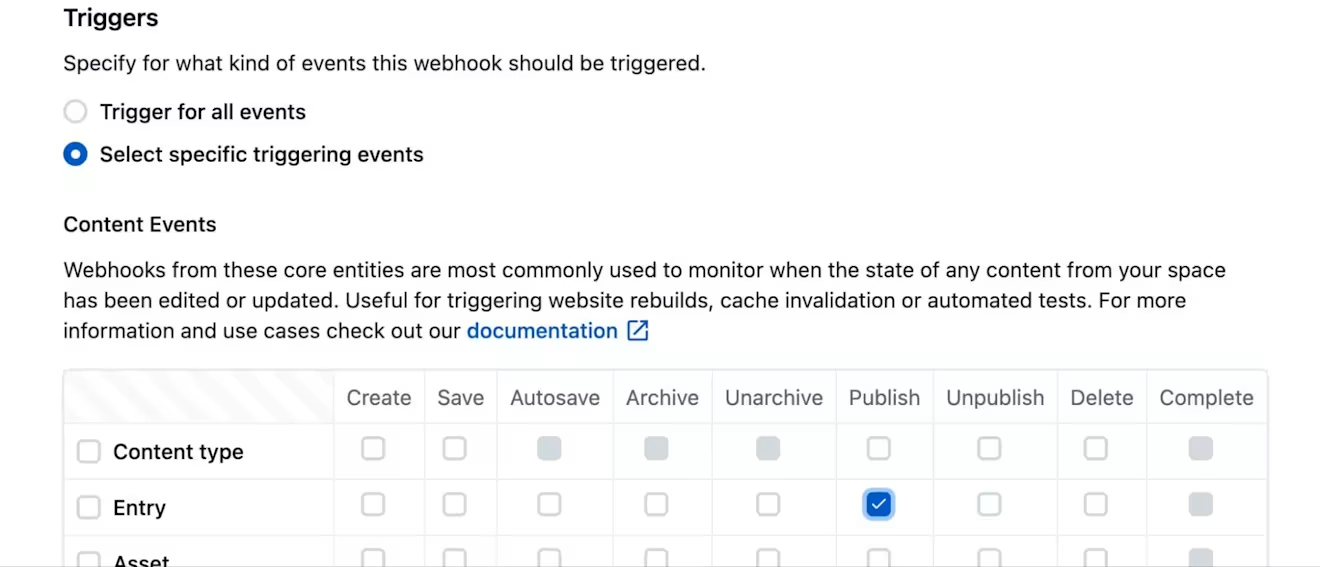
Set up a filter so that only published entries of type “recipe” are considered:

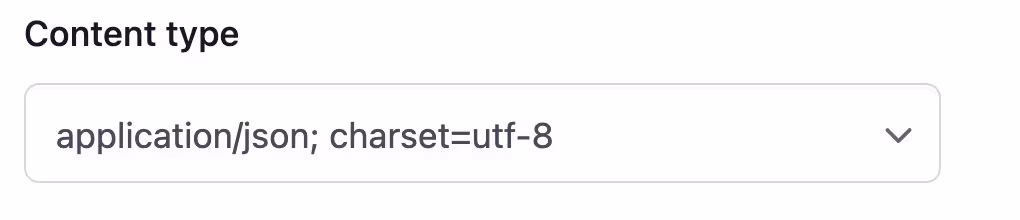
Set the content type to application/json:
Conclude by defining a custom payload that we will pass to our service.
And you're done! Save our webhook.
3. Building the serverless function
So far we’ve created our webhook on Contentful and configured it to meet our needs. However, currently, no one is listening, and the data is being lost. To resolve this, we will define serverless function: A serverless function enables running code on-demand without needing to manage your own infrastructure.
Let’s define a function that will perform the following operations:
Retrieve data from the Contentful webhook.
Since the webhook can only send us a reference to the asset and not the asset itself, we'll need to fetch the asset using the contentful-management library. We'll need an access token for this.
Use the grammy library to send our message to our Telegram channel using our bot.
💡 Remember that this piece of code responds to the address we defined within our webhook.
We will use Vercel to deploy our function, but it's not essential; you can use the platform you prefer, even a completely custom solution (with no serverless function), of course. For this reason, we won't go into the configuration details, if interested, you can find a quickstart on the Vercel website.
Pre-configurations
Before writing our function, we need to define three environment variables that we will use later in our code.
BOT_TOKEN: This is the token provided by BotFather during the creation of our bot on Telegram. It is necessary to identify the bot and will be used by the grammy library.
TELEGRAM_CHANNEL: This is the name of our channel, in our case @YourAmazingChannel. It identifies the channel to which our bot will send the message.
CMA_TOKEN: This is the token required to use Contentful's Content Management API and retrieve information about our asset. You can create a key by accessing the API Keys section under Settings within the Contentful web app.
How to retrieve the payload
During the webhook configuration, we set the content type to application/json. The serverless function gives us access to a request object from which we can retrieve the body of the call containing our payload defined on Contentful in JSON format:
Retrieve the image from Contentful
As mentioned earlier, the webhook doesn't provide the entire asset but only a reference. For simplicity, our payload is configured to directly provide the asset's ID, and from this, we retrieve the necessary information. We'll leverage the “contentful-management library” code to retrieve the asset.
Send the message to the channel
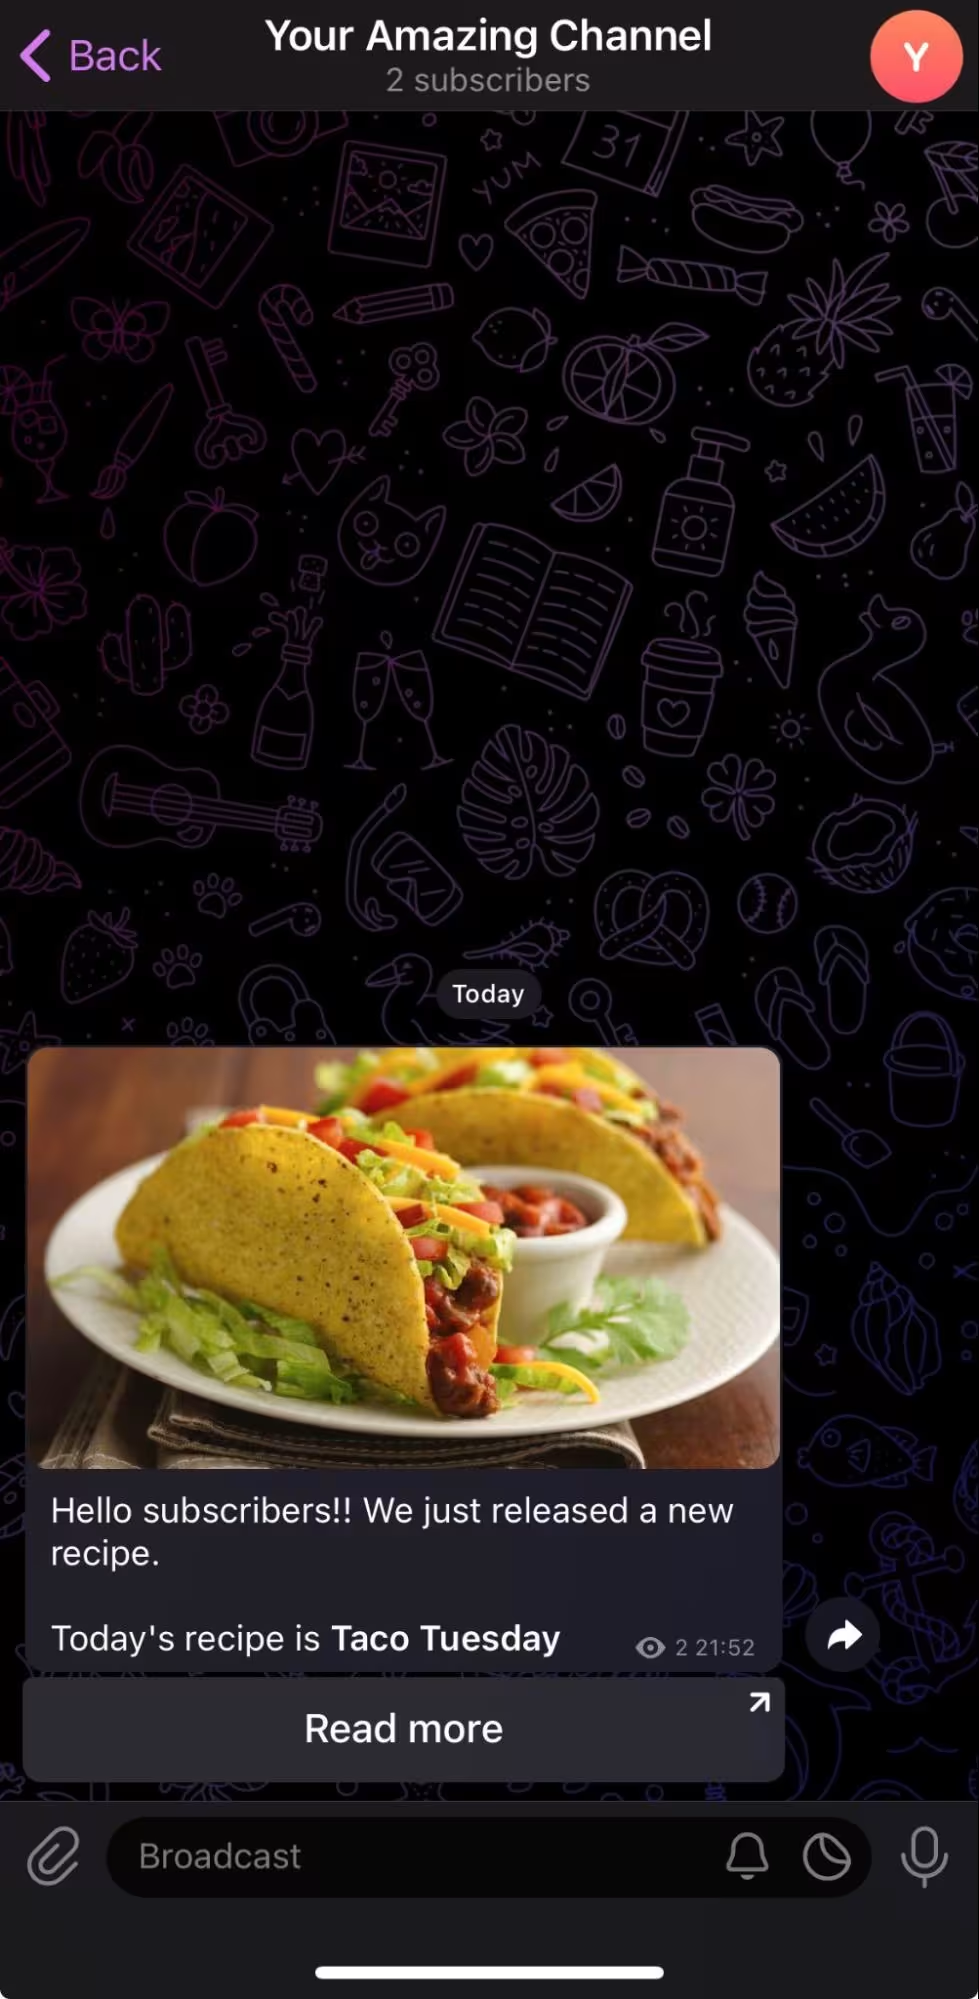
We have finally gathered all the information and are ready to send our message to the channel. The grammy library provides us with all the necessary tools to achieve what we need. We want to send a message to the channel with an image, text, and a link to the recipe. Let's see how to do it.
And here is our message shared on the channel:
Here you can find the complete function:
Wrapping up
In this guide we saw how, after configuring Telegram and Contentful, we managed to set up our service and send a message to the subscribers of the channel with just a few lines of code.
Through some simple configurations on the Contentful side, it is also possible to add an extra layer of security by adding custom headers containing secrets that only our service can recognize. Alternatively, you can also activate Webhook Request Verification, which always provides an additional layer of security to ensure that the call to your service actually comes from Contentful.
And with this, our journey through bots and webhooks comes to an end. Here you can find the links to the repositories used in this post: Webhook endpoint. Have fun and happy coding!

Inspiration for your inbox
Subscribe and stay up-to-date on best practices for delivering modern digital experiences.
Meet the authors
William is a Senior Frontend Engineer at Reply Syskoplan CX IT with 5+ years of experience in Frontend development and 10+ years in general Web development. He's passionate about frontend, photography and technology in general.
Related articles

Which is the best React rich text editor? Seven options compared
July 23, 2026

Effortless automatic content linking in Next.js using Content Source Maps
September 30, 2024

Mastering React routing: A guide to routing in React
January 20, 2025
