Apps and open source: A guide to making Contentful truly yours
Published on June 23, 2020


Inspiration for your inbox
Subscribe and stay up-to-date on best practices for delivering modern digital experiences.
Getting content in front of your audience hasn't gotten easier over the last decade. The content you're so carefully crafting has to find its way into phones, watches and cars. At the same time, you need to be able to repurpose it for different campaigns, sites and apps. If you want to reach your audience no matter where they are using whatever technology is the next big thing, your content must be structured, flexible and platform-agnostic.
Luckily, we think we figured that one out! Contentful provides ways to create the content structures you need, and you can use our JSON APIs everywhere. This flexibility brings us to the next problem on the list — we cannot know what you’re building and where your content is going. Without this knowledge, it’s impossible to provide a perfect editorial experience for your requirements out of the box.
We made a decision: Rather than build something we think is best for most use cases, we provide you with the tools to make Contentful truly yours! We’re happy to announce that by open-sourcing our field editors, you now have three tools in your belt to customize your Contentful experience.
The ecosystem to take your editing experience to the next level
The Contentful App Framework enables you to customize your editing experience across the whole web application. You can replace fields, create top-level pages and even replace the entire entry editor.
Technically speaking, a Contentful app is a website embedded in an iframe. Inside this iframe, you have access to Contentful’s functionality using the Extensions SDK. Using the SDK, you can update values, react to data changes and interact with the surrounding web application.
You can pair this core functionality with our open-source design system — Forma 36. Contentful’s UI uses React under the hood. We provide components that match our style one to one. While it’s possible to build Contentful apps with any client-side technology, we recommend using a React CMS for complex scenarios. Combine the App Framework with Forma 36, and you can create custom UIs that look and feel like Contentful.
But what if you don’t want to reimplement everything from scratch and only need a tiny tweak to an existing experience? In this situation, the new open-sourced field editors come into play. The Contentful UI provides a lot of functionality, from editing text to selecting reference entries to creating rich text. And trust us, you don’t want to build that from scratch! That’s why the React components we run in production are available on GitHub now.
How to extend the Contentful Markdown editor

Let’s bring these three technologies together in an example. In this tutorial, we’ll extend the Contentful Markdown editor and add some custom validations to it. To follow along, you have to have npm and Node.js available on your machine. You can find the final source code of this tutorial application on GitHub.
Sound good? Let's get started!
1. Create a new React project and install dependencies
Create a new directory and initialize the project using npm on your command line:
This command creates a new package.json. The package.json is the configuration file for front-end projects and defines your dependencies, the commands to build and develop your application and other configurations.
Install the following dependencies:
This tutorial uses the Parcel bundler to get the React application ready to develop and ship. Parcel is a fabulous tool to bootstrap a new project because it offers a lot of functionality while following a zero-config approach. This ease makes it perfect for tutorials like this one.
2. Set up the project structure
To start developing your application, create two files in your project root: index.js and index.html.
The index.html looks like this:
The index.html is the entry file for Parcel. Parcel traces all the dependencies in this file and creates a beautiful bundle out of everything. All zero-config!
Next, create the referenced index.js. This file defines your application logic.
This JavaScript code imports the installed Extensions SDK and calls the provided init function. An instance of the SDK itself is passed as a function argument to interact with the Contentful user interface. It will come in handy later!
These five lines of JavaScript are a tiny Contentful app that you can use to change the editor experience. It’s now time to get it ready for the Contentful UI.
3. Bring your code into Contentful
Even though you installed the Parcel bundler, you're not using it yet. Change that by replacing the example test script with two npm scripts in the scripts property of your package.json.
You can now run npm start in your terminal to start the development mode. In development, Parcel starts a web server running on port 8080. Thanks to the watch argument, the server will refresh pages after code changes. This way, you can develop locally and your embedded Contentful application refreshes automagically.
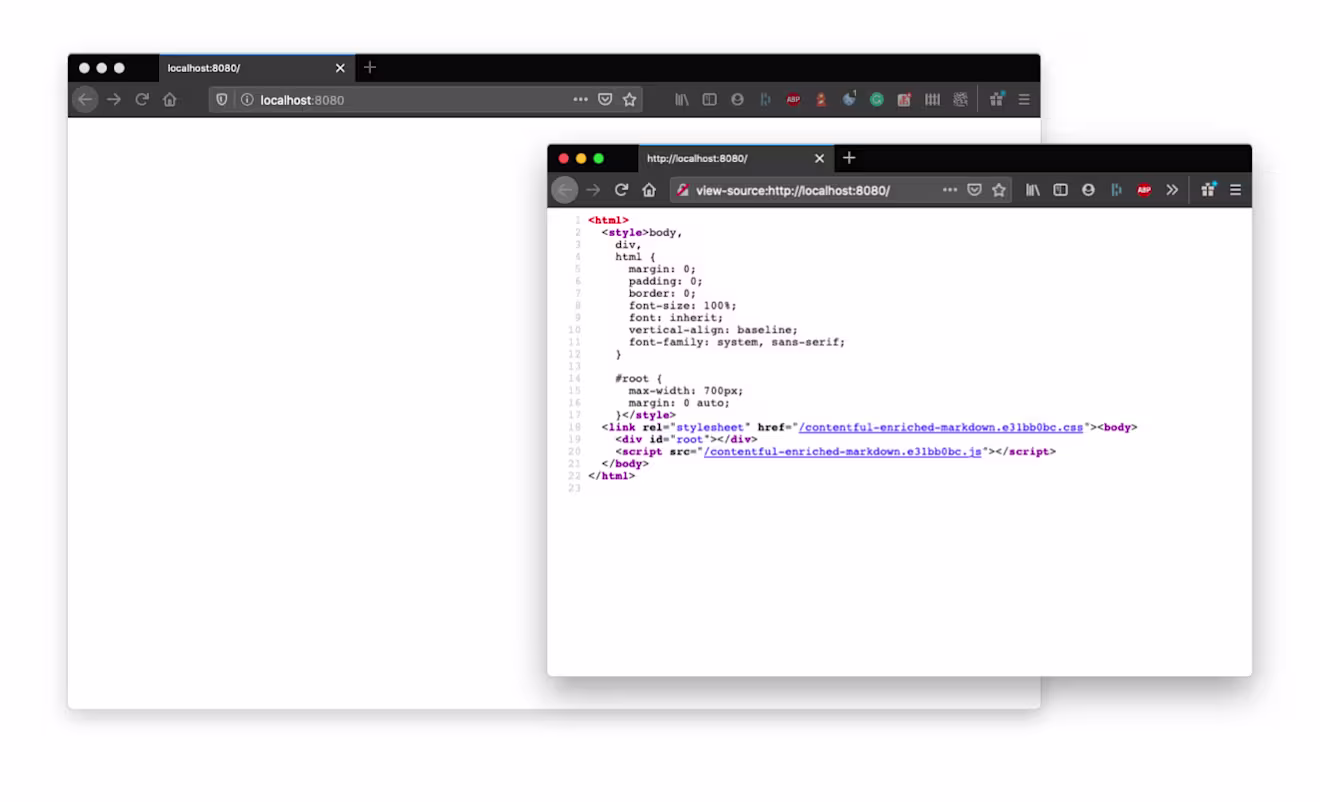
If you open localhost:8080 in your browser, you might be surprised that all you see is a blank page. Remember, Contentful apps run in iframes inside of the UI. The init callback is only called in this particular environment. If you open the page in your browser and nothing shows up, that is correct.
The build command comes into play after you finish development. This will be explained at the end of the tutorial.
4. Create and install your new Contentful app
Contentful apps work on an organization level. While you can install apps using the Content Management API, we prefer to install them right in the organization settings in order to not deal with API endpoint details. Open the space selection in the top left corner and head to the organization settings. There you find "Apps" in the top-level navigation. Click the "Create App" button.
Define the app name and source URL in the app creation dialog. The source URL for development is http://localhost:8080. After you've done that, define that your app should be available in the entry-field location for longtext fields.
You can ignore the app configuration screen location in this tutorial. For future apps, if you need to store app-specific configurations like third-party tokens or visual settings, use the app config location to accept and store needed values.
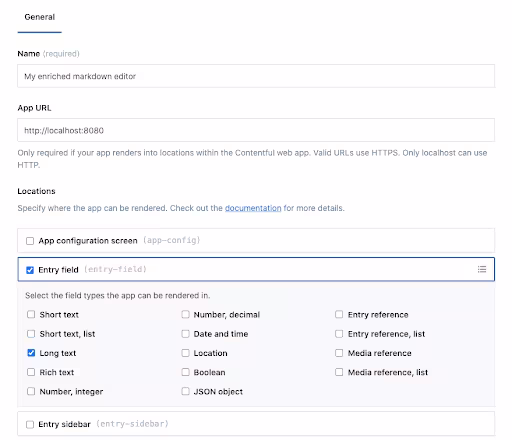
When your app configuration looks like the above, press "Create App." Congratulations, you just created a Contentful app for your organization!
To install the app in a specific space, click "Install to space" in the top right corner and choose your desired space and environment. Unless you're running in an advanced setup with several environments, choose the master environment.
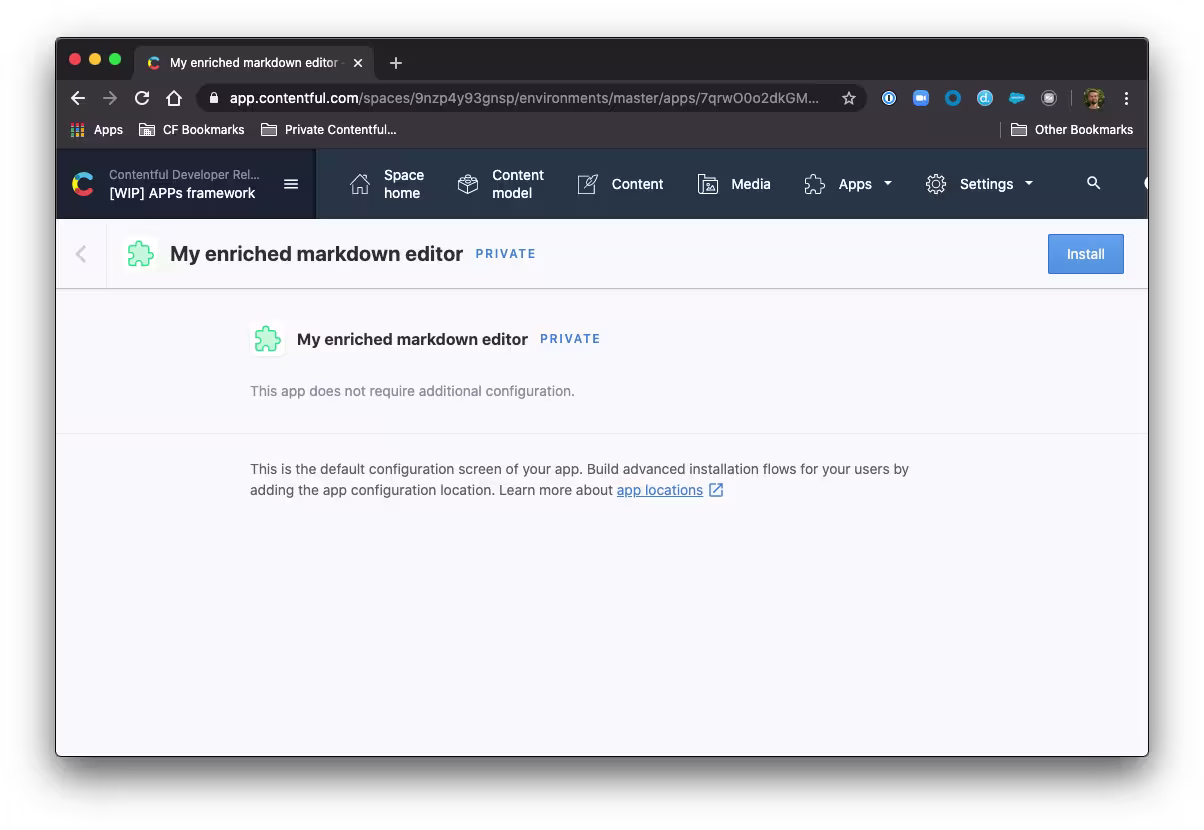
This selection redirects you to the app configuration screen of the space to install the app. But wait, you didn't define the "App Configuration Screen" in the app definition. What are you seeing here?
When writing a Contentful app, you can use this app location to provide a settings screen. If there’s no further configuration needed, you don't have to set it up and be presented with a default screen as shown in the screenshot above.
To go on, click "Install."
5. Enable your app for a field type
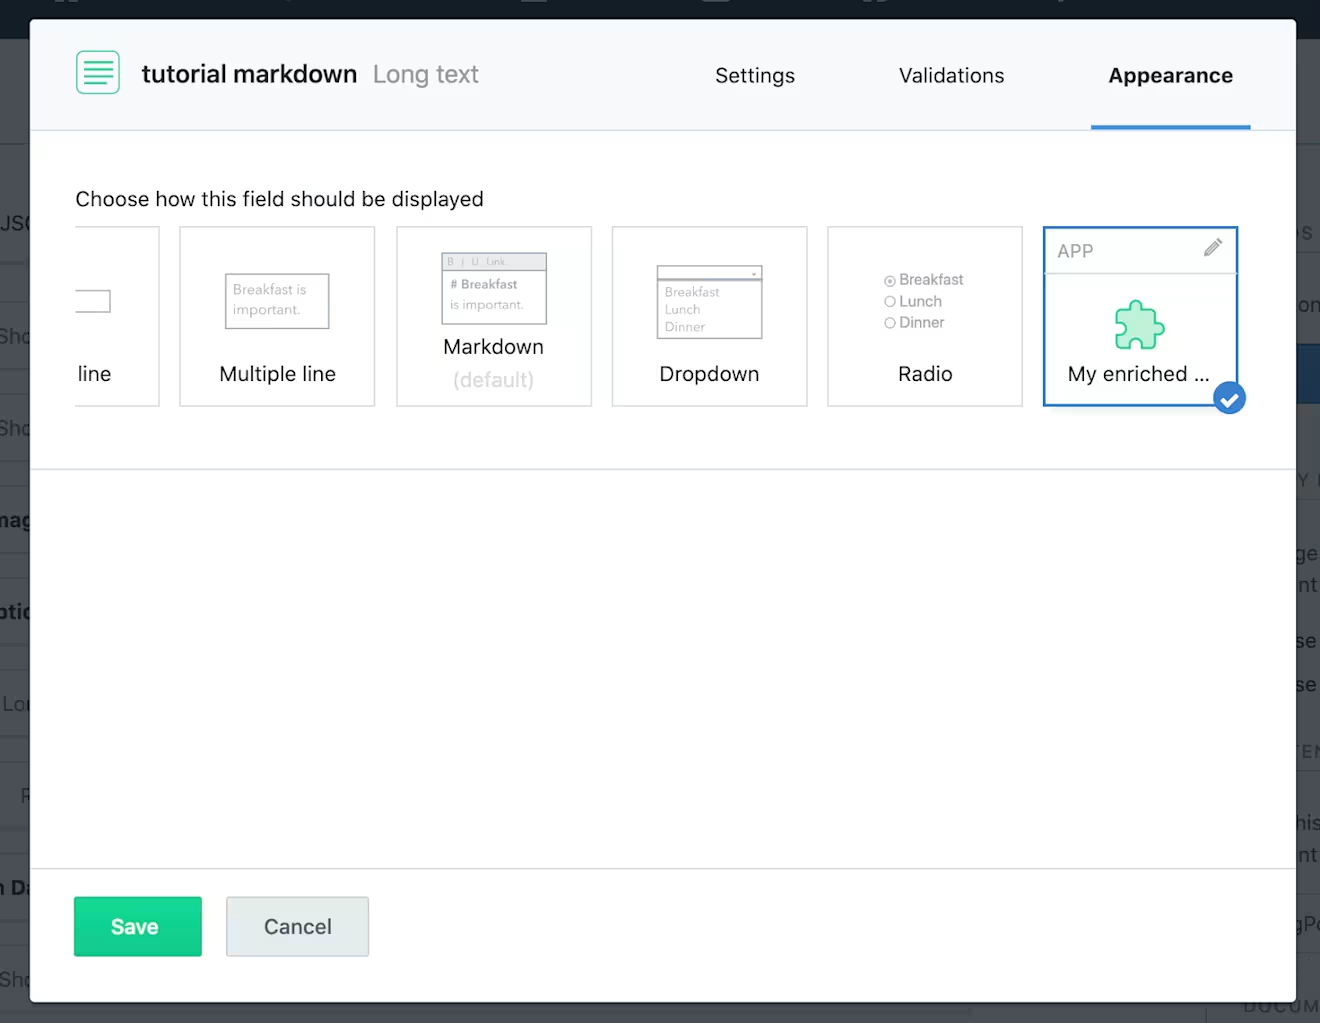
After installing the app, it's time to enable it for particular field types like the "long text" field. From the top navigation, head over to the content model section and edit the content model of a content type. If you already have an existing content model, edit the field configuration for a "long text" field. If you don't, create a new "long text" field. Open the "Appearance" section of the particular fields and select the app that you just created.
Navigate to edit an entry of the given content type and find your app that says "Hello world" where the Markdown editor is usually displayed.

How to render custom React components in the Contentful UI
To use Contentful's design system and field editors, you have to use React. Luckily, you installed the library already. Use React's render function and change the index.js file to the following:
After this change, the "long text" field appearance is still a "Hello world", but you're now ready to build a custom implementation that looks and feels like Contentful.
Render different components depending on their location
Contentful apps offer a way to run the same code in different UI locations. These range from the app configuration screen previously mentioned, to top-level pages, to the entry sidebar and, like in this case, entry fields.
The index.js is the entry point for all of these locations. To figure out what to render, the Extensions SDK offers a locations object and the location.is helper function.
Create a new functional component called MyMarkdownEditor and change your index.js to use sdk.location.is:
These changes enable your app to render different components depending on their location. The app renders the MyMarkdownEditor component only when it's used as an entry field.
Make sure to also call sdk.window.startAutoResizer when the Markdown editor is rendered. It guarantees that the iframe embedding your components has the correct height.
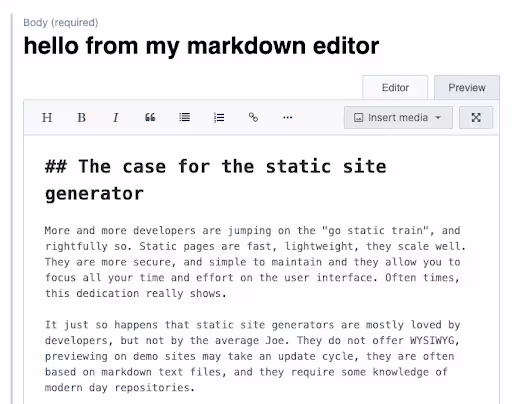
The ”long text” field is now greeting you with a "hello from my markdown editor" rendered with the MyMarkdownEditor component.

At this stage, what you’ve accomplished is:
Creating and installing a Contentful app
Defining and setting your app for a content entry field
Rendering a custom entry field
With all of the above, it's time to build your custom Markdown editor.
How to implement Contentful's field editors
With the release of our field editors, you’re free to build custom UI sections sitting on top of the functionality Contentful already provides. Install the following packages from your terminal:
This command installs Contentful's Markdown editor and Forma 36's React components. Add the following imports right below the other import statements in index.js:
The Contentful Markdown editor uses the Codemirror text editor. Include Codemirror's stylesheet, the Forma 36 styles and the MarkdownEditor React component.
Go and change the MyMarkdownEditor component to wrap Contentful's MarkdownEditor:
And voilà — you just enriched the Markdown editor with your headline. The Markdown editing experience is functional and ready to use, thanks to Contentful's extensibility tools.
Let's move on and add some functionality!
Extend native UI functionality with your own
We're big fans of the Alex.js project. Alex helps to write inclusive texts and points out possible issues. It's available as a JavaScript library on npm.
After installation, import alex on top of the index.js. Because MyMarkdownEditor is a functional component, you have to use useState and useEffect which you can import from React.
To check if you imported everything correctly, you can find all import statements on GitHub.
Tweak the MyMarkdownEditor component. Start with using useState. You can use useState in functional React components to keep track of component state and trigger rendering.
useState returns an array that includes a getter variable and a setter function. In this case, you're initializing the local state with an empty array. This array represents all the Alex.js warnings. Call setWarnings whenever you want to define new items and re-render the whole custom Markdown component.
But how do you get these warnings? Use sdk.field.onValueChanged to register a callback that will be invoked whenever the underlying field value changes. It's important here to register this callback in an useEffect hook and not in the component function itself.
A functional React component is invoked on every re-render. If you're not careful, you could register hundreds of onValueChanged callbacks quickly. To only register the callback once use useEffect(() => …, []). You can find more information about the useEffect hook in the React documentation.
Call Alex.js in the onValueChanged callback, use the passed in value and set the resulting warnings to the local state using setWarnings:
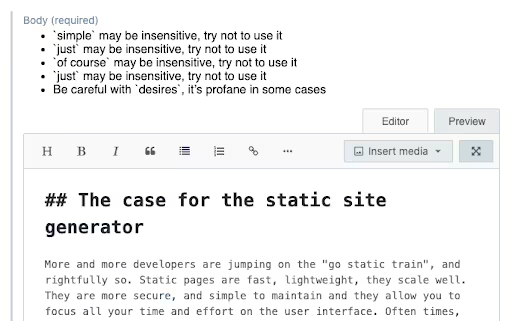
Every time you edit the Markdown, the local state will be updated with potential issues in your wording. These updates lead to re-rendering the component. The last step is to display the errors in the returned JSX:
Check for the length of the warnings array, and if it includes warnings, iterate over every entry and display a list item including the warning's message property.
With these changes, you accomplished the following:
You defined a local state dealing with an array of warnings
You attached an event listener to react to value changes and analyze it
You rendered a list of potential text issues
The complete code of the MyMarkdownEditor component looks now like this:
The list of rendered warnings above the Markdown editors are everything but "on brand" right now. They don’t match Contentful's styling. Let's fix this!
How to build Contentful-like UI components using Forma 36
Contentful's design system Forma 36 offers a lot of ready-to-use components. Head over to its Storybook and have a look. Implement three components: List, ListItem and Note. Go to the top of the file and import them.
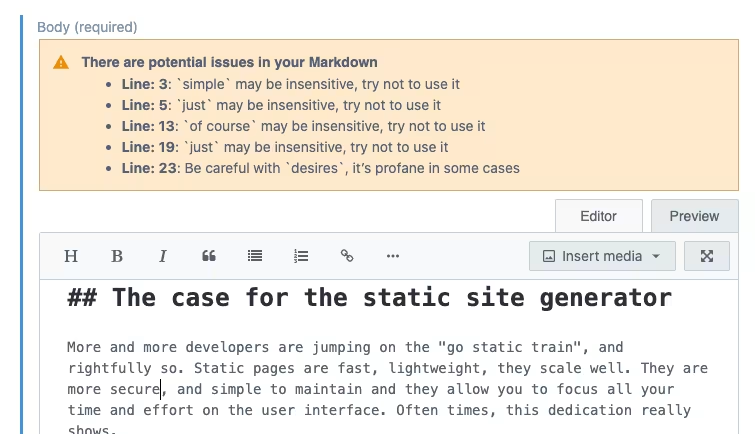
Adjust the rendering of the Alex.js warnings to use Forma 36's components instead of ul and li.
And here you go! You now have an official Contentful Markdown editor paired with custom functionality. And it looks good too!
The last app location: how to make Zen mode work
With the Markdown editor rendering properly, you're almost there. You might have noticed one thing missing. When you press the full screen button (the cross with the arrows) you notice that it's not opening the editor in full screen.
The reason for that is that the full screen mode is another app location. To make it work, your application code has to run in two locations: in an entry field and in the dialog location.
Luckily, the documentation for the Markdown editor provides guidance on how to implement this app in the dialog location. Adjust the import statement for @contentful/field-editor-markdown:
The renderMarkdownDialog method can then be used in the init function handling all the different locations:
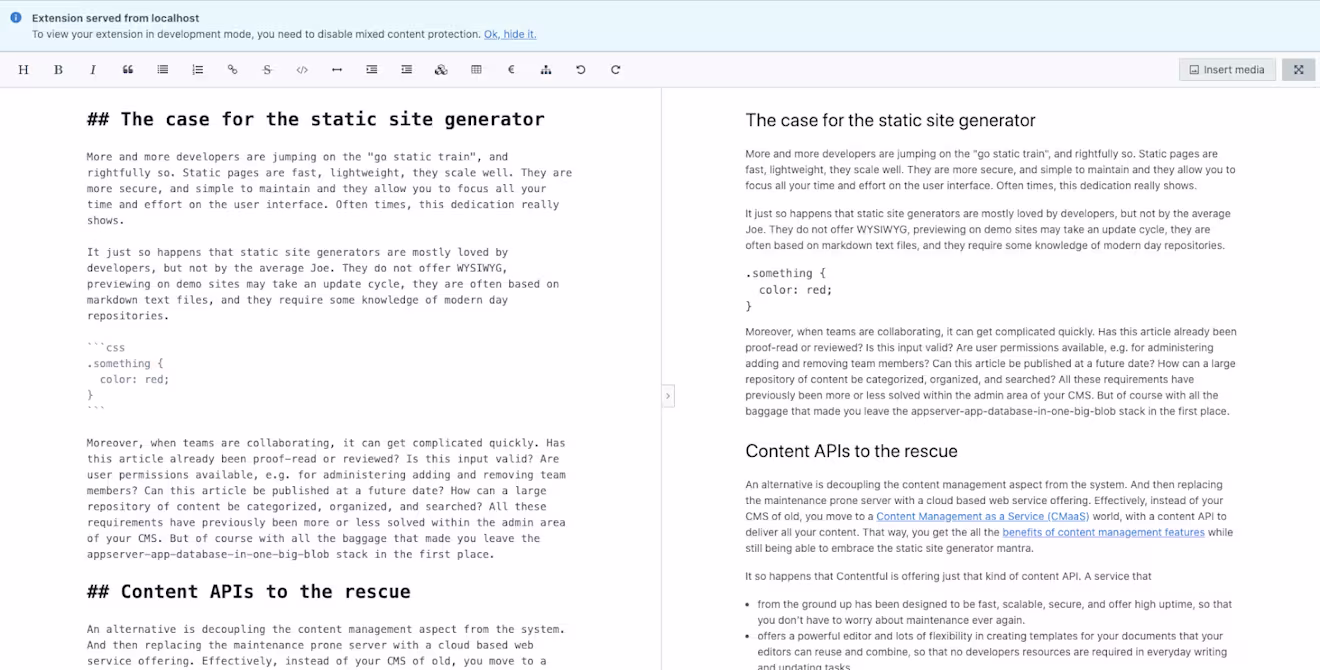
With these adjustments you can now open your Markdown editor in full screen, too!
How to get your app ready for production
The application is served from localhost:8080 so far. To run your application in production, you should optimize the source code and host it outside of your local machine.
Luckily, Parcel takes care of the optimization part. Run npm run build on your command line. This command generates a dist directory that includes everything you need to host this app. Upload it to your static hoster of choice.
We use Netlify for a lot of projects. If you only want to see the enriched Markdown editor in action, head back to the app definition in your organization settings and set https://contentful-enriched-markdown.netlify.app/ as your app source.
What will you build?
This tutorial shows how you can leverage Contentful's App framework, the design system Forma 36 and the open-sourced field editors to tailor your editing experience to your needs. We can't even say how excited we are about this. A lot of Stefan's sites run on Contentful, too, and that's why he started building a collection of custom editor experiences. Feel free to use it and open issues with requests for other components.
So what's next? To use this tutorial application, find the final source code on GitHub. And to learn more about Contentful's fields editors head over to the field editors section in the docs or look at the detailed developer documentation.
Providing you the tools to customize the Contentful UI is one of our top priorities, and we can't wait to see what you build with this new set of tools. Let us know what you create or reach out to Stefan via Twitter or Email; we'd love to learn more about the Contentful experiences that are truly yours!

Inspiration for your inbox
Subscribe and stay up-to-date on best practices for delivering modern digital experiences.
Meet the authors

Stefan Judis
Senior Manager, Developer Relations
Stefan was formerly a Senior Manager, Developer Relations at Contentful. He loves web performance, new technologies, and accessibility.

Alex has ten years of professional expertise in web development and creating complex SPAs. I'm focused on performance and maintainability, simplifying processes and getting things done. Currently, I'm most interested in React, React Native, Reason, Kotlin, and GraphQL.
Related articles

Integrate Contentful with Next.js 16 Cache Components
April 28, 2026

Mastering GraphQL filters
April 7, 2025

How to build an API with the best GraphQL performance
July 9, 2025
