React tutorial with Contentful
The JavaScript library React is a popular tool to build interactive front end applications. Using the library, can deploy new React projects to any static hosting provider. This is great for performance and security, but also has a limitation: content often must be hardcoded in the application. To edit and update text or images, developers have to make code changes and redeploy the entire application.
Luckily, React handles API data very well. To make content editable, you can bring in an API-driven content management system (CMS) like Contentful. Contentful’s content platform is an excellent choice to untangle content and code to offer content creators ways to edit data without the need for a source code deploy.
This guide to getting started with React explains how to connect a create-react-app application with Contentful’s GraphQL API.
Prerequisite
To follow this tutorial, you need:
- a recent version of Node.js and npm available on your machine
- a free Contentful account
- a code editor
Create a new React application
The first thing is to bootstrap a new React application. Luckily, this use case is exactly why the create-react-app npm package exists. Head over to your terminal and run the following commands:
npx create-react-app creates and bootstraps a new React project. It comes with a recommended React toolchain, follows best practices and is ready for development. To learn more about the setup, read the official documentation.
npm start starts a local development server. It supports hot reloading and source code linting to make React development as straightforward as possible.
Open localhost:3000 in your browser and find the create-react-app default screen.

Your application is now ready to be developed. Let’s change it to use Contentful API data.
Set up your Contentful space
Using Contentful, you can tailor content structures and the connected API responses to your needs. In this tutorial, you will use and fetch a “Page” entry that holds the information of a title and a logo to replace the hardcoded values included in create-react-app.
In Contentful, create and open a new Contentful space. Then create a new Page content type from the “Content model” section linked in the top navigation bar.
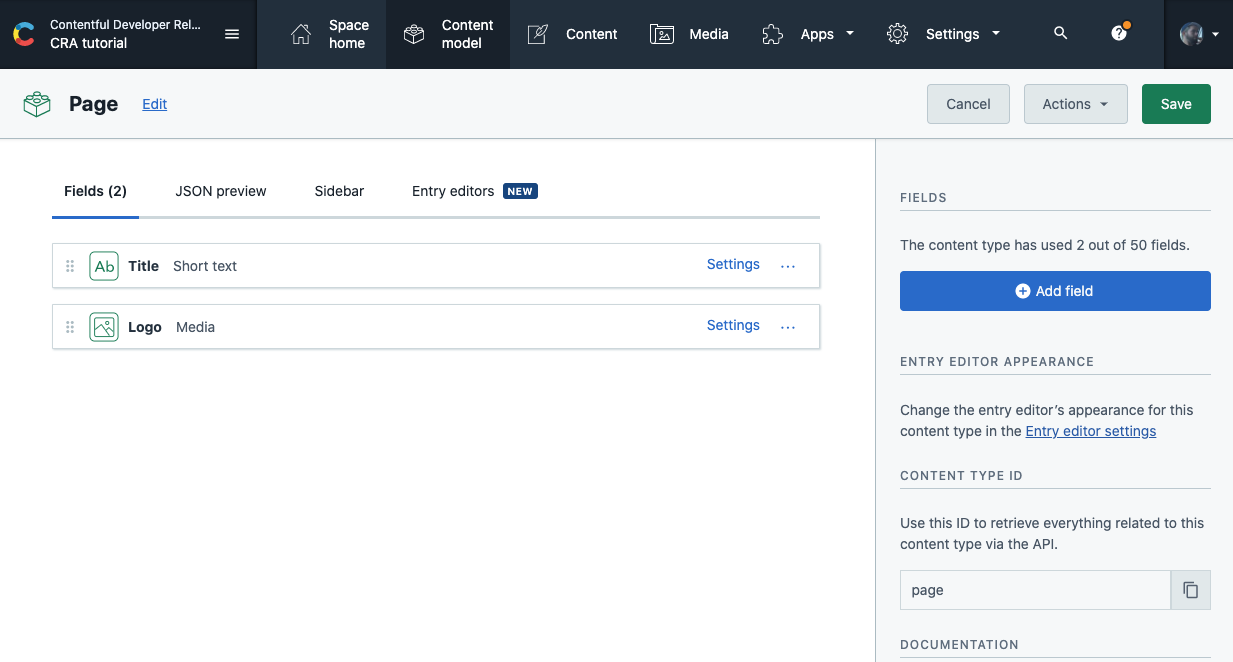
Ensure that the content type defines a short text field for the title and a one file media field to allow a file upload for the logo. Once you created the content type, you can create multiple entries with the defined structure that includes a title and a logo field.
Now, head to the “Content” section and create a new “Page” entry.
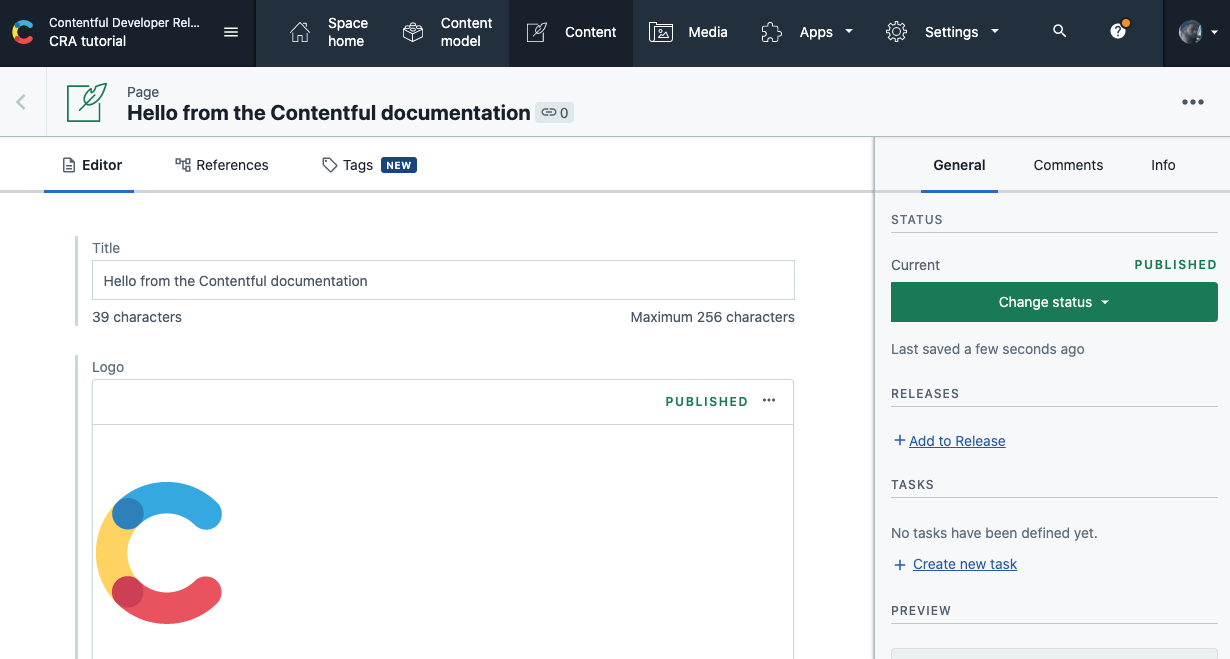
Fill the fields with your preferred data and publish the entry. You are now ready to fetch this entry from within the React application.
Fetch your content using GraphQL
To fetch the data stored in Contentful, you can use RESTful APIs (Content Delivery API, Content Management API and Content Preview API) or the GraphQL API.
This tutorial uses the GraphQL API. The main advantage of GraphQL is that developers can request and define the data included in the response. Additionally, GraphQL endpoints are self-documenting, and there is no need to install additional tooling or SDKs.
Explore Contentful’s GraphQL endpoint using GraphiQL
To find out what data is available via the GraphQL endpoint, Contentful provides GraphiQL. GraphiQL is an in-browser tool that allows you to write GraphQL queries and explore the available data and schema.
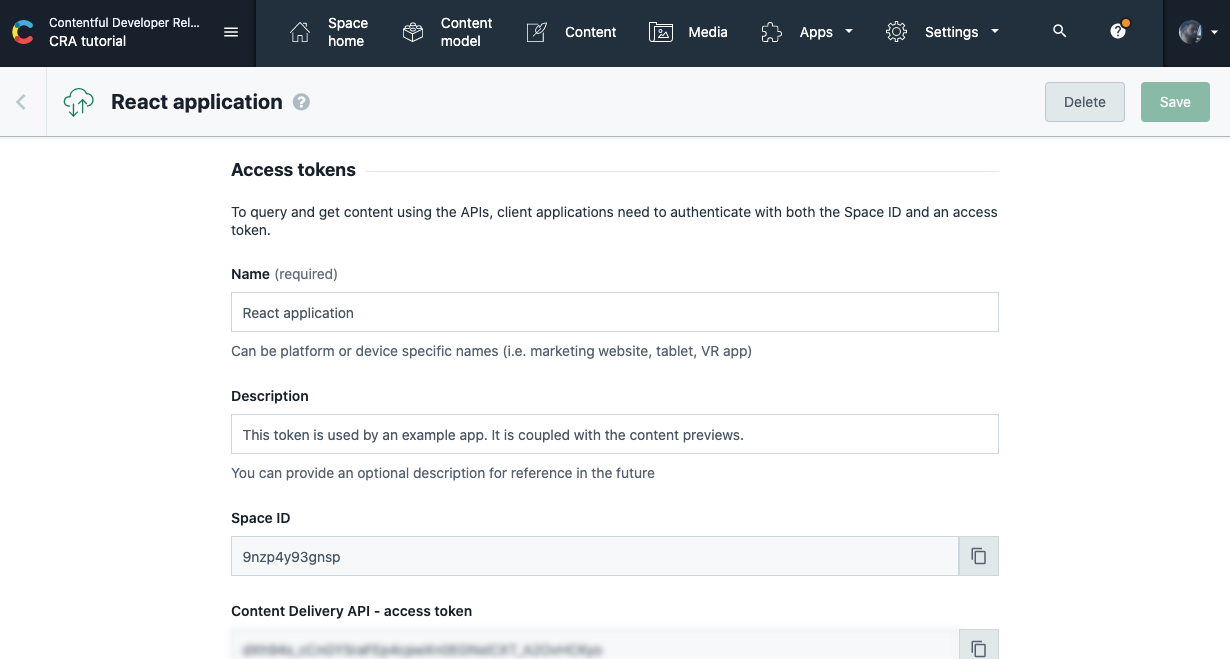
We need to authenticate the made requests and provide an access token before we can use GraphiQL or the GraphQL API. Head to the API keys section in the Contentful UI (top-level navigation -> Settings -> API keys) and copy your Space ID and Content Delivery API access token.
With the Space ID and access token at hand, add these to the following URL and open GraphiQL in your browser:
https://graphql.contentful.com/content/v1/spaces/[YOUR_SPACE_ID]/explore?access_token=[YOUR_ACCESS_TOKEN]
access_token query parameter or an Authorization HTTP header.Write your first GraphQL query
Now, use GraphiQL to write and define your GraphQL query. The tool allows you to make authenticated requests within its UI. Additionally, you can find the GraphQL schema documentation on the right side of the interface and you can write GraphQL queries with handy auto-completion.
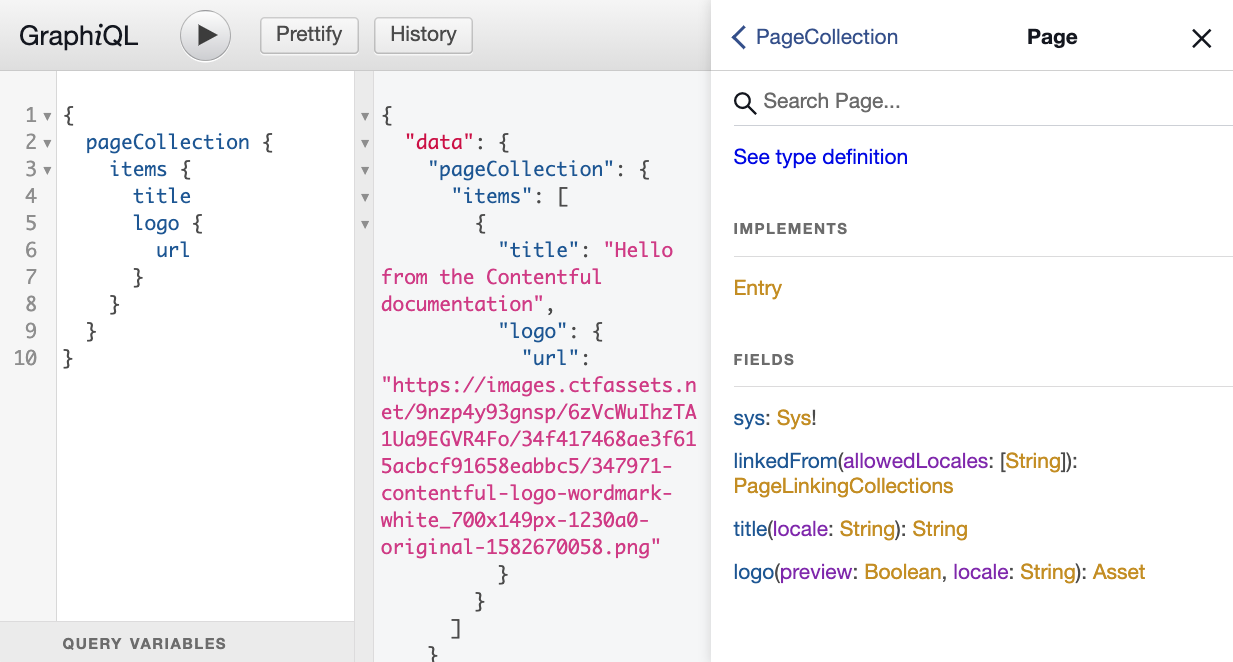
Depending on your defined content model, the GraphQL API provides queryable fields. To query a single “Page” entry with an id, use page(id), or query a collection of pages using the pageCollection field.
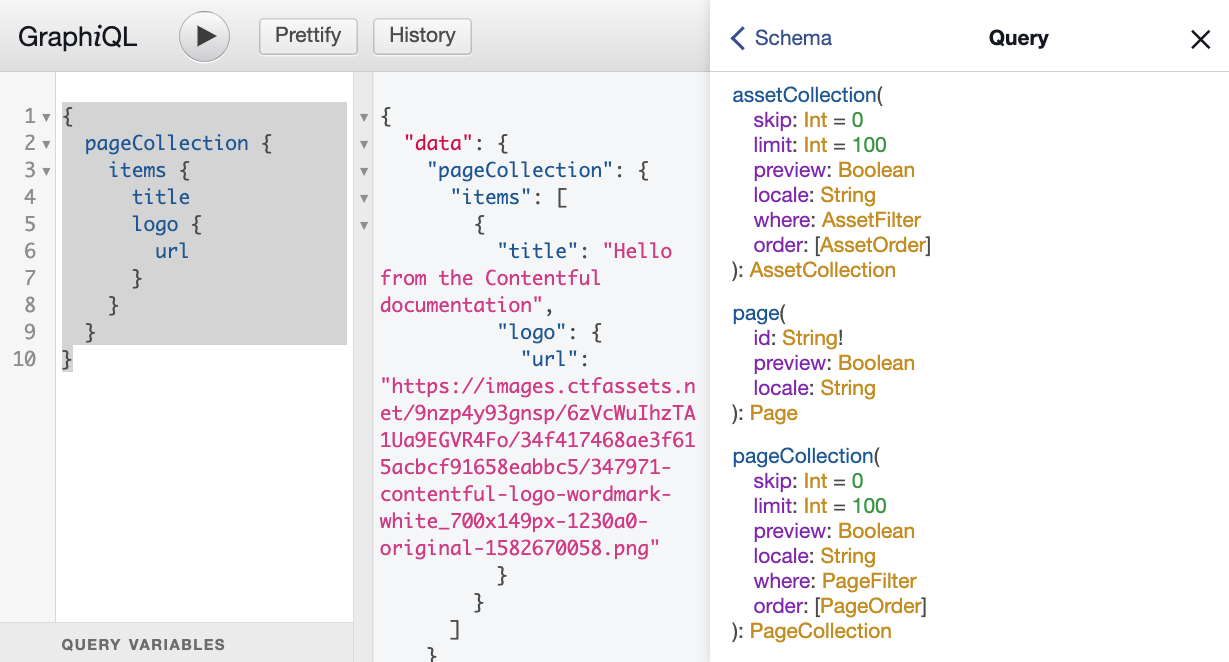
For simplicity, this tutorial uses the queryable collection field. To fetch a collection of pages use the following query to retrieve the title and logo for every entry.
With this query you can move on and start fetching data from within the created React application.
Use Contentful GraphQL in your React application
The main component in your bootstrapped React application is App.js. Let’s edit the included functional component and bring in the Contentful data.
The provided component includes hardcorded data and has the following structure:
Copy and paste the working GraphQL query into the file and define a new query variable on top of the App function.
To make requests and connect functional React component to a particular state, add an import statement at the beginning of the file to import the React hooks useState and useEffect.
Go into App and define some initial state using useState.
useState allows you to define an initial state value. It returns the current value and a setter method for the specified data. Every time you call the returned setter (setPage in this case) React rerenders the functional component.
At this stage, the React application always shows a loading message because you’re not fetching any data yet. To retrieve the page entry stored in Contentful, use useEffect to perform a request and set the returned data using setPage.
window.fetch method provides all the functionality you need for this tutorial.Define the URL endpoint (https://graphql.contentful.com/content/v1/spaces/[YOUR_SPACE_ID]/) as the first function argument and pass in headers and additional configuration.
useState and useEffect is not part of this tutorial. To learn more about this React functionality, read the official React documentation, or watch the official React documentation.With the addition of window.fetch called in useEffect the App component fetches GraphQL data from Contentful. But it is not rendering it yet. The last step is to update the returned JSX template to use the data. Change the logo URL and the hardcoded text to use page.title and page.logo.url.
The final state of your Contentful-connected React component now looks as follows:
Summary
In this tutorial, you learned how to create a new content type, how to create an entry of this type and fetch it from within a new React application using GraphQL. The application data is now editable from Contentful’s UI, and you replaced the hardcoded React logo and message with dynamic API data.