How to build a CMS using JavaScript with Contentful
Published on November 29, 2022


Inspiration for your inbox
Subscribe and stay up-to-date on best practices for delivering modern digital experiences.
A content management system (CMS) enables a website’s editor to manage content without technical expertise. A CMS also provides a quick glimpse into the status of your content — whether it’s live, unpublished, or in the review process.
Although their original scope was limited to web page content, CMSes are now used for all sorts of business operations.
The Web 2.0 era saw the establishment of the monolithic, linked (all-in-one) CMS that included everything needed for organizing and publishing web content. However, this solution was designed to deliver web content to desktops, and the subsequent proliferation of mobile devices and IoT devices challenged its efficacy.
Then, the decoupled and headless CMS arose. This new model allowed developers to work with the frontend of the website without affecting the site’s content.
Now that CMS tools are integral to website management, some CMS providers offer API capabilities, enabling developers to create custom CMS platforms. One such example is the Contentful Content Management API, which you’ll explore in this tutorial.
The following tutorial demonstrates how to create a CMS with a backend that enables you to generate, manage, save, and publish information using the Content Management API. This API empowers developers to rapidly design high-quality user experiences without worrying about how changes might affect the application’s backend business logic.
Can you build a CMS with JavaScript?
Most certainly! In this tutorial, you'll learn how to create a JavaScript CMS app that connects with Contentful’s Content Management API. Prerequisites for following along:
A fundamental understanding of apps built with Node.js and Express.js.
A Created Contentful space and an API key to store and retrieve content from your space.
A personal authentication token.
Access to Postman for testing.
You can find the full project code on GitHub.
Getting started
To begin, follow these steps to install and set up a new project.
First, create a new directory for your project and navigate to it.
Now, open a terminal in that directory and run the command below.
This will walk you through the steps to adding a package.json file to your directory.
Now, you’ll add some additional packages for this project.
Run the following commands in your terminal to install Express.js, and Nodemon, which monitors file changes.
This tutorial will also use other npm packages: dotenv for storing the token, axios for making HTTP requests to the API, and content-management to use Contentful’s built-in functions. Later on, you’ll use Postman to test the API endpoints.
To install the modules, use the following command:
After the packages are installed, create a new file, index.js, in the root directory. This will act as the main file in your Node application.
Before you write any code inside your index.js file, you’ll have to set up Nodemon to point to the index.js file.
Open the package.json file and add the following line under the scripts section:
Save the file.
Next, to store environment variables, create a new file called .env in the root folder to store the CMA and CDA tokens. In that file, create two variables and replace the placeholder text with your tokens, which you can retrieve by following this guide:
Now, you can create an express server in the index.js file with the necessary routes, using the code below:
Once you’ve added the boilerplate code, save the index.js file.
Now, create a new folder, /routes in your project directory, and create a new file called cmsroutes.js in the routes folder.
Then, add the following code in the cmsroutes.js file:
Now, the basic application is ready for the next steps. Open a terminal in your project directory and run the following command to start the Node server:
(Note: Because you have yet to add routes, it’s not advisable to test the server response in-browser, as it will return an error.)
Building a JavaScript app that authenticates into your Contentful account
In this and subsequent sections, you’ll need your Space ID. You can locate your Space ID while creating the token or you by following this guide.
Now, open the routes directory. Then, inside the cmsroutes.js file, add the following code to make a new route:
In this code, you created a route to authenticate a user who is logging in to a specific space in their Contentful account. The authentication is performed using the CDA token, which you passed in the headers, along with your request to the Contentful server. Based on the response from Contentful, the user is notified if they’re authorized to log in.
Now that you’ve created the route and method, it’s time to test the API in Postman, a popular API testing tool. Once you’ve downloaded Postman, you can add URLs, types of requests, and headers to carry out API testing.
Below is an example of Postman in action.

Note that the string after authUser is the space_id. To create this request in Postman, you can add the following in the URL bar:
The successful API response returns the string: You are authorized to log in!!
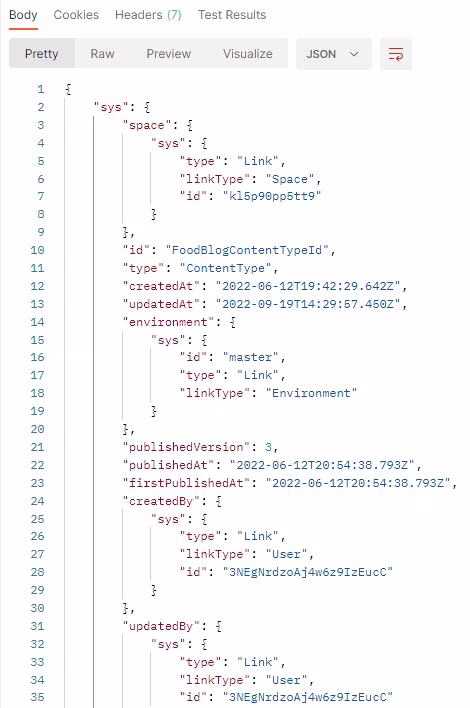
Adding content types to your space
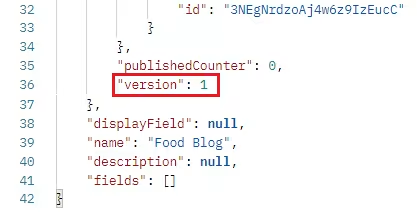
Before continuing, it is worth noting that when you call the Contentful API to create or update the content type, you receive the version of the particular type in the response. So, to validate subsequent requests, you need to pass that version through the request body.
Now, you can add a content type to your space. Start by creating a new route in routes/cmsroutes.js:
In the above code, :space_id passes the ID of the newly created space, :environment_id passes the ID of your environment (master), and :content_type_id is the user-defined name of your content type.
Note that you’re passing two parameters in your header:
Authorization: `Bearer ${process.env.CDA_ACCESS_TOKEN}`"content-type": "application/vnd.contentful.management.v1+json"
Now that the route is created, test it in Postman using the URL:
Ensure that the type of request is set to PUT and the request body type is JSON.

The request body is:
In response, you received:

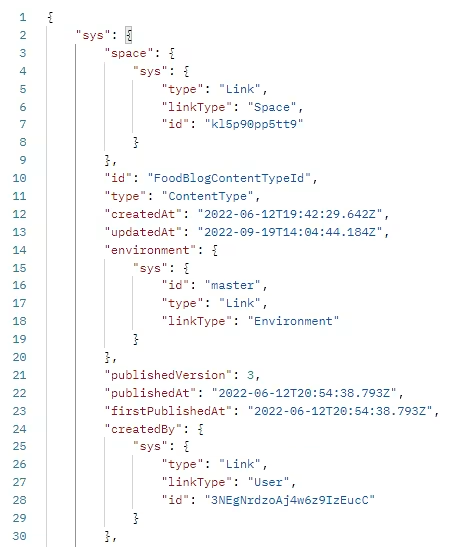
The Contentful portal will create the content type like this:

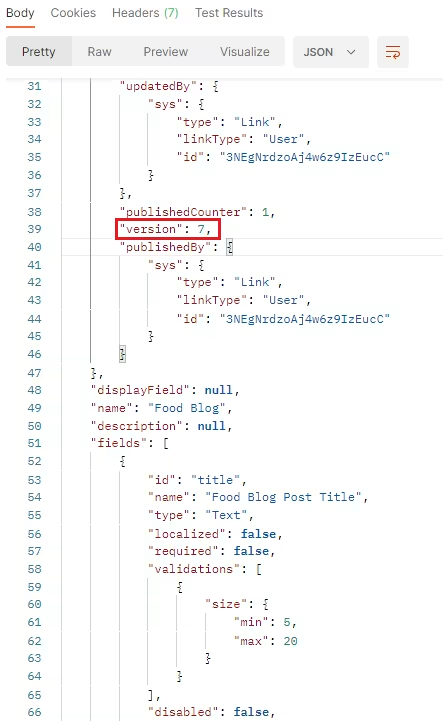
Adding several fields to your content type
After creating your content type, you can add more fields to it, like a title and body.
To do this, create a new route in routes/cmsroutes.js by adding the following code:
Here, you’re passing :space_id, :environment_id, and :content_type_id. You’re also passing three parameters in your header:
Authorization: `Bearer ${process.env.CMA_ACCESS_TOKEN}`"content-type": "application/vnd.contentful.management.v1+json""X-Contentful-Version":content_versionwhich will come from request body
The third parameter, X-Contentful-Version, tracks the version of the created content type. Each time it updates, the version number increases.
Now, to test the route in Postman, add the following URL:
Again, ensure the type of request is set to PUT.
The request body should be as follows:

Then, Postman provides this response:
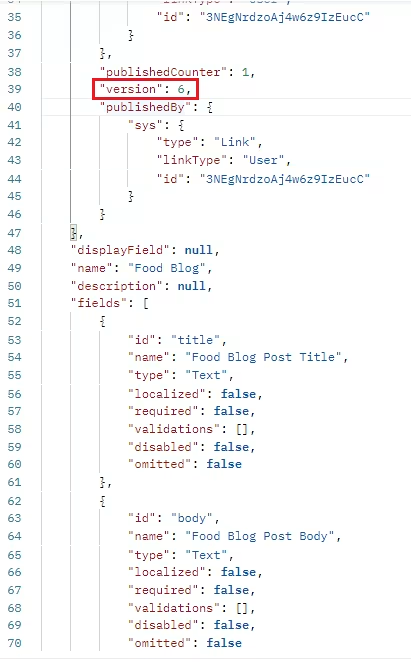
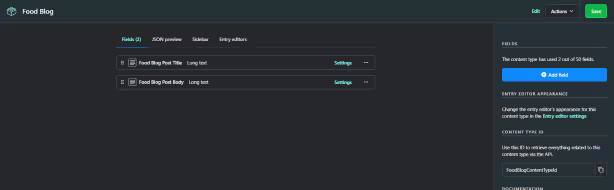
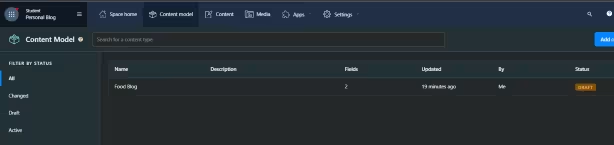
Your content model should look similar to this:
Validations
When making or changing a content type, defining the validations of a field enables you to prevent errors.
You can use the same route that was used to add fields to the content type. However, when passing the JSON object in the body of your request, you’ll also add validations in addition to the fields using the following code:

A successful response looks like this:

Then, the Contentful UI shows the validation.

Activating a content type
You can change the status of the content type from Draft to Active. To activate a content type, first, add a new route in your routes/cmsroutes.js file. Then, add the following code:
In the code above, you used a built-in library from Contentful and initialized it by adding contentful.createClient to your cmsroutes.js file.
Parameters like :space_id, :environment_id, and :content_type_id are also passed, similar to other routes. Contentful’s library takes care of everything else.
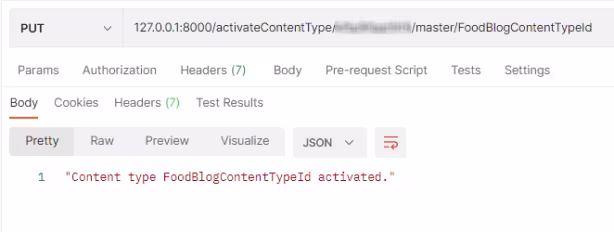
Now, you can test the route to activate the content type in Postman using the following URL:

In the Postman response body, you’ll see that it’s been activated! The Contentful CMS portal will set the content type as ACTIVE.
Retrieving the editor interface for the content type
An editing interface represents a content type’s appearance and behavior in the Contentful web app. Each category of content type can only have a single editing interface. The API will return a 404 error if a content type hasn’t been activated yet.
To retrieve the interface, first set up a new route in routes/cmsroutes.js file by adding the following:
Similar to other routes, you’ve passed two arguments in your route: :space_id and :environment_id.
Additionally, the header contains your CMA (Contentful Management API token):
By testing the route in Postman using the URL 127.0.0.1:8000/editorInterfaces/{space_id}/{environment_id} and setting the request type as GET, you receive the following response:

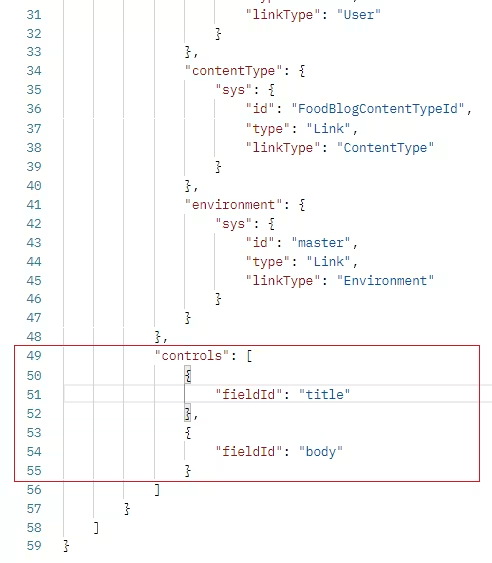
Updating the editor interface for the content type
You can add new properties to a content type field, amend existing ones, or remove them entirely by using an editor interface.
To begin making changes, add the following code in the routes/cmsroutes.js file:
You’ve passed three parameters in your route:space_id, environment_id, and content_type_id.
Now, just like adding fields in content_type, you’ll pass three parameters in your request header:
Authorization: `Bearer ${process.env.CMA_ACCESS_TOKEN}`"content-type": "application/vnd.contentful.management.v1+json""X-Contentful-Version":`${req.body.content_version}`
This is a PUT request:
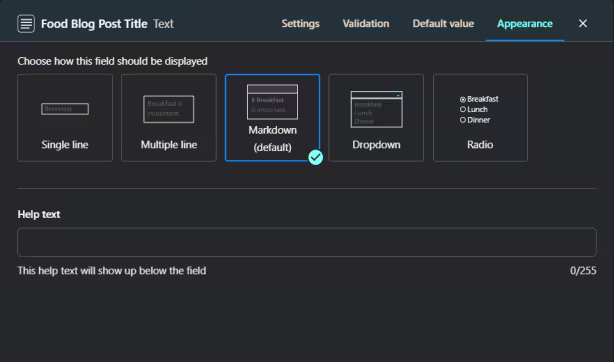
Then, add the following code snippet for the body:
By default, the title field is set as: Markdown.
After executing the route, the response in Postman looks as follows:


Now, the title field appearance is set to: Multiple line.

Content Delivery
Now, you can retrieve all the spaces created in your organization. You’ll do this using the Content Delivery API (CDA), which is mainly used to retrieve your content. It works just like the CMA.
To do so, first create a new route in routes/cmsroutes.js using the code below:
The parameters you passed are similar to previous routes, but this time, you passed the CDA token instead of the CMA token in your route’s URL.
By executing the route in Postman with this URL:
you should receive a response as shown in the images below:
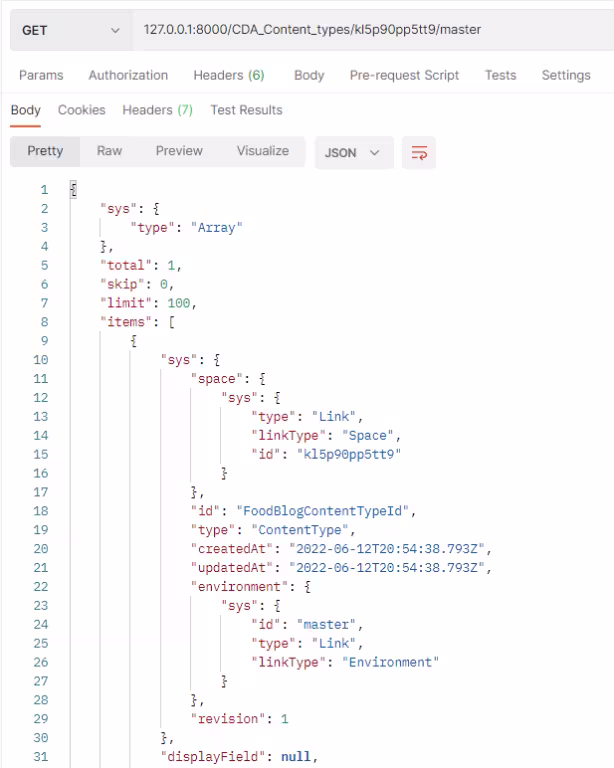
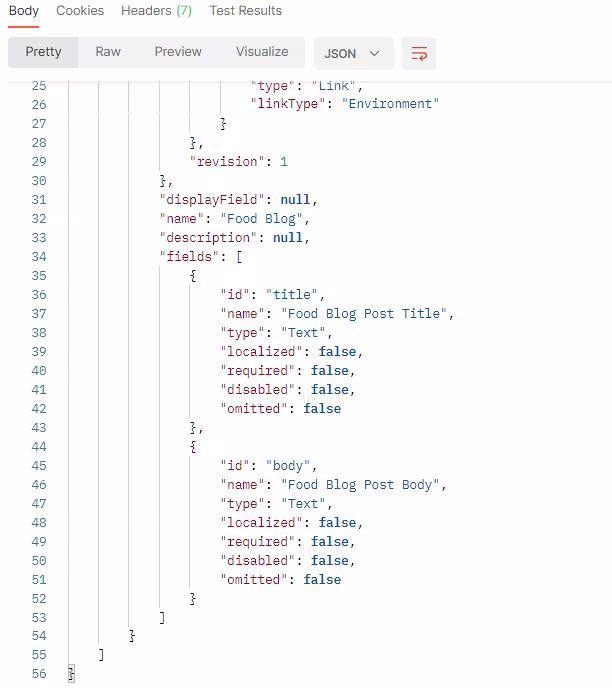
As you can see, the Postman response is identical to using the CDA token.
Wrapping up
You’ve seen how easy it is to create a JavaScript CMS app that connects with Contentful’s Content Management API. But you’ve barely scratched the surface. Contentful offers a wide range of APIs and SDKs.
Are you interested in building a related project using Contentful? Create a free Contentful account and get started in moments, no credit card required.

Inspiration for your inbox
Subscribe and stay up-to-date on best practices for delivering modern digital experiences.
Meet the authors

Alvin is a developer advocate and creative coder, formerly with Contentful. He's worked on many things like games, charts, 3D graphics, marketing sites, data visualizations, design systems, and maps.

Bulent collaborates with Contentful's customers, partners and users to publish articles that support and elevate the community.
Related articles

Which is the best React rich text editor? Five options compared
March 18, 2025

Next.js Middleware guide, tutorial, and code examples
July 6, 2025

Ultimate starter guide to A/B testing with best practices
May 13, 2025
