Three ways to use Puppeteer and Node.js to screenshot web pages and generate dynamic Open Graph images
Published on March 17, 2021


Inspiration for your inbox
Subscribe and stay up-to-date on best practices for delivering modern digital experiences.
It's no secret that you drive more engagement when you share beautiful images with links on social media. But generating fresh images each time you publish a new blog post can be incredibly time-consuming.
The good news is, we can harness the power of a tool called Puppeteer to take screenshots of browser pages and generate dynamic images to share on your social media accounts. Let's take a look!
Sign up for your free Contentful account and start building in minutes.
What is Open Graph?
The Open Graph (OG) protocol was created at Facebook in 2010 to enable web page links to become rich objects with similar functionality and appearance to other content posted on Facebook. If you’ve shared a link on social media and have seen the platform automatically show you a large image, title, description and URL for the link you want to share even before you’ve clicked Post — you’ve seen the OG protocol at work.
Open Graph meta tags are used in the <head> of an HTML page to expose information about web pages to social media platforms and other applications that unfurl URL metadata. OG meta tags are identified in the HTML by a property attribute prefixed with og.
This is an example of an Open Graph meta tag. It provides a url to an image that is used to represent the web page.
OG meta tags can also be used to customize the appearance of your web pages according to the platform it’s shared on. For example, Twitter rolled out their own custom implementation of this, built on the OG protocol, and the following code tells Twitter to show the large image web page previews.
You can see this in this image generated from one of my tweets.

A basic — yet useful — implementation of an Open Graph image tag on your web pages should point to a static image. But in a world of sensory overload, how do you ensure your OG images provide useful context to your audience for the link you are sharing? How do you create automatically generated dynamic OG images for your web pages without having to open up Photoshop each time you want to promote a new post?
Enter Puppeteer!
Puppeteer is a Node library that provides a high-level API to control headless Chrome or Chromium. “Headless” browsers allow you to automate your interactions with a browser-like environment via a command-line interface. Most things that you can do manually in the browser can be done using Puppeteer.
A great way to elevate your Open-Graph-image game is to harness the power of Puppeteer by providing a link in your OG image tags that calls out to a serverless function that generates a screenshot of a browser page.
Other uses for the automation of generating screenshots of web pages might include build pipeline tools that check for web page regressions during new feature releases, or to provide richer experiences in the front end for your audience. Vercel had a great example of this. They show a preview of your application in your deployment dashboard.

If you want to dive straight into some example code, this repository demonstrates how you can get started with Puppeteer to generate screenshots of web page pages.
How to take screenshots of webpages with code
This puppeteer-demo repository contains a Vercel serverless function that runs in the browser and accepts a URL parameter of page. This would be a URL of a web page you want to screenshot, including https://.
Give it a try by visiting this URL: https://puppeteer-screenshot-demo.vercel.app/api/screenshot?page=https://whitep4nth3r.com
Here’s what you’ll see in the browser.
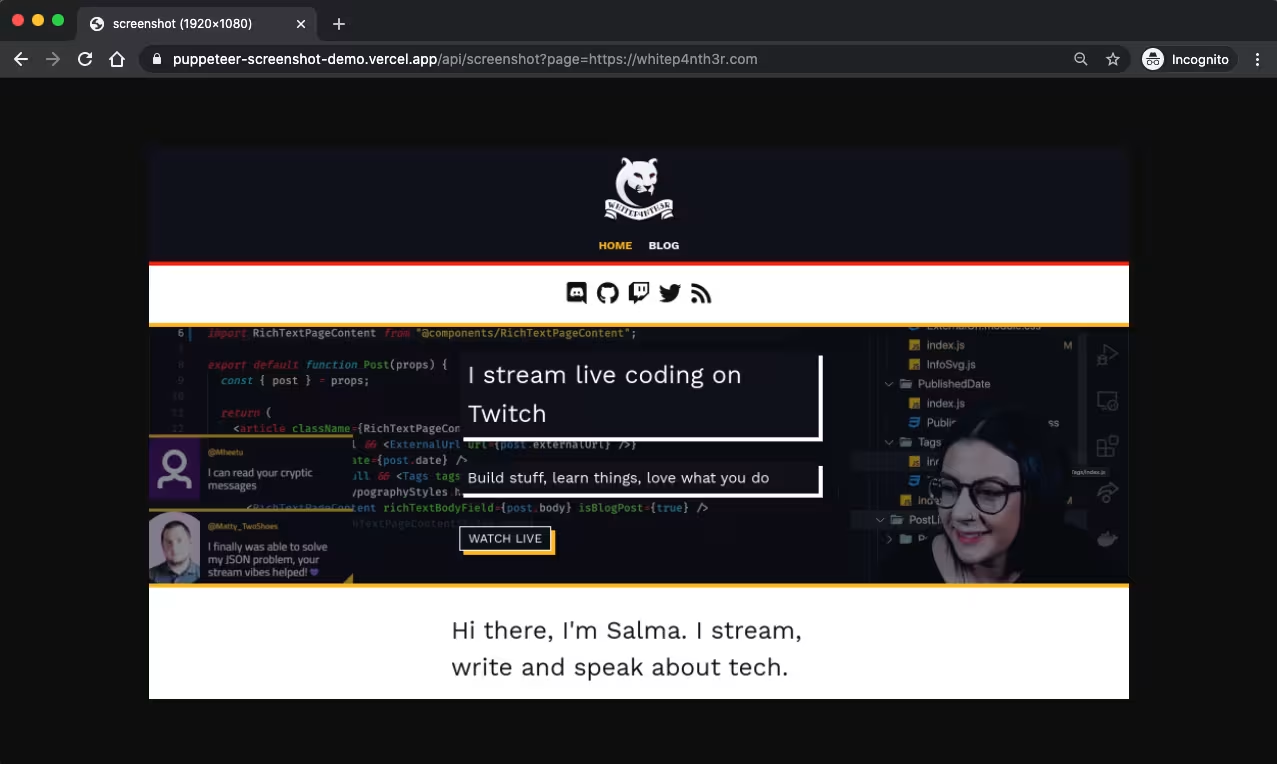
Switch out the page parameter for a different URL to watch it in action!
Let’s take a look at what just happened when you called the URL in the browser.
You called out to a serverless function hosted on Vercel
The instance of the function installed Puppeteer and spun up a Chrome headless browser in memory
The installation of Chrome launched, and visited the provided URL with a viewport size specified of 1920 x 1080
Chrome took a screenshot of the page as a .png file in the viewport and the function saved the file in memory
The instance of Chrome closed itself
The function returned the file to the browser with a Content-Type of image/png
That’s pretty cool, right?
If this excites you as much as it excited me when I first discovered the capabilities of Puppeteer, read on to see three ways in which you can use Puppeteer to take screenshots of web pages: on the command line, as a serverless function in the background or in a front-end application.
1. Generating screenshots on the command line
First, clone the repo to your local machine.
Using git HTTPS:
Or, using the GitHub CLI:
Install dependencies:
Run the following command in your terminal at the root of the project directory. You can also pass in multiple URLs separated by a space.
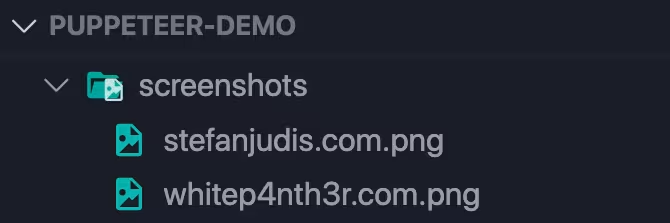
You'll notice that a new .png file (or files) will be created in the screenshots directory from the URL provided.
Let’s look at the code.
2. Running a serverless function in the browser
Vercel serverless functions can have a maximum size of 50MB. The code on the server (api/screenshot.js) uses the puppeteer-core package (which comes without any headless browser installed) instead of the full puppeteer installation. To take the screenshot, we install a light version of Chrome via chrome-aws-lambda on the server. This keeps the function size down.
Additionally, we configure the puppeteer.launch() options differently for development and production. For safety on the server, we only accept one URL.
To run the serverless function locally, you’ll need to install the Vercel CLI.
To install the Vercel CLI globally via npm, run:
To start the development server, open your terminal and run:
To ensure Puppeteer is given the correct options for the development environment, pass the query parameter isDev=true to the function. Here’s an example of how to run the serverless function in your local development environment.
Here’s the serverless function adapted from the code which runs on the local command line.
3. Building a slightly fancier front end to run the serverless function
Finally, we can call out to the serverless function in a web page application that returns the screenshot to us in the browser. Call the function URL using fetch, construct a blob from the response and create an object URL from the blob to be able to display it in the HTML.
Here’s the functional front-end code built with vanilla JavaScript.
View the live demo application here.
How I generate my dynamic Open Graph images for whitep4nth3r.com
To create dynamic Open Graph images for my personal blog site built with Next.js and Contentful, I forked this repository from Vercel that uses Puppeteer in the same way as described above, and created my own custom service which I host on Vercel.
View the front-end application here.
The application renders an HTML page based on the title of a blog post or page, which then uses Puppeteer to screenshot the page, and cache it.
The URL parameters in the request hold the key to the magic being performed here. Here's a look at the code that generates my dynamic Open Graph images in the head of my web pages, which you can find in full here.
Harness the magic of Puppeteer in three ways: on the command line, as a serverless function in the background, or in a front-end application. Explore and fork this puppeteer-demo repository to see Puppeteer in action — and have fun creating dynamic Open Graph images for your websites or finding new ways to use Puppeteer!
If you found this helpful, check out the rest of my guides. Or if you’re really enjoying using Contentful, spread the good word with your friends so they can sign up for a free Contentful account of their own.
And remember, build stuff, learn things and love what you do.

Inspiration for your inbox
Subscribe and stay up-to-date on best practices for delivering modern digital experiences.
Meet the authors

I help developers build stuff, learn things and love what they do. I code live on Twitch. I'm a teacher, musician, and a front end fanatic with a fierce mission to promote accessibility and inclusivity in technology on planet earth.
Related articles

Effortless automatic content linking in Next.js using Content Source Maps
September 30, 2024

Do llms.txt files actually improve AI search visibility?
June 3, 2026

Getting started with Contentful Studio and the Experiences SDK
May 29, 2024
