Integrate Contentful with Next.js 16 Cache Components
Published on April 28, 2026


Inspiration for your inbox
Subscribe and stay up-to-date on best practices for delivering modern digital experiences.
Content teams traditionally had to choose between fast static sites and dynamic, personalized experiences. Cache Components in Next.js 16 eliminate this trade-off, allowing you to build sites that are both fast and personalized without sacrificing performance. Pair this with Contentful to serve content instantly while still reflecting updates as soon as an editor publishes.
This guide walks through three rendering strategies in Next.js to explain the why and how behind Cache Components.
Dynamic rendering — Fresh content, slower pages
Static rendering — Fast pages, stale content
Mixed (Cache Components) — Fast pages and fresh content
The full source is available on GitHub, and this guide starts from the dynamic branch.
Prerequisites
Contentful account: https://www.contentful.com/sign-up/
Vercel account: https://vercel.com/signup
Node.js 20.9+
pnpmRedis (optional)
Setup
Start with a fully dynamic version of the application.
1. Clone the repo
npx create-next-app@latest my-contentful-app --example "https://github.com/vercel-labs/template-contentful-next/tree/dynamic"
cd my-contentful-app
2. Run the setup script
pnpm setup-contentful
The script creates a Contentful space, configures your content model, and writes credentials to .env.local so you can start your development server.
If you run into issues with the script, follow the manual steps below.
Manual Setup
Create a Contentful space: Go to https://app.contentful.com/spaces/new and create an empty space.
Get API tokens
Settings → API keys → Add API key
Copy the Space ID and Content Delivery API access token.
Go to CMA tokens and generate a personal token: https://app.contentful.com/account/profile/cma_tokens
Configure environment
Create .env.local:
Create the content model
In Content model → Add content type, create Article with ID article:
Field | ID | Type | Required |
|---|---|---|---|
Title |
| Short text | Yes |
Slug |
| Short text (unique) | Yes |
Summary |
| Short text | No |
Details |
| Rich text | No |
Date |
| Date only | No |
Article Image |
| Media | No |
Author Name |
| Short text | No |
Category Name |
| Short text | No |
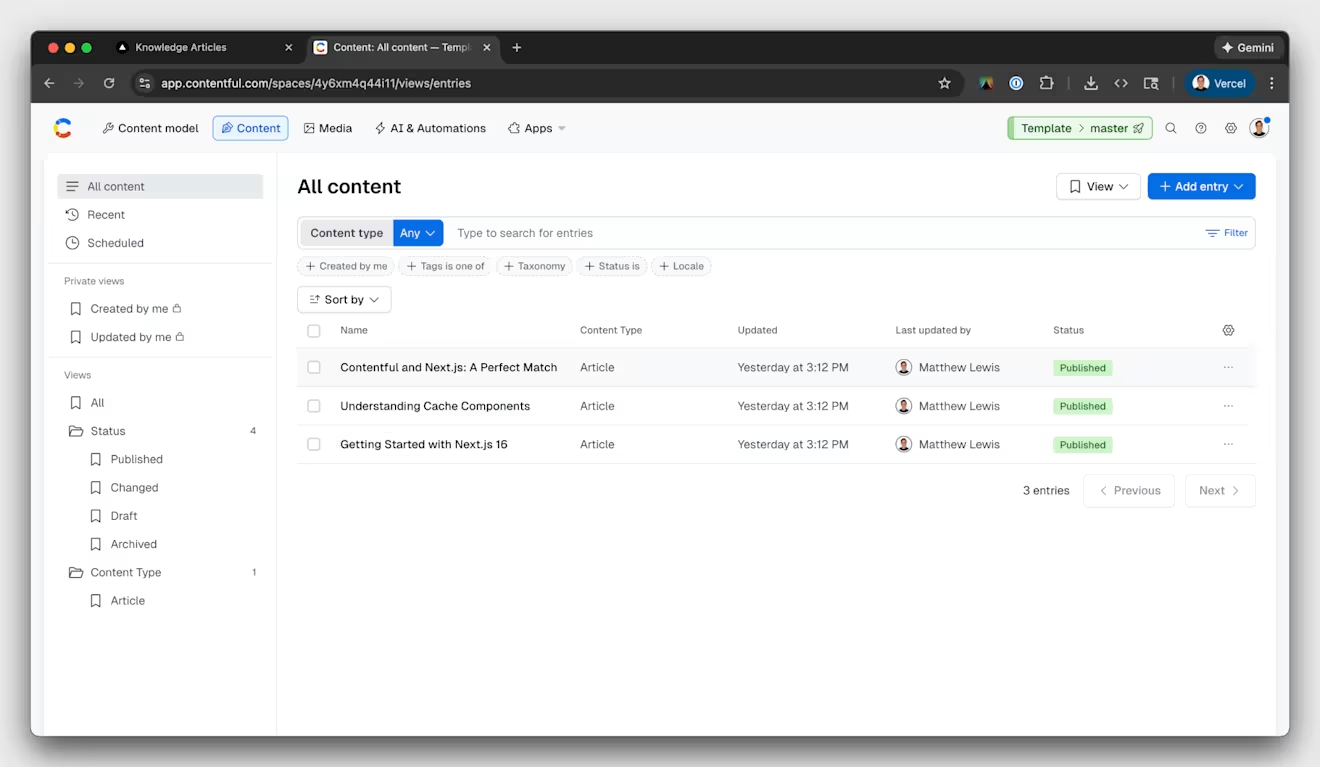
Create content
Add at least one Article entry and publish it.
Once setup is complete, your Contentful space should look like this:
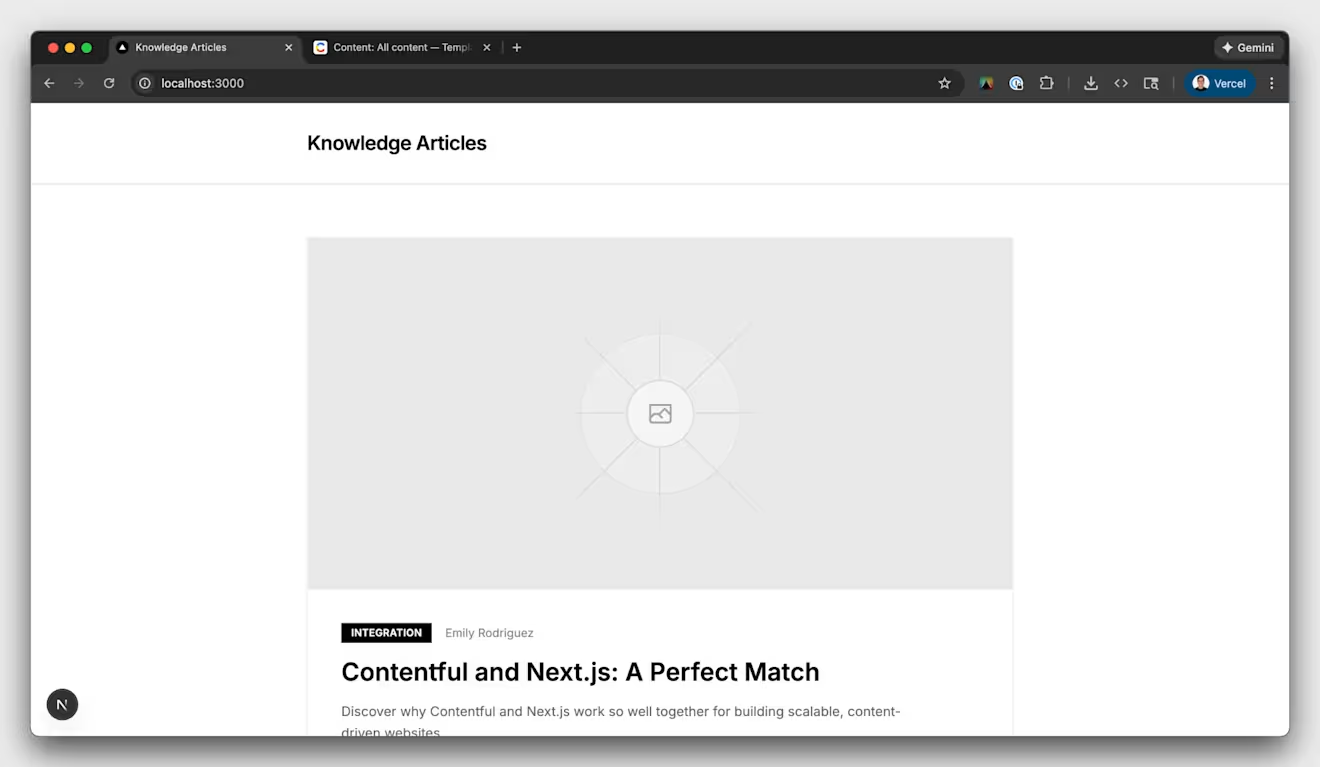
3. Start the development server
pnpm dev
Open http://localhost:3000 to see your Next.js application. Your home page should look like this:
Dynamic rendering
Dynamic rendering is the simplest place to start. It also mirrors what many teams ship first: fetching on every request to show the latest content.
Home page
The home page renders a single component named <Articles />, which uses the getArticles function to fetch from Contentful. Since getArticles runs without any dynamic parameters, Next.js treats this route as static by default.
Article page
However, the /articles/[slug] route renders <ArticleContent>, which depends on the dynamic parameter [slug]. This makes the route dynamic by default, causing Next.js to fetch articles from Contentful on every request.
Article component
The Views component also depends on the dynamic parameter, [slug], and reads real-time data from Redis.
Views component
The problem
This approach doesn't scale as traffic grows. The page fetches content from Contentful on every request, even when that content has not changed. A better pattern is to cache content and refresh it only when editors hit publish.
Static rendering
Static generation becomes the logical next step when you need to scale content delivery. Next.js supports static generation via generateStaticParams and allows you to choose which pages to pre-render at build time.
Generate static paths
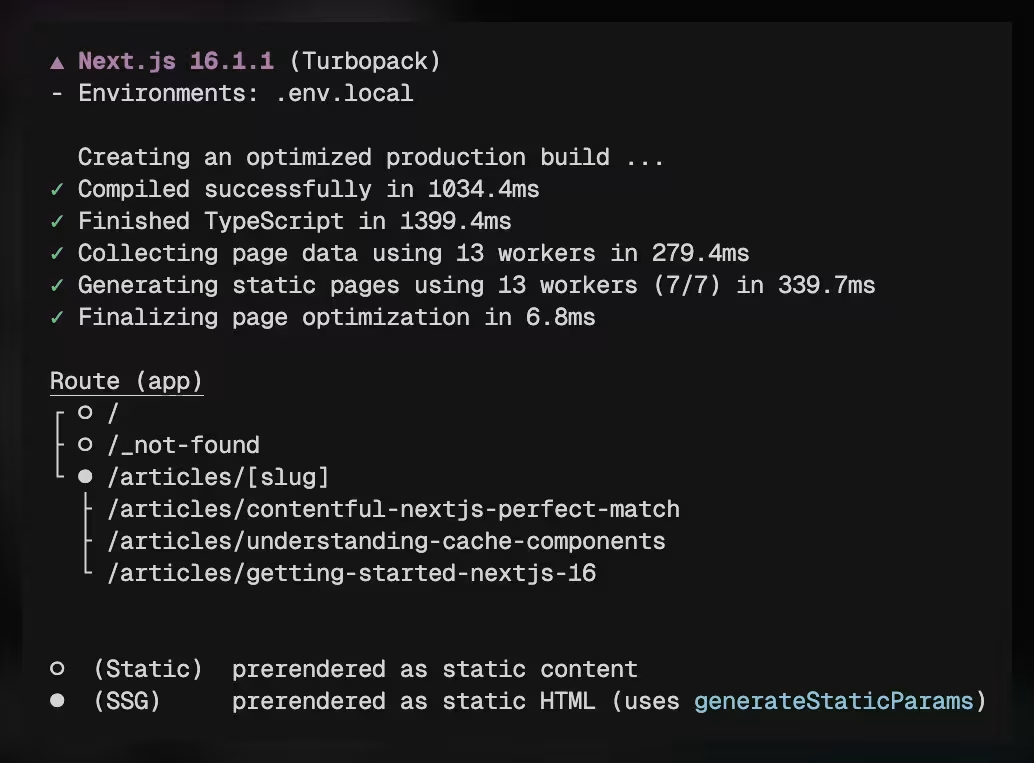
Add this to the top of app/articles/[slug]/page.tsx:
Now run pnpm build. Next.js generates static HTML for every article slug in generateStaticParams.
More problems
This solved the latency issue of dynamic rendering, but introduced two new problems. Because the page was pre-rendered at build time, published Contentful updates won’t appear on the deployed page until the app revalidates or rebuilds. The view counter was also pre-rendered, so it always shows a stale value.
You could try to hydrate the view counter on the client, but that has more trade-offs:
Layout shift: The server sends initial HTML (often with a placeholder or stale value), then the client fetches the real data and updates the UI, causing visible content to jump around.
Hydration mismatches: If the server-rendered HTML differs from what React expects on the client (e.g., a counter showing "0" on server but "42" after hydration), React will warn and potentially re-render, hurting performance.
Extra API calls: The client must make a separate request to fetch the current count after the page loads, adding latency and network overhead that wouldn't exist with a pure server approach.
The wrong workaround
You might think: wrap the view counter in unstable_cache() with revalidate: 0 so it stays fresh.
But revalidate: 0 means the cache expires immediately, so every request still triggers a fetch. You pay for caching infrastructure and get zero caching benefit. You also add the complexity of unstable_cache() and manually coordinating cache keys.
Most importantly, you still can't mix rendering strategies on the same route. Articles want to cache for minutes or hours, and views want to update on every request. Static rendering is all-or-nothing; you can't keep one part static while another part stays dynamic.
Cache Components
Cache Components solve this problem by letting you mix rendering strategies on the same page. Static sections are delivered instantly from the cache, while dynamic sections stream in with Suspense.
Enable Cache Components
With cacheComponents enabled, async components require either the "use cache" directive or a <Suspense> boundary. Without one of these patterns, Next.js throws an error to help developers avoid performance issues.
Cache home page content
Add "use cache" to the top of the <Articles> component. Next.js caches the rendered output of the component, allowing it to statically render this page at build time.
Your home page content might change frequently, or it might stay static for weeks. Next.js provides cacheLife to configure the cache policy that best fits your needs. Learn more here.
Mix cached and dynamic content
The article detail page uses dynamic data in the <Views> component and static content in the <ArticleContent> component. Cache Components make it easy to mix these strategies on a single page. Start by removing the <Suspense> boundary around the ArticleContent component.
Run your development server and you’ll see this error: Data that blocks navigation was accessed outside of <Suspense>. To fix it, add "use cache" to the <ArticleContent> component.
On-demand revalidation updates the page whenever a user hits Publish in Contentful. Before Cache Components, developers had to define cache tags before fetching content. The new cacheTag API lets you define them afterward. Fetch the content, create a unique cache tag based on the response, and use webhooks to revalidate.
Add a cache tag to ArticleContent based on the sys.id of the Contentful entry. This ID is a unique value assigned to every piece of content in Contentful. sys.id is more stable than the slug, which may change (and potentially require redirects). Next.js recommends pairing on-demand revalidation with the "max" cache profile for best performance.
Note: If a slug was not pre-rendered at build time, Next.js can still generate it on-demand and cache it (ISR-style).
The static shell renders instantly, covering navigation, layout, and article content. Meanwhile, <Views> streams in dynamic content with <Suspense>. You maintain both freshness and speed without compromise.
On-demand revalidation
Contentful’s webhook events and stable entry IDs make this cache invalidation model straightforward. Use Contentful webhooks to notify your app when content changes. The webhook payload includes the entry sys.id, which you can use to invalidate any cached data tagged with that ID.
Protect the endpoint with a shared secret.
Create a revalidation secret
openssl rand -base64 32
Add it to .env.local:
CONTENTFUL_REVALIDATE_SECRET=your-generated-secret
Add the webhook endpoint
revalidateTag(entryId, "max") marks cached data tagged with that entry ID as stale. The next request can serve stale content immediately while fetching fresh data in the background, which gives you stale-while-revalidate behavior.
Configure the Contentful webhook
Settings → Webhooks → Add webhook
URL:
https://your-domain.vercel.app/api/contentful/revalidateHeaders:
x-vercel-reval-key: your-secretTriggers: Publish, Unpublish
Save
Now, when you publish in Contentful, your /api/contentful/revalidate route invalidates the correct cache entries and updates the application immediately.
Commit all changes
Import the project into Vercel: https://vercel.com
Add these environment variables:
CONTENTFUL_SPACE_IDCONTENTFUL_ACCESS_TOKENCONTENTFUL_REVALIDATE_SECRETREDIS_URL(optional)
Deploy.
After you deploy, update the Contentful webhook URL to point at your Vercel domain.
Summary
You have migrated a fully dynamic application to Cache Components. You now get granular cache invalidation and strong web performance without sacrificing the ability to immediately update your content.
Cache Components eliminate the need to choose between performance and freshness. Your users get instant loading, your content editors get real-time publishing, and your development team no longer rebuilds the entire site for every update.
To learn more about Next.js and Cache Components, visit https://nextjs.org/docs/app/getting-started/cache-components.

Inspiration for your inbox
Subscribe and stay up-to-date on best practices for delivering modern digital experiences.
Meet the authors

Matthew specializes in Senior Partner Solutions, AMER at Vercel.
Related articles

Mastering GraphQL filters
April 7, 2025

The ultimate guide to TypeScript utility types (with code examples)
July 14, 2025

How to use SVG in React: 7 ways to import SVG images (with examples)
October 31, 2024
