How to build a lightweight microblogging site with Contentful, HTML, CSS and JavaScript
Published on February 5, 2021


Inspiration for your inbox
Subscribe and stay up-to-date on best practices for delivering modern digital experiences.
I’m a big believer in the web development principle KISS. KISS is an acronym for the phrase “keep it simple, stupid” — and while I don’t advocate for calling anyone “stupid” — I advocate for keeping things very simple when learning to work with new technology.
Before joining Contentful as a developer evangelist in January 2021, I purposefully avoided using the popular platform in my front-end projects so that I could come to it with fresh eyes and explore it with purpose and meaning.
This microblogging platform is the first-ever app I’ve built using Contentful (🎉). As a beginner, I focused my efforts on learning the basics, rather than getting bogged down with other front-end frameworks and technologies such as Angular, React, Vue, or Svelte (which are all great, by the way).
Wait, what’s a microblogging platform?
Microblogs are shrunken versions of long-form, traditional blogs (which you can also build with Contentful) that have grown in popularity to satisfy increasingly short attention spans and busy schedules. Some of your favorite social media platforms fall into this category of content — think Twitter, Tumblr, Instagram, Facebook, LinkedIn, and other social networks. An attribution shared by microblogs, homemade or otherwise is an unforgiving character limit. This ensures brevity in all things — short posts, short messages, and short status updates.
The goal of a microblog isn’t to impress search engines, but rather to create shareable — better yet viral — content for others to repost, reblog, and retweet.
Seriously? No front-end framework needed?
Thingoftheday, my finished microblog, is a simple static web page built entirely with vanilla HTML, CSS, and JavaScript. There are no packages to install, no build commands to run, and no framework patterns to follow.
Sidenote: It was really fun to get back to basics using native JavaScript functionality such as document.querySelector and document.createElement in this app. As a bonus, the single-page application is super fast and is deployed instantly (to Netlify) whenever the repository receives new changes.
Sounds great! How do I get started?
If you’re the type who likes to fork a repository and get to coding straight away (I know I am!), I’ve included a quick-start guide on GitHub where you can import the content type and the example content defined in this tutorial in minutes using the Contentful CLI. Here's a quick tutorial.
For those that prefer a full-text walkthrough, let's go over the setup for a lightweight microblogging site built the old-school way with Contentful.
First, you'll need to create a free Contentful account.
Then, you'll need to prepare your development environment. If you want to use es6 syntax in your vanilla JavaScript file, you’ll need to serve your module file to the browser over an HTTP server in your local development environment. You can do this with this nifty npm package, aptly titled “http-server.”
That’s everything you need. Now, let's get building.
Building your microblog
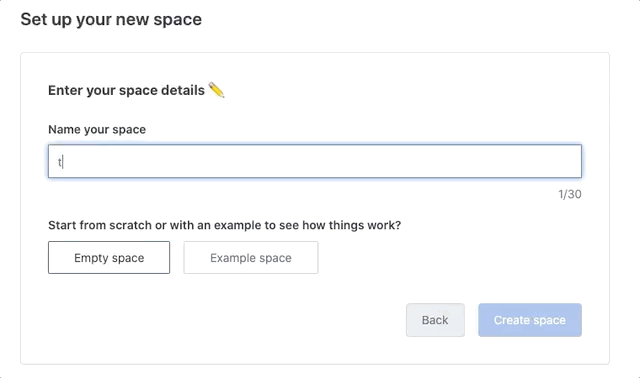
1. Create your space in Contentful
Call it whatever you like. We’ll go with thingoftheday.
2. Create and define your content type
Before we write any code, we’re going to create a content type inside our space.
What’s great about Contentful is that it encourages you to approach your applications, in this case, our microblogging platform, with a data-first mindset. I have always advocated for building applications from the “middle out,” which means defining your data structures and how they might be extended before beginning any development on a project. This method encourages agile workflows where backend and frontend development teams can work simultaneously.
Your content is the most important building block of your applications. Without its data, your application doesn’t have a voice and won’t be capable of attracting its target audience.
Wait, what’s a content type?
A content type is a collection of bits of data you’d like to group. Think of it as an object in JavaScript.
For example, you might have a content type of a cat. Your cat will have different fields that describe it (or properties in JavaScript object land), which might be breed, numberOfLegs, or favoriteBrandOfCatFood. These fields will be of certain types (think text, date, or media). If you’re familiar with strongly typed programming languages such as TypeScript, this might seem familiar.
The purpose of thingoftheday is to capture multimedia, infographics, snippets, tweets, gifs, or links of things I learn or achieve each day. This record will help me remember what I’ve accomplished without getting lost in a Twitter timeline.
Here are some basic requirements for each post in our microblog:
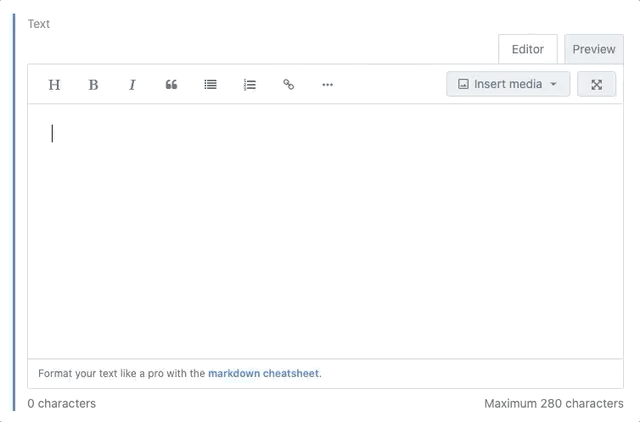
Text
An image
An external link
Text for the link
A panther emote that represents my mood
We’ll use these elements to build our content type.
In case you’re wondering about the panther emote, or any of the panthers you see if you follow me online, I’ll explain. It started as a tongue-in-cheek nod to my favorite television show, Mr. Robot (if you haven’t watched it, you need to). My handle, @whitep4nth3r, is what I would call myself if I were a member of FSociety. The panthers expanded from there. If you watch my Twitch stream, you can express yourself with a plethora of panther emotes or drop different flavors of panther rain on me. They’ve become “my thing” — so they’ll be a “thing” for my thingoftheday!
Here’s a quick tutorial on how to set up the content type for our microblog.
We just created the content type for our microblog post. 🎉
Here’s what the UI should contain when you click on the content model navigation tab.

3. Add your first microblog post
Navigate to the content tab and click Add microblog.
Add some fun stuff, something that’s trending. Insert a couple of hashtags. Then, click the big green Publish button.
Navigate back to the content tab, and you’ll find your shiny new microblog post in the list. The text field has been used for the entry title in the name column as we specified earlier.

Congrats! You’ve created your first short-form blog post with your very own content type in Contentful. Feel free to add “microblogger” to your LinkedIn profile. 😎
4. Fetch your content
To fetch your content, you’ll need two pieces of data. Your space ID and an access token.
If you head on over to Settings and click General settings, you should see your space ID at the top of the page.

Click on the Settings tab again, and click API keys.
Then, click Add API key, configure what you need and then copy the Content Delivery API access token. Click Save.

5. Call the Content Delivery API
Contentful offers a few ways to fetch content, including the REST API and the GraphQL API. We’re going to use the GraphQL API for this application because there’s no need to download any packages or SDKs, and, most importantly, it’s a fantastic way to request only the data you need for the front end — which takes less time. No need to deal with complex payloads and irrelevant system information. Remember, keep it simple, stupid!
If JavaScript isn’t your thing, you can use the GraphQL API with cURL, Python, Ruby, or PHP.
Let’s head over to Contentful’s GraphQL interface using the following URL configured with your space ID and access token.
Here’s where we’ll construct our GraphQL query to use in our application code.
You might need to play around with the format of your query depending on your content type fields (and whether or not you chose to include panthers!). Here’s some example code to get you started.
The name of your content type (i.e., microblog) must be queried as a collection (e.g., microblogCollection) with a property of items.
Notice that the query is constructed from the automatically generated field names we defined when we set up our content type.
I’m requesting some system information in this query (sys.firstPublishedAt). You can add a separate date field to your microblog content type if you wish, instead of using the system information. Moreover, if you’re using the Contentful REST API, sys.created and sys.updated will be available.
6. Write some vanilla front-end code
Let’s set up a basic HTML boilerplate file and add links to our CSS and JS files.
Since we’re using vanilla JavaScript, we’re going to use the native fetch API in our code.
The aim of this next part is to fetch our content from Contentful in our app.js file and log it into the browser console.
What are you waiting for? Use the query you constructed in the GraphiQL interface, construct your fetch options, and fetch that data!
It might feel risky using sensitive data (space ID and access token) in your code directly rather than using environment variables (as you would usually do in a framework like React), but don’t fret!
Contentful’s Content Delivery API (or CDA) is a read-only API. If you’re using Contentful to fetch public data in real time, there’s nothing to worry about. If you would prefer to keep your Contentful credentials private, I would recommend proxying the data fetched from Contentful to your client via your API server application.
Start your HTTP server and check out the console in your browser.
We have content! 🎉

7. Add your content to the DOM
For each bit of data of each item in the returned array, we’ll want to create an HTML element and append it to the DOM. Below is an example function.
You’ll now see your posts as unstyled HTML in the browser.

With a little bit of date formatting, some classes added to the HTML, and a hint of vanilla CSS magic, you’ll have something similar in no time. Then, you’ll be set to add short posts to your daily — if you remember.

You can view the code for the application on GitHub and the final microblogging site at thingoftheday.xyz.
Feel free to fork this project, play around with it, and really make the microblog your own. I’ve also included a quick setup guide in the README file, where you can import the content type and example content defined in this tutorial using the Contentful CLI in a matter of minutes.
If you use this tutorial to launch a lightweight microblogging site using Contentful, I’d love to check it out! Oh, and share with your friends too. Perhaps they’ll be inspired to sign up for a free Contentful account and create one too.
And remember: Build stuff, learn things, and love what you do.

Inspiration for your inbox
Subscribe and stay up-to-date on best practices for delivering modern digital experiences.
Meet the authors

I help developers build stuff, learn things and love what they do. I code live on Twitch. I'm a teacher, musician, and a front end fanatic with a fierce mission to promote accessibility and inclusivity in technology on planet earth.
Related articles

How to generate types with cf-content-types-generator
March 25, 2026

Tailwind vs. Bootstrap: Comparing CSS frameworks
August 15, 2024

Build a blog with Next.js, Tailwind CSS, and Contentful
July 24, 2025
