Developer Showcase Spotlight: How to build a user-friendly image hotspot configurator
Published on December 14, 2022

Inspiration for your inbox
Subscribe and stay up-to-date on best practices for delivering modern digital experiences.
In my job as a senior frontend engineer, I’m used to defining and creating components for different clients and their content teams. Many times the task is simple, and a basic configuration is enough. In other situations, some extra effort is required.
But, regardless whether the request is simple or complicated, my goal is always the same: to provide a frictionless user experience for the content team that has to work with it on a daily basis.
Let me give you an example. A few years ago, a client asked for a hero component with hotspots for images. The expected behavior was to show an info tooltip when hovering over it with the cursor. While scoping out the requirements for this feature, the biggest question was: How to configure them?
With the monolithic CMS solution the client was using, customization was a non-starter. Because of this inherent limitation, only the most basic solution was possible: a field with a list of x/y coordinates that the user had to enter manually — with no visual preview to guide them!
I’ve always thought there was a better way to do this. And today we can with The Contentful App Framework.
An easy way to extend and customize the Contentful content platform, the App Framework enables you to be more creative and can drastically improve user productivity. And let's be honest, it’s more fun for the client too 😄.
So, I think that this scenario is a perfect use case for a little side project of mine: a user-friendly image hotspot configurator. The project is also viewable on the Contentful Developer Showcase, together with several others I’ve created.
Concept
Let's start explaining the main drawbacks with the basic solution:
You need to manually insert the coordinates for every hotspot....😪
You don't have a live preview of the hotspot position (and you probably need to publish it in a staged environment).
The position doesn't need to be pixel-perfect, but how many attempts do you need before finding the correct spot?
Our little app will leverage the Contentful App SDK, enabling the user to select a media from the gallery and define a list of hotspots with a point-and-click functionality.
For each hotspot, you will also be able to define a title and a description (helpful for a hypothetical tooltip on the frontend implementation). The hotspot coordinates, visible only to admin users, will be stored in a JSON object.
Setup
Now let’s dive into a few configuration steps to set up our local environment with the App Framework.
Prerequisites
A Contentful account and basic knowledge of the Contentful web app. Sign up for your free account here.
Node.js installed on your local machine.
Basic CLI Knowledge.
Basic React Knowledge.
Install the app
Log in to your Contentful account and go to the Apps section in your organization settings.
Here we can click on the Create app button, give a name to our app (e.g., Hotspot Configurator), and land on the app definition screen.

On this screen we have a bunch of settings, but our use case is pretty simple, so we only need to configure a few things:
Define on the Frontend field our local environment URL (e.g.http://localhost:3000).
Define the location where our app will be available. For our use case, it will be the Entry field location.
Select the JSON object field type. Our app will store all the information in a JSON object.
(Optional) Specify an icon for our app.
We should end up with the following configuration:

We are ready to click Save and install the app on our space/environment and authorize access:
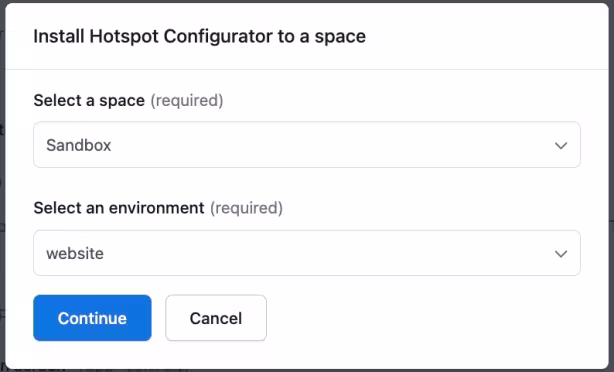

Eureka, our app is available on our space and environment, but bear with me … one more step is required 😇.
Content model
So far, we set up the local environment and installed the app on our Contentful account. We need to connect our app to an existing content model or create a new one. I’m going with the latter.
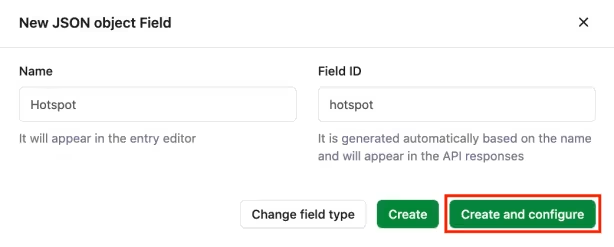
So, I created a new content model, named Hotspot Component, and defined a field of type string for the title (used only as the main title in the entry list). Now I am going to create a JSON object field.

You can call it whatever you want (I called it Hotspot). The important thing here is to click on the Create and configure button as shown below:
After that, we need to go to the Appearance tab, we should see our app, select it and click Confirm.

We are done with the configuration 🎉🎉🎉.
We can now create Hotspot Component entries and play with our app.
In the next sections, I will show some key features of the app, and at the end, there will be a little demo on how you can use the data gathered by the app.
Hotspot App
Now let’s dive into the app.
To configure hotspots, we need an image first 💁♂️.
Initial layout
As soon as you land on a brand-new entry, the app gives you two buttons where you can select an existing image from your media gallery or create a new one.

Let’s look at our code now.
Thanks to the SDK provided by Contentful, we can easily select the image with the same UX provided by the standard media field.
Both methods return a Promise, so we can await the response to get information about the image.
The first method returns the entity directly. The second returns a NavigatorOpenResponse instead. On this object, we can access the entity on the homonym attribute.
Let’s assume that we have the image already in our gallery and click on the first button.
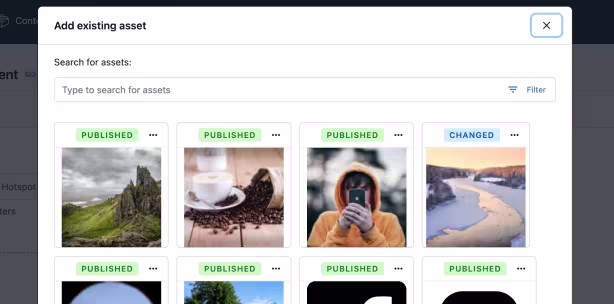
Image wrapper layout
After the image has been selected, this is the layout provided by the app:

As explained in the previous section, those two methods give you access to the entire media object. So, you can retrieve extra information like the name or the publishing status of the image.
To show the status of the image, I am using the Entity Status Badge from the Forma 36 design system.

It receives as input the status string and outputs the correct/standard UI for the badge (pretty cool).
For the utility method getEntityStatus, I followed this tutorial available on the Contentful documentation.
The three dots near the status opens a menu where you can visit the selected image ( sdk.navigator.openAsset(assetId) ) or change/delete the image and the relative hotspots. (The change/delete operations are irreversible.)

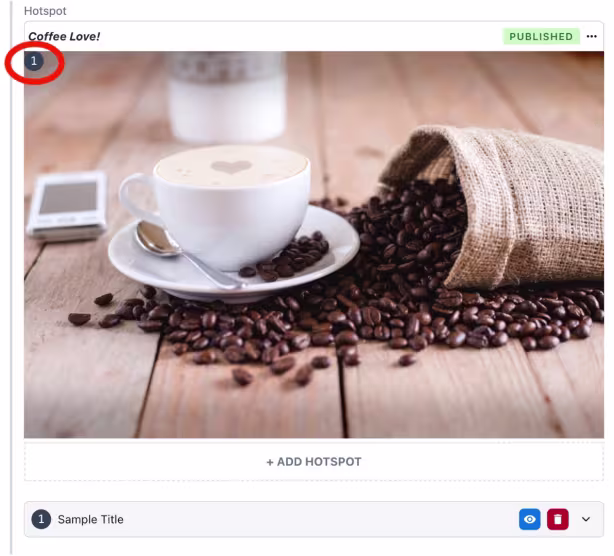
At the bottom of the image, we have a big ADD HOTSPOT button where you can add a single hotspot (you can’t miss it 😁).
Hotspot entry layout
We just clicked the ADD HOTSPOT button. The application inserts a new hotspot in the entry list below and adds a numbered rounded hotspot over the image (initially at position 0,0).
For the drag feature, I am using dnd-kit. Whenever a dragEnd event is triggered by the library, I update the data with the latest coordinates.
Because the image is resized to fit the CMS UI, other than updating the coordinates used by the drag feature, I am also storing: the current width and height of the image (for resize purposes inside the app), the percentage values and the natural x/y coordinates. By natural, I mean according to the natural width and height of the loaded image.
Natural and percentage values are not required for the proper functioning of this application. They can be used in the development phase of the component on our website/app.
Entry detail
We can now analyze the entry UI (it's an accordion):
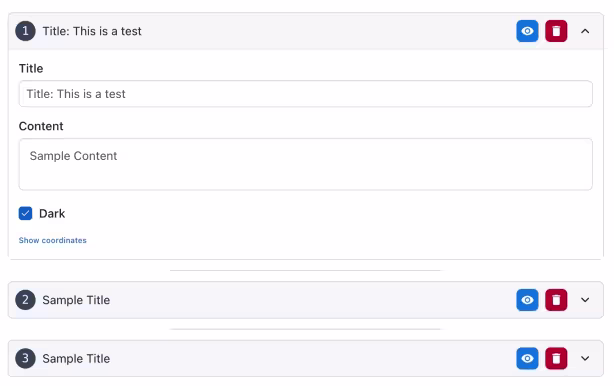
The top bar, other than the hotspot number, shows a live preview of the Title field (this could be useful to identify the hotspot better, especially when the accordion is closed).
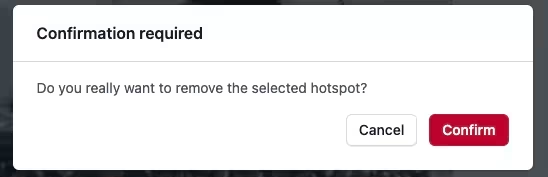
On the right, we have two buttons. The trashcan icon lets you delete the hotspot, showing a prompt before confirmation:
The eye icon is a highlight functionality. It lets you highlight a single hotspot on the image. Here you can see a little demo of this feature:
The body of the accordion contains a Title and a Description. These fields could be used in your component as info for a tooltip/popup.
The Dark checkbox is an additional feature to identify your hotspot. If you turn off this option, the hotspot background color will change to white:

The last feature, is a section visible only to admin users, and it shows the stored coordinates of the hotspot:

Where is my image layout?
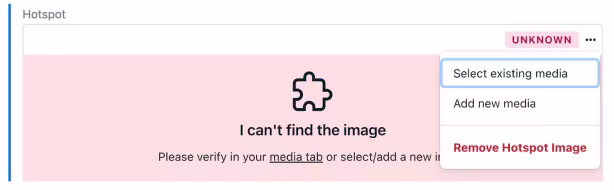
Since we are using images stored in our Contentful account, it could happen that, for any reason, the image is not available or has been deleted. In that case, we show an error message:
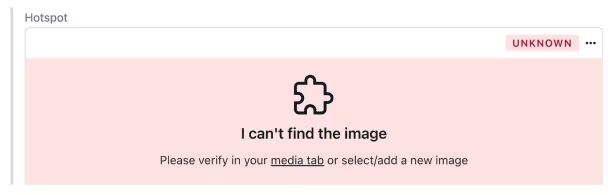
Here you can investigate the reasons why or, through the top-right (three-dot) menu, select a new image or remove the current configuration.
Right now, when you select a new image, the app also removes the hotspot configuration. A future optimization could be the possibility to only update the image, keeping all the hotspots.
Stored Data
Here you can see how the data is structured and saved on Contentful:
Media reference: the missing piece
If you have a little experience with Contentful, you will notice a problem with the data structure above.
We are saving the media as a simple string, storing the asset ID. That's fine since we are using a JSON object field type, but if you go to your media gallery, you will notice that in your selected image, there is no reference to our component.

This means that if you try to remove the media directly from the gallery, the Contentful web app will not warn you about your app using the image.
To fix this issue, I came up with the following solution: I made a hidden field of type Media on the content model.
This is possible on the app thanks to one of the hooks provided by the Contentful SDK:
The useCMA hook, as explained in the documentation, gives you access to an initialized client for the Contentful Management API.
Now, every time I select an image (or create a new one) on the app, I check if the hidden field exists on the content model. If not, I can create it and store the selected media.
Due to technical limitations on how many fields you can have on a single content model (max 50), I perform a check against this limit before adding this new hidden field. If we have already hit the 50 fields limit, it will show a message saying that the app will continue working without a proper link between the current entry and the media gallery.
Let’s see how I did it:
As soon as the app creates the hidden field, you will receive the following warning:

This kind of warning will be visible only once after the app creates the hidden field for the first time. It will not be visible if the field already exists.
The reason for this warning is that the Contentful web app detects a change in the content type and suggests you reload the page. In our case, we added a hidden field, so you will not see any difference after a page reload.
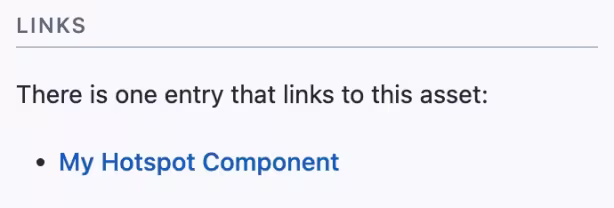
You can notice the difference inside the content model. Here's what happened:

Now your media knows about the component:
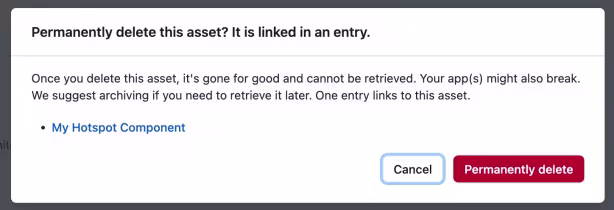
And if you try to delete the asset, the web app shows a modal alert:
Demo
I made a demo of this little project available. It comes with a predefined image and a list of hotspots. There are two main sections:
The Playground
Here you can view a replica of the Contentful app. You will not be able to change the image but you will be able to play around with the hotspots.
Frontend Integration
After playing around with the hotspots in the playground, in this page you will see a frontend app that uses the information generated by the app.
🚨 The hotspots are stored in browser memory. If you hard reload the page you will go back with the initial configuration.
You can find the demo using the following link: https://hotspot-configurator-demo.vercel.app/
Repository
https://github.com/williamiommi/hotspot-configurator
Conclusion
That's all folks! I hope you enjoyed the article.
The app, as you can imagine, has a very specific use case. The main motivation here is to show you how powerful these CMS customizations can be.
Contentful provides an easy setup and a wide range of possibilities to improve user experience in something that maybe sometimes is very boring (like writing 'random' x/y coordinates by hand 😉), but useful. Explore this React CMS resource page for deeper insights into seamlessly integrating Contentful with React.

Inspiration for your inbox
Subscribe and stay up-to-date on best practices for delivering modern digital experiences.
Meet the authors
William is a Senior Frontend Engineer at Reply Syskoplan CX IT with 5+ years of experience in Frontend development and 10+ years in general Web development. He's passionate about frontend, photography and technology in general.
Related articles

FastAPI vs. Flask: Python web frameworks comparison and tutorial
June 12, 2025

Getting started with Contentful Studio and the Experiences SDK
May 29, 2024

Effortless automatic content linking in Next.js using Content Source Maps
September 30, 2024
