The most foolproof way to get started with Contentful
Published on April 9, 2018


Inspiration for your inbox
Subscribe and stay up-to-date on best practices for delivering modern digital experiences.
Hello from the Customer Success team! As support engineers, we tackle hundreds of user questions a month such as: How does Contentful work? What is content modeling? and How does content stored in Contentful get rendered on my web app? No two days are the same and it’s quite the exciting life. Having said that, if my boss were to corner me and make me quantify what I spend most of my day doing (hypothetically, because she’s awesome and this would never happen IRL), I would have to answer: Drinking coffee (obviously) and helping new users get started with Contentful.
You see, once people understand what Contentful does, how it works, and how they can integrate it into their projects, they get into this magical, locked-in place with us where their sites are fast, their content is organized, and their build-to-ship process impressively quick. In short, our users become really good at using Contentful and likewise, Contentful does great things really well for our users.
However, for those just toying around the idea of using Contentful as your content solution, there could be an initial courtship dance of figuring out what it’s all about and how everything works. Yes, we have very useful Getting started with Contentful guides and example apps (and I highly recommend them!), but if you just want to see what Contentful does in the most foolproof way possible, well, step into my office.
The high level view
Let’s decouple Contentful from all of the cool modern web development technologies for a moment and not worry about picking your stack or installing packages just yet. Our goal right now is to create a quick project so you can understand how Contentful works and deliver your first bit of content. Once you get a taste for what Contentful can do, it will be rainbows, sunshine, and beyond — trust me!
One of my favorite "this is how Contentful works" links I send to new users is a JSFiddle that shows the relationship between your content model, your content, and the output to your end product. Using that JSFiddle code as inspiration for our very first project, I’ve created a template for a make-believe home goods business called Urbän Hømesteäd (when I came up with this name, I was coming off of a vacation high from a winter trip to the Scandinavian countries… what can I say).

*Visit my version of the example product catalogue.
Get started: creating your Contentful space
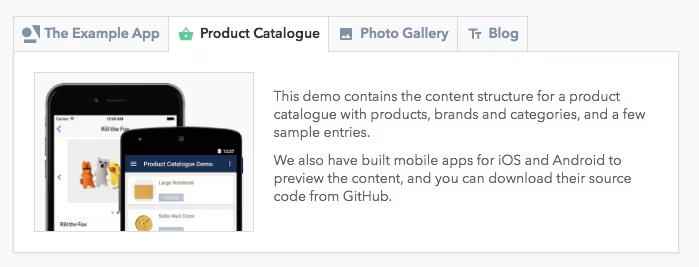
Before we take a look at the project files, let’s create a new space in Contentful. When you create a space in Contentful, you can either create an empty space (so you would be building your content model from scratch) or an example space which comes with a content model and even some sample entries included. Example spaces are a great way for you to get started with Contentful so we will be creating one of those for this project.
From the web app, click on the menu icon in the upper left and from the menu that slides out, click +Add space.
In the Create a new space dialog, click Create an example space.
Select the Product Catalogue space and then Create space — don't forget to give your space a name:
After your space is prepared, click on Get started and… welcome to your new space! Take a look around and click into the different sections to see your content model, content, and media files. Your content model is where you will create different content types, a template for each of the entries you create. Don't worry if this is still confusing — it will make more sense once you see some content rendered on your web page.
Now that your space is set up, let's connect Contentful to our web project files. We will be using starter code for our make-believe online store and, because we are taking the path of least resistance, you won’t need to install any packages or run code in the command line in order to view your sample website. All you need are the three files from the Contentful code starter pack on your computer:
index.html
contentful.css
contentful.js
Authenticating Your Web Project
To enable Contentful to "speak" with your web project, we've already added our CDN in a <script> tag to the <head> element of your .html file. Typically, we recommend that you connect to Contentful by installing our SDK using a package manager such as npm. However, since we’ve said goodbye to packages and installs and all of those other extremely-helpful-but-not-for-right-now tools, a <script> tag is perfect for this use case.
Next, open up contentful.js in a code editor so you can authenticate your web project to fetch content from Contentful. You will need to input your space ID and Content Delivery API access token to initialize the client from your JavaScript:
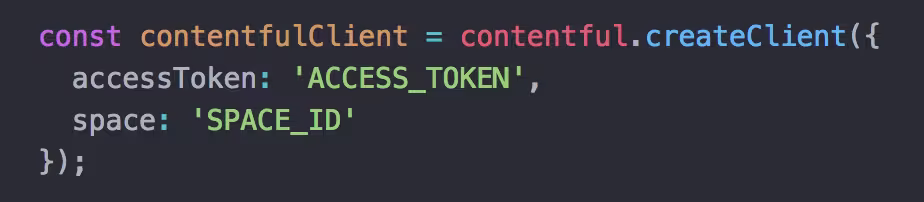
To find your Space ID and access token, go to Space settings > API keys > Content delivery / preview tokens. Expand the Example space token 1 section and you will see your Space ID and Content Delivery API access token. Copy and paste these values over to your code, then save your file.
Making your first Delivery API Call
Open the index.html file in your browser and BOOM.
Congrats — you've just delivered content using Contentful!
Taking a Closer Look at Your Code
The four entries you see on your web page are existing, example entries that were populated when you created your example space. To see where these entries are being retrieved from, go back to the web app and click into the Content section. You will see a total of nine entries but in our web page, only four entries are rendered — the reason being we are only fetching entries that have the Product content type (which we've queried for using the content type ID 2PqfXUJwE8qSYKuM0U6w8M) in our contentful.js file:
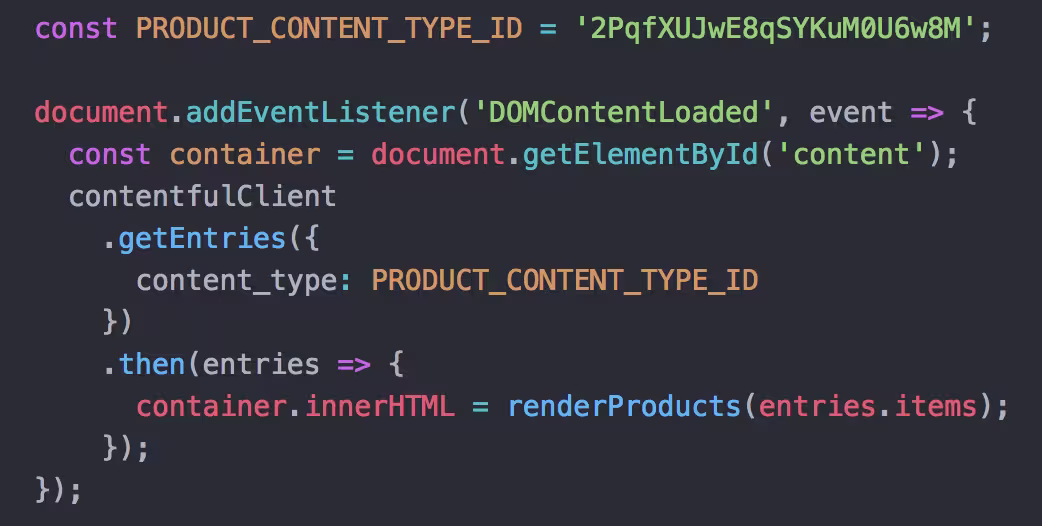
To simulate what your web project code is doing from the web app, apply the filter Content type = Product in the search bar and you will see the 4 entries being fetched by our web page:

To understand which fields are getting rendered on your web page, take a look at the JSON response of your API call. All of the object keys are properties you can access by passing them into your code:
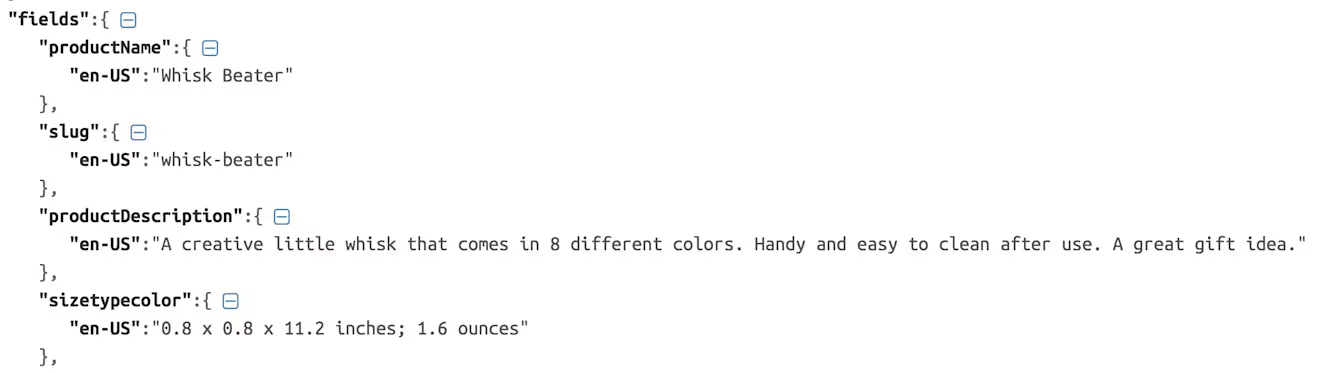
However, if we are just rendering one content type, why do we have three content types in our content model? To answer this question, let's go back to the web app and click into the Whisk Beater entry. Scroll down a bit and you will see two fields that link to other entries: Categories and Brand. These linked entries use the two other content types in our content model: Category and Brand.
Even though we are only fetching the Product content type, we have access to entries from other content types because we have reference fields in the Product content type.
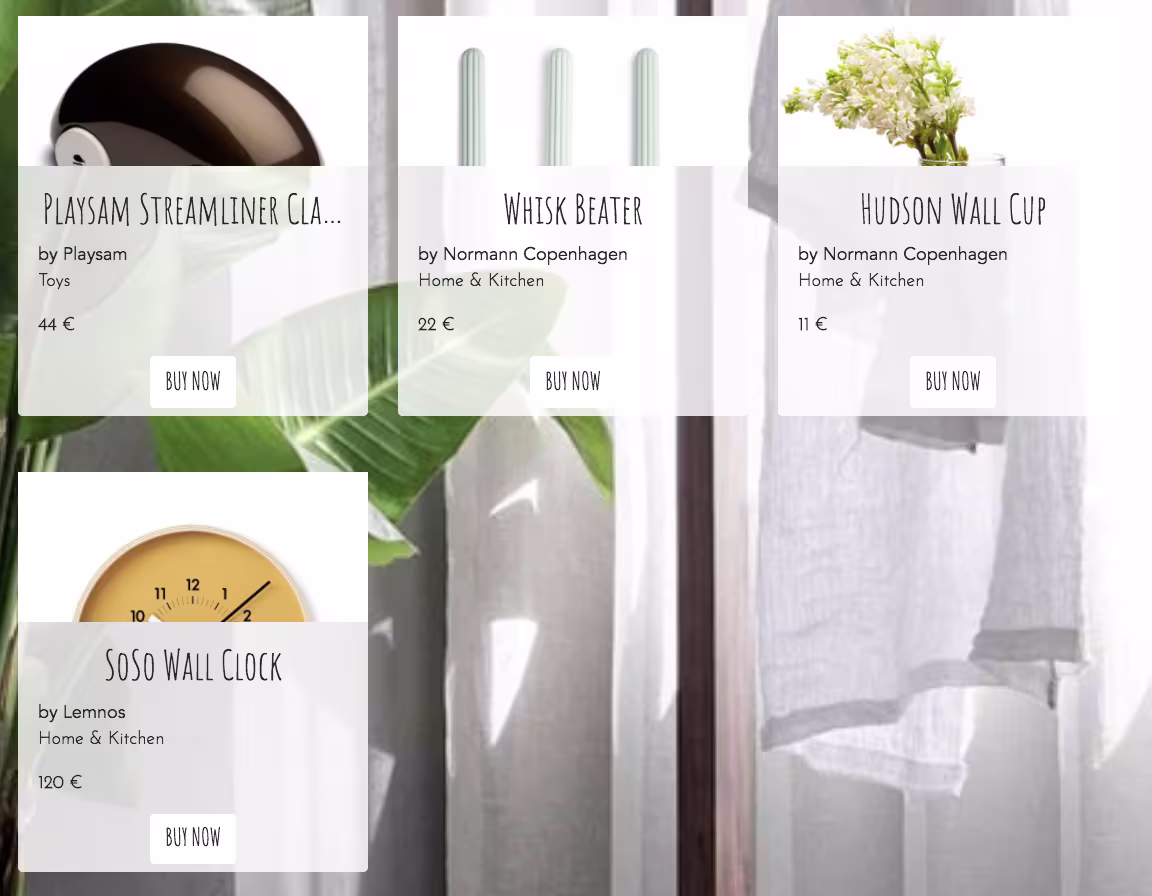
Take, for example, this rendered entry on your web page:

Right under the name of the product, we have the brand of the product (Normann Copenhagen) and the category of the product (Home & Kitchen). In our code, we are accessing this content when we pass in fields that reference other entries:
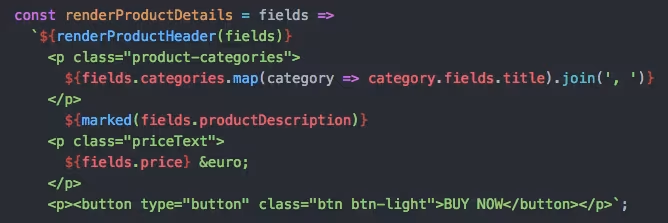
In the JSON response for our query, you can see that the categories field is a link entry that gives us access to another entry since we have the sys.id value of the other entry in the response:

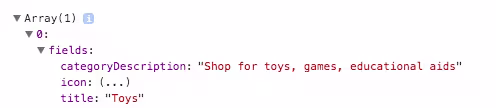
You might be able to visualize this better if you add ${console.log(fields.categories)} to your code. In the console, you will see the properties for which you are able to access from your linked reference entries:
This concept of content types and linking entries is the foundation for understanding content modeling. At this point, I encourage you to change a few things around in your Product entries. Mix up the categories and brands in your entries and see what happens on your web page.
To Infinity and Beyond
Now that you've seen the relationship between Contentful and your web project, it's time to have some fun!
As you may have noticed in my version of the product catalogue, I have more entries than what’s included in the example space. So go ahead, create more entries from the web app and build out your sample page. Edit product names and swap in images that make more sense to you (Hint: you can add new assets by going to Media > Add asset). As an additional exercise, edit the contentful.js file so you can utilize and render fields in your web page you are not currently using (such as Slug and Tags).
Remember, what we just worked through was the most rudimentary way of showing you what Contentful can do for you. Contentful is meant to plug into frameworks such as React, static site generators such as Gatsby, and pretty much any other project you can think of. And while we just used one, we have several more API’s that support every stage of your development process from staging to all the way to production.
There you have it, a condensed look into a day in the life of a support engineer. But the best part of my day is now up to you. We love seeing all of the cool things people build using Contentful and we learn so much from our users. Create something beautiful, do something amazing, and share it with the community; we are excited to see what you come up with.
Don't forget to share anything awesome you've built using Contentful and show the community how you solved your content problems!
Getting started with Contentful is free - try the community edition and build your project without worrying about the cost!

Inspiration for your inbox
Subscribe and stay up-to-date on best practices for delivering modern digital experiences.
Meet the authors

Ex-tech writer who decided she actually wants to work with the technologies she used to write about.
Related articles

The future of digital experiences are AI-powered, composable, and built to win
March 31, 2025

Custom Flags are here: End-to-end digital experience optimization in one platform
October 2, 2025

Close the personalization gap: Activating Salesforce CRM data in real time with Contentful
June 12, 2025
