Triggering static site builds with webhooks
Once you've setup a static site that pulls in your content during the build process, you're ready to configure webhooks that will be triggered when you publish or unpublish content in your space. This tutorial will teach you how to setup webhooks to trigger builds and deployments of static sites for two providers: Netlify and Heroku.
Netlify
Setting up a Contentful webhook that will trigger a build and deployment of a Netlify site takes only a few steps.
Prerequisite: configure the site for continuous deployment
Your site must already be deployed to Netlify, and it must be configured for continuous deployment via a linked Git repository hosted with a Git provider. Instructions for initializing a local repo to Github can be found here.
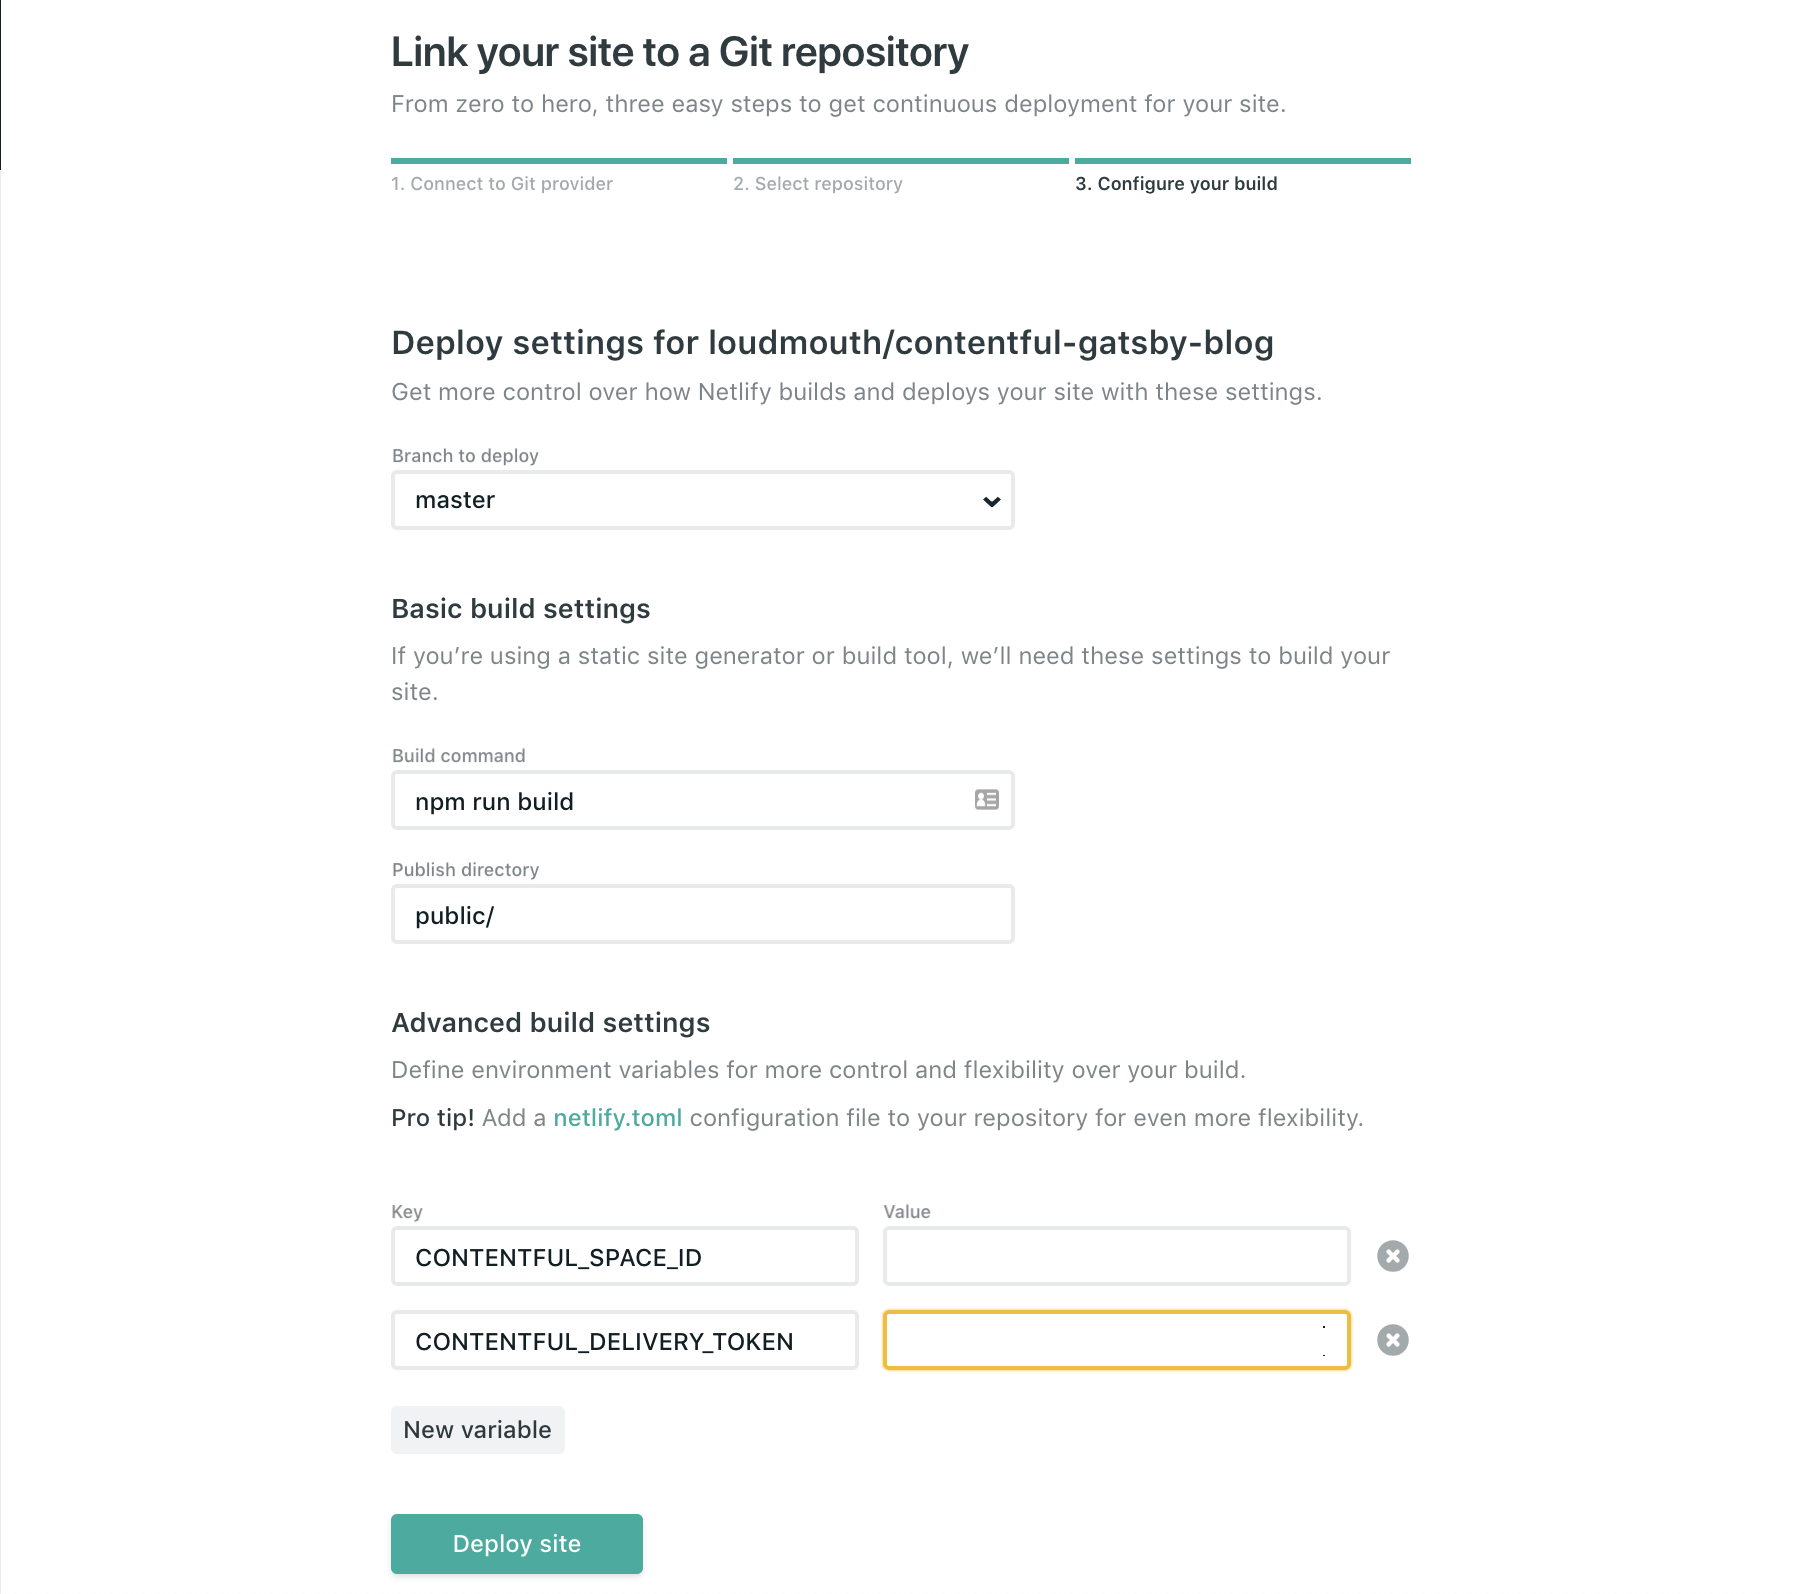
git remote set-url origin REMOTE_REPOSITORY_URL before pushing the repo.After the website's codebase is pushed to a remote Git provider, navigate to the settings for the site in Netlify. Under the Build & deploy section, click the Link site to Git button. Select your Git provider and follow the steps. During the "Configure your build" step, provide your build command, e.g. npm run build; provide the path to the built site directory, e.g. public; and add any environment variables that the build script must use, e.g. Contentful space identifier and access token(s).
Configuring a Netlify build hook
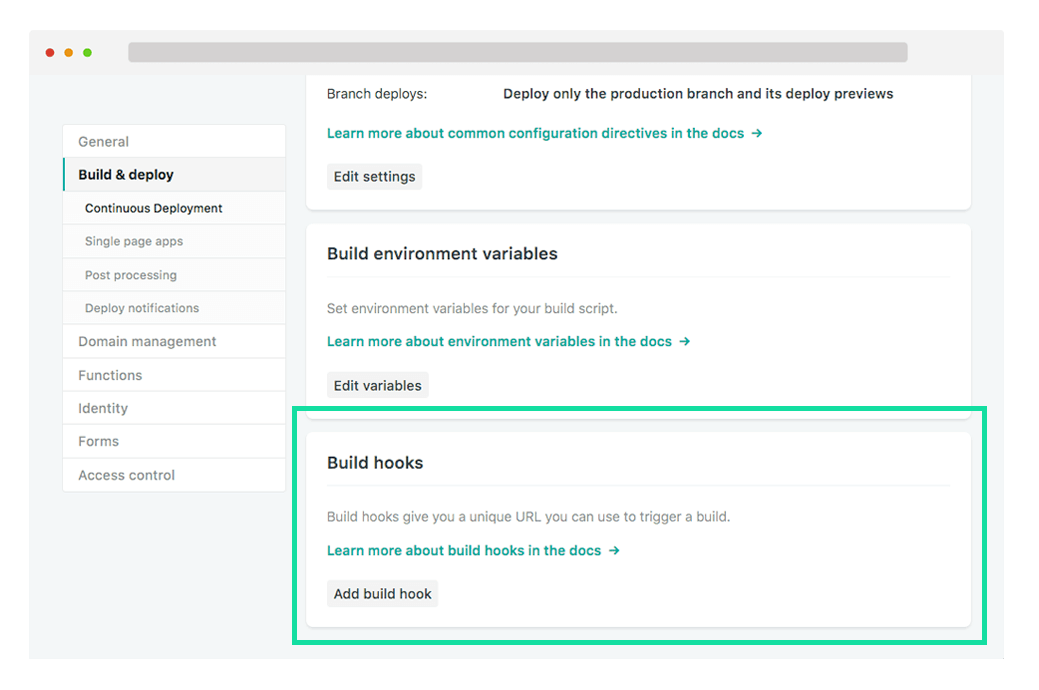
From the Netlify dashboard, navigate to the "Settings" for your site, choose "Build & deploy", and scroll to "Build hooks".
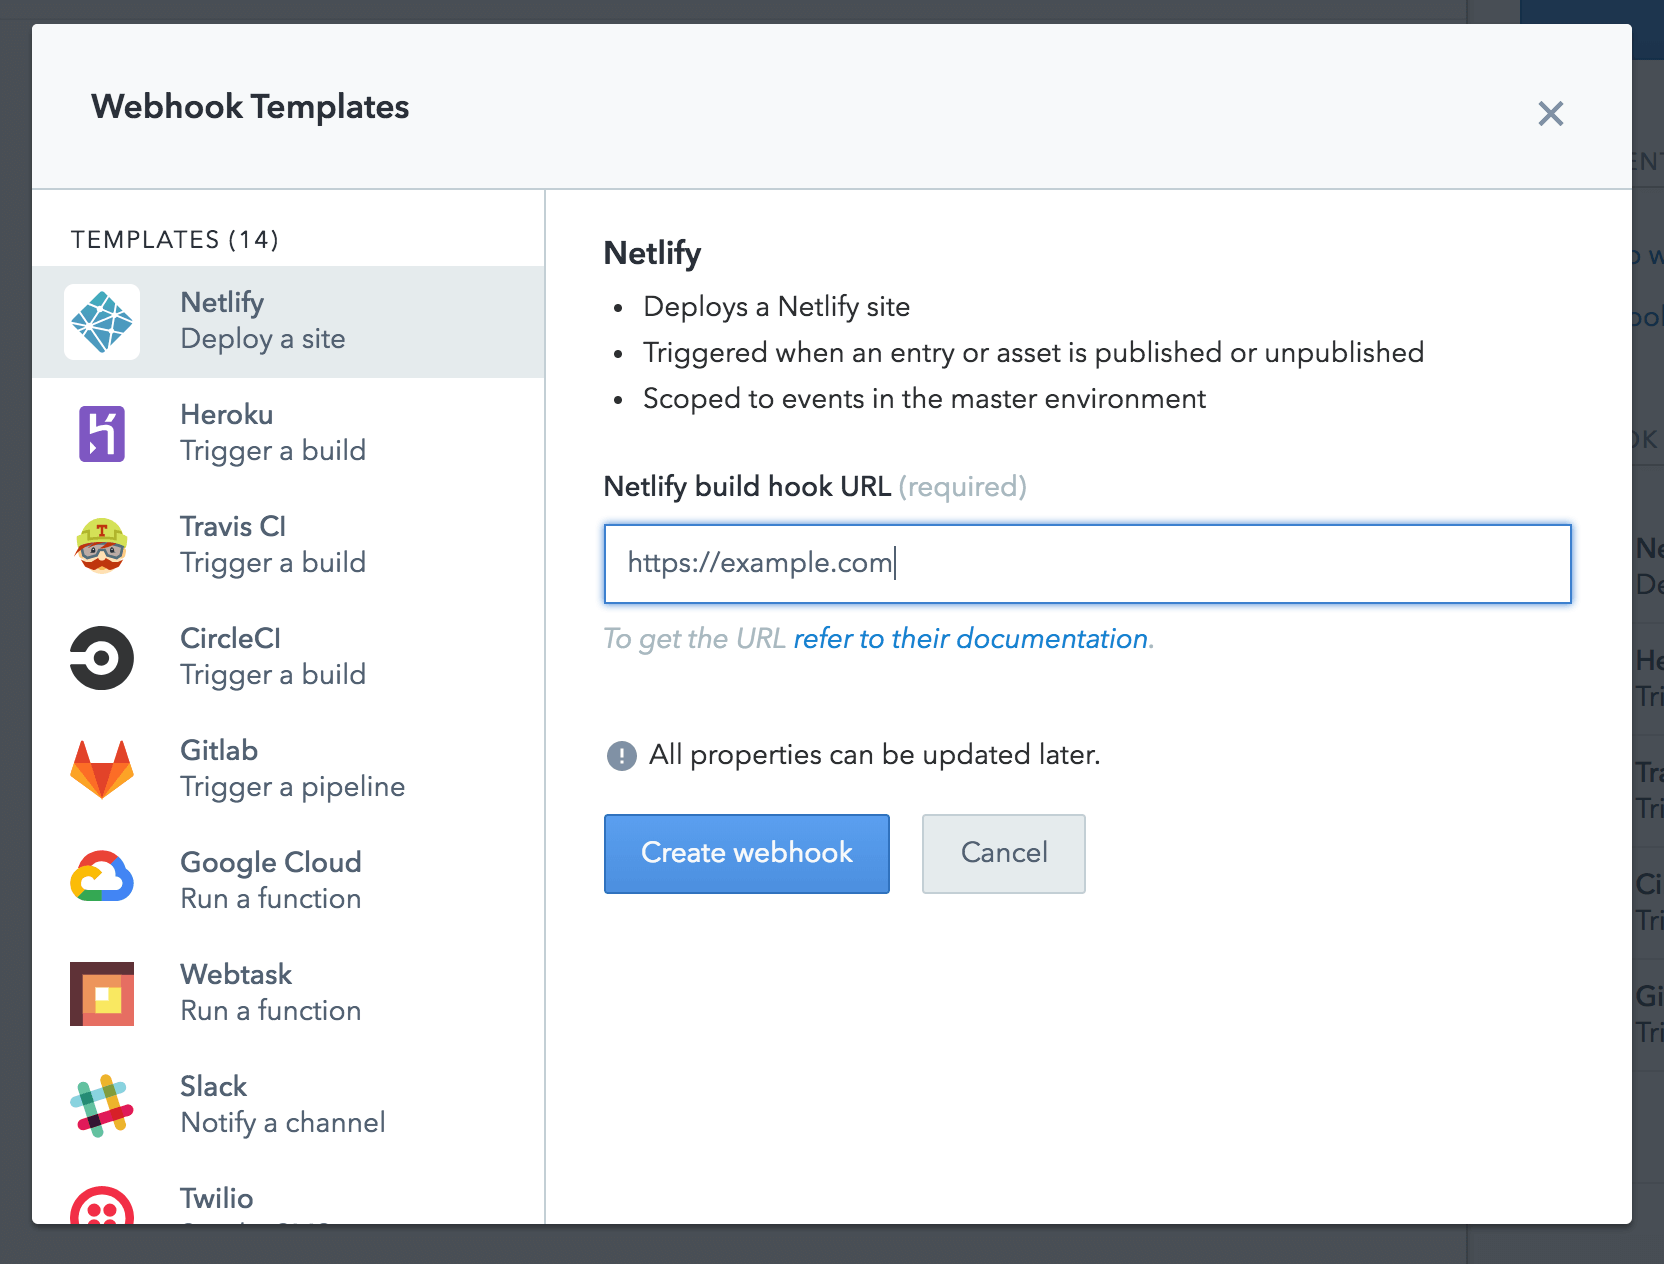
Click Add build hook, give your webhook a memorable name, and choose the branch you'd like to build. Netlify then generates an HTTPS URL which responds to POST requests by triggering a build and deployment of your site. Copy the URL and navigate back to the Contentful web app. Use our Netlify webhook template to quickly configure the webhook. Just paste the URL that Netlify provided into the form and you are ready to go.
You can further customize the webhook by changing filters, triggers or even a transformation. This gives you control on which events in Contentful should trigger Netlify builds or which variables to pass on to Netlify's build scope. The template will only trigger builds when entries and assets have been published or unpublished.
Save the webhook and now when you publish a content change, your Netlify site gets built and deployed.
Heroku
If you are hosting your static site with Heroku, you need an intermediate system to automate the build. For this section of the tutorial, we use the CircleCI to build and deploy our site to Heroku.
Prerequisites
You must have an account with CircleCI and your site must already be deployed to Heroku. You should also have a remote Git repo configured for your project hosted on either Github, GitLab, or Bitbucket. For our purposes, we assume the project is hosted on Github.
Building on CircleCI
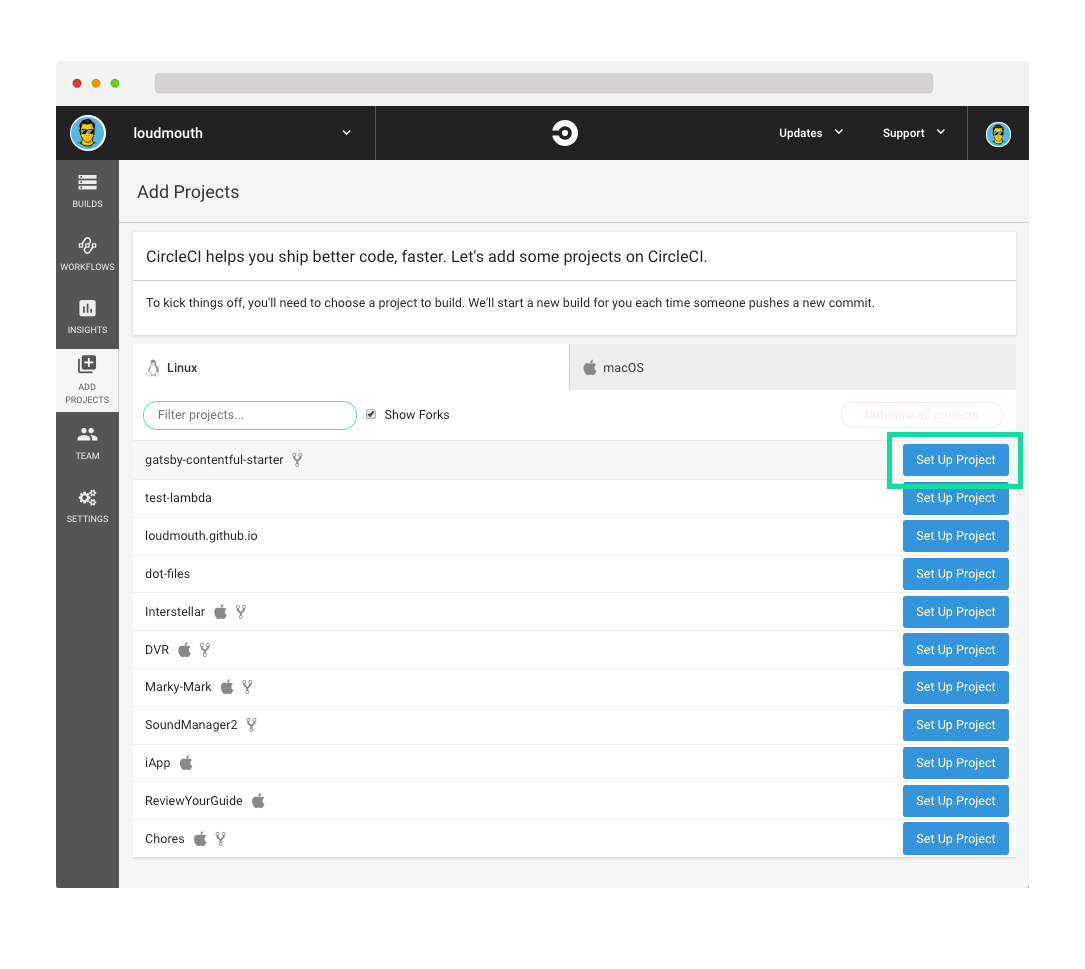
First, navigate to the CircleCI dashboard, select the correct Github organization from the dropdown in the top left, click "ADD PROJECTS", and select your Git repo. Click "Start building" to finish connecting your Git repo (you can ignore the initial build itself).
In order for your repo to run a build on CircleCI, you'll need the relevant configuration files. Create a directory called .circleci in your project root directory, with one file called config.yml inside it. Copy the code below to .circleci/config.yml. It is a basic CircleCI configuration to build a NodeJS project that checks out the latest commit of the current branch, installs npm dependencies, builds, and finally then deploys the site. Note that this config file deploys all branches to the production server, so the deploy script should be changed to fit your setup before it can be used in production. Refer to the CircleCI documentation for further reference on finding a continuous integration pipeline that suits your needs.
version: 2
jobs:
build:
docker: # run the steps with Docker
- image: circleci/node:8
steps:
- checkout
- run:
name: update npm
command: 'sudo npm install -g npm@latest'
- restore_cache:
key: dependency-cache-{{ checksum "package.json" }}
- run:
name: Install node modules
command: npm install
- run:
name: Build
command: npm run build
- run:
name: Deploy
command: git push https://heroku:$HEROKU_API_KEY@git.heroku.com/$HEROKU_APP_NAME.git
- save_cache:
key: dependency-cache-{{ checksum "package.json" }}
paths:
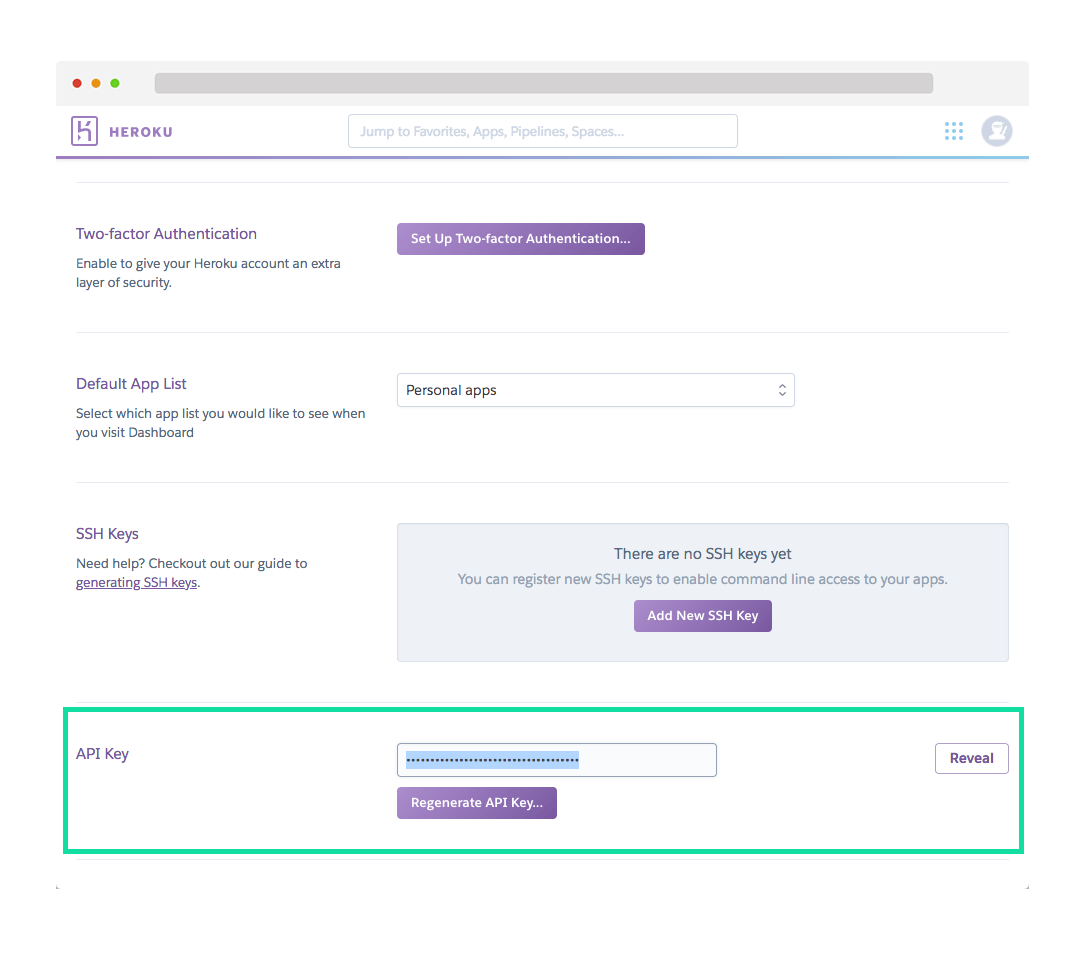
- ./node_modulesCommit this file to your branch, and push it to Github. You should see a job begin to execute in the CircleCI dashboard, and all the steps should pass in the build job. The deploy job should fail as we have not yet added the relevant environment variables for Heroku. Navigate to your Heroku account to grab your token for the Heroku Platform API, copy it.
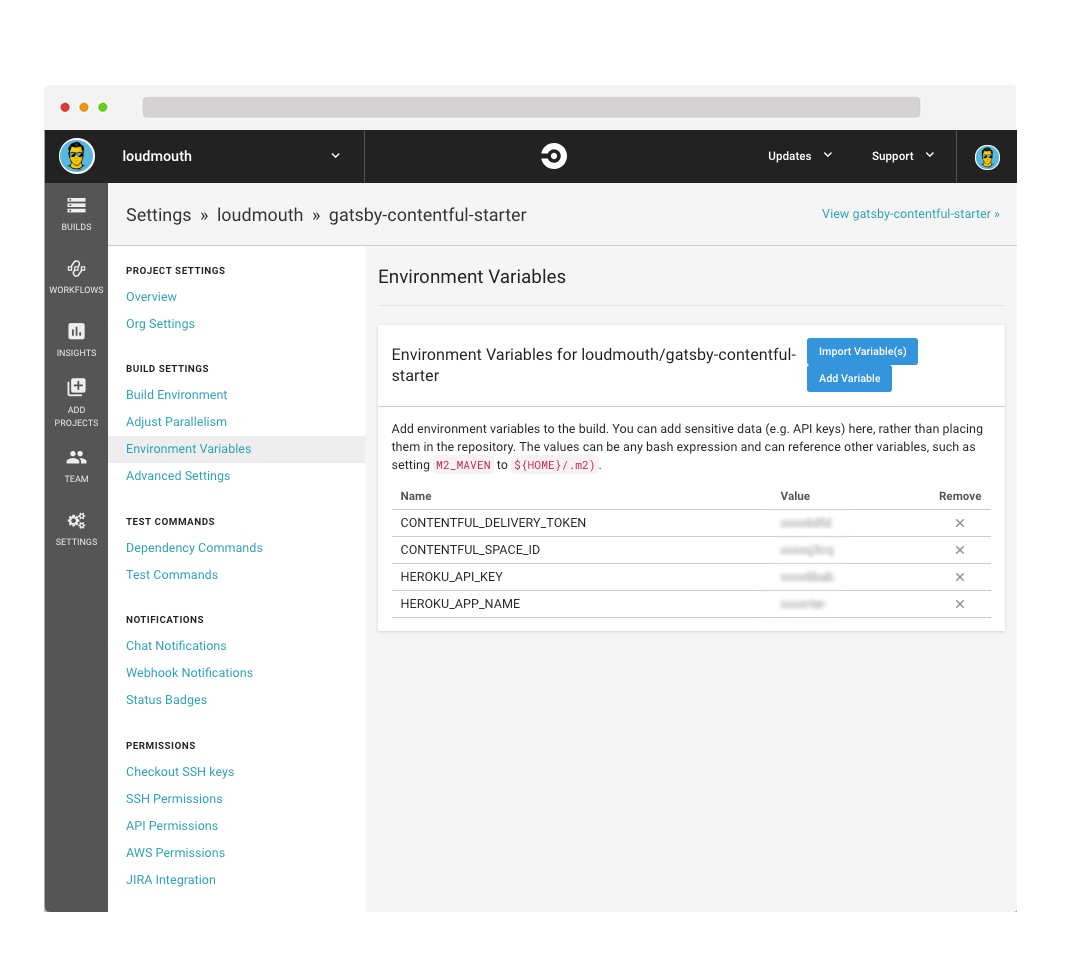
Navigate back to the settings for your CircleCI project and click "Environment Variables". Add an environment variable with a name HEROKU_API_KEY. For the value, paste the key you copied from Heroku. Copy your Heroku project name and paste it as the value for an environment variable called HEROKU_APP_NAME. If you have other environment variables necessary for your project to build, add them now.
Triggering a CircleCI build with a webhook
The last variable we need to grab is your CircleCI Personal Access Token. You can create this token in the "User Settings" in CircleCI. After you've copied your new token to your clipboard, navigate to our Circle CI Webhook Template Circle CI webhook template and simply fill out the form.
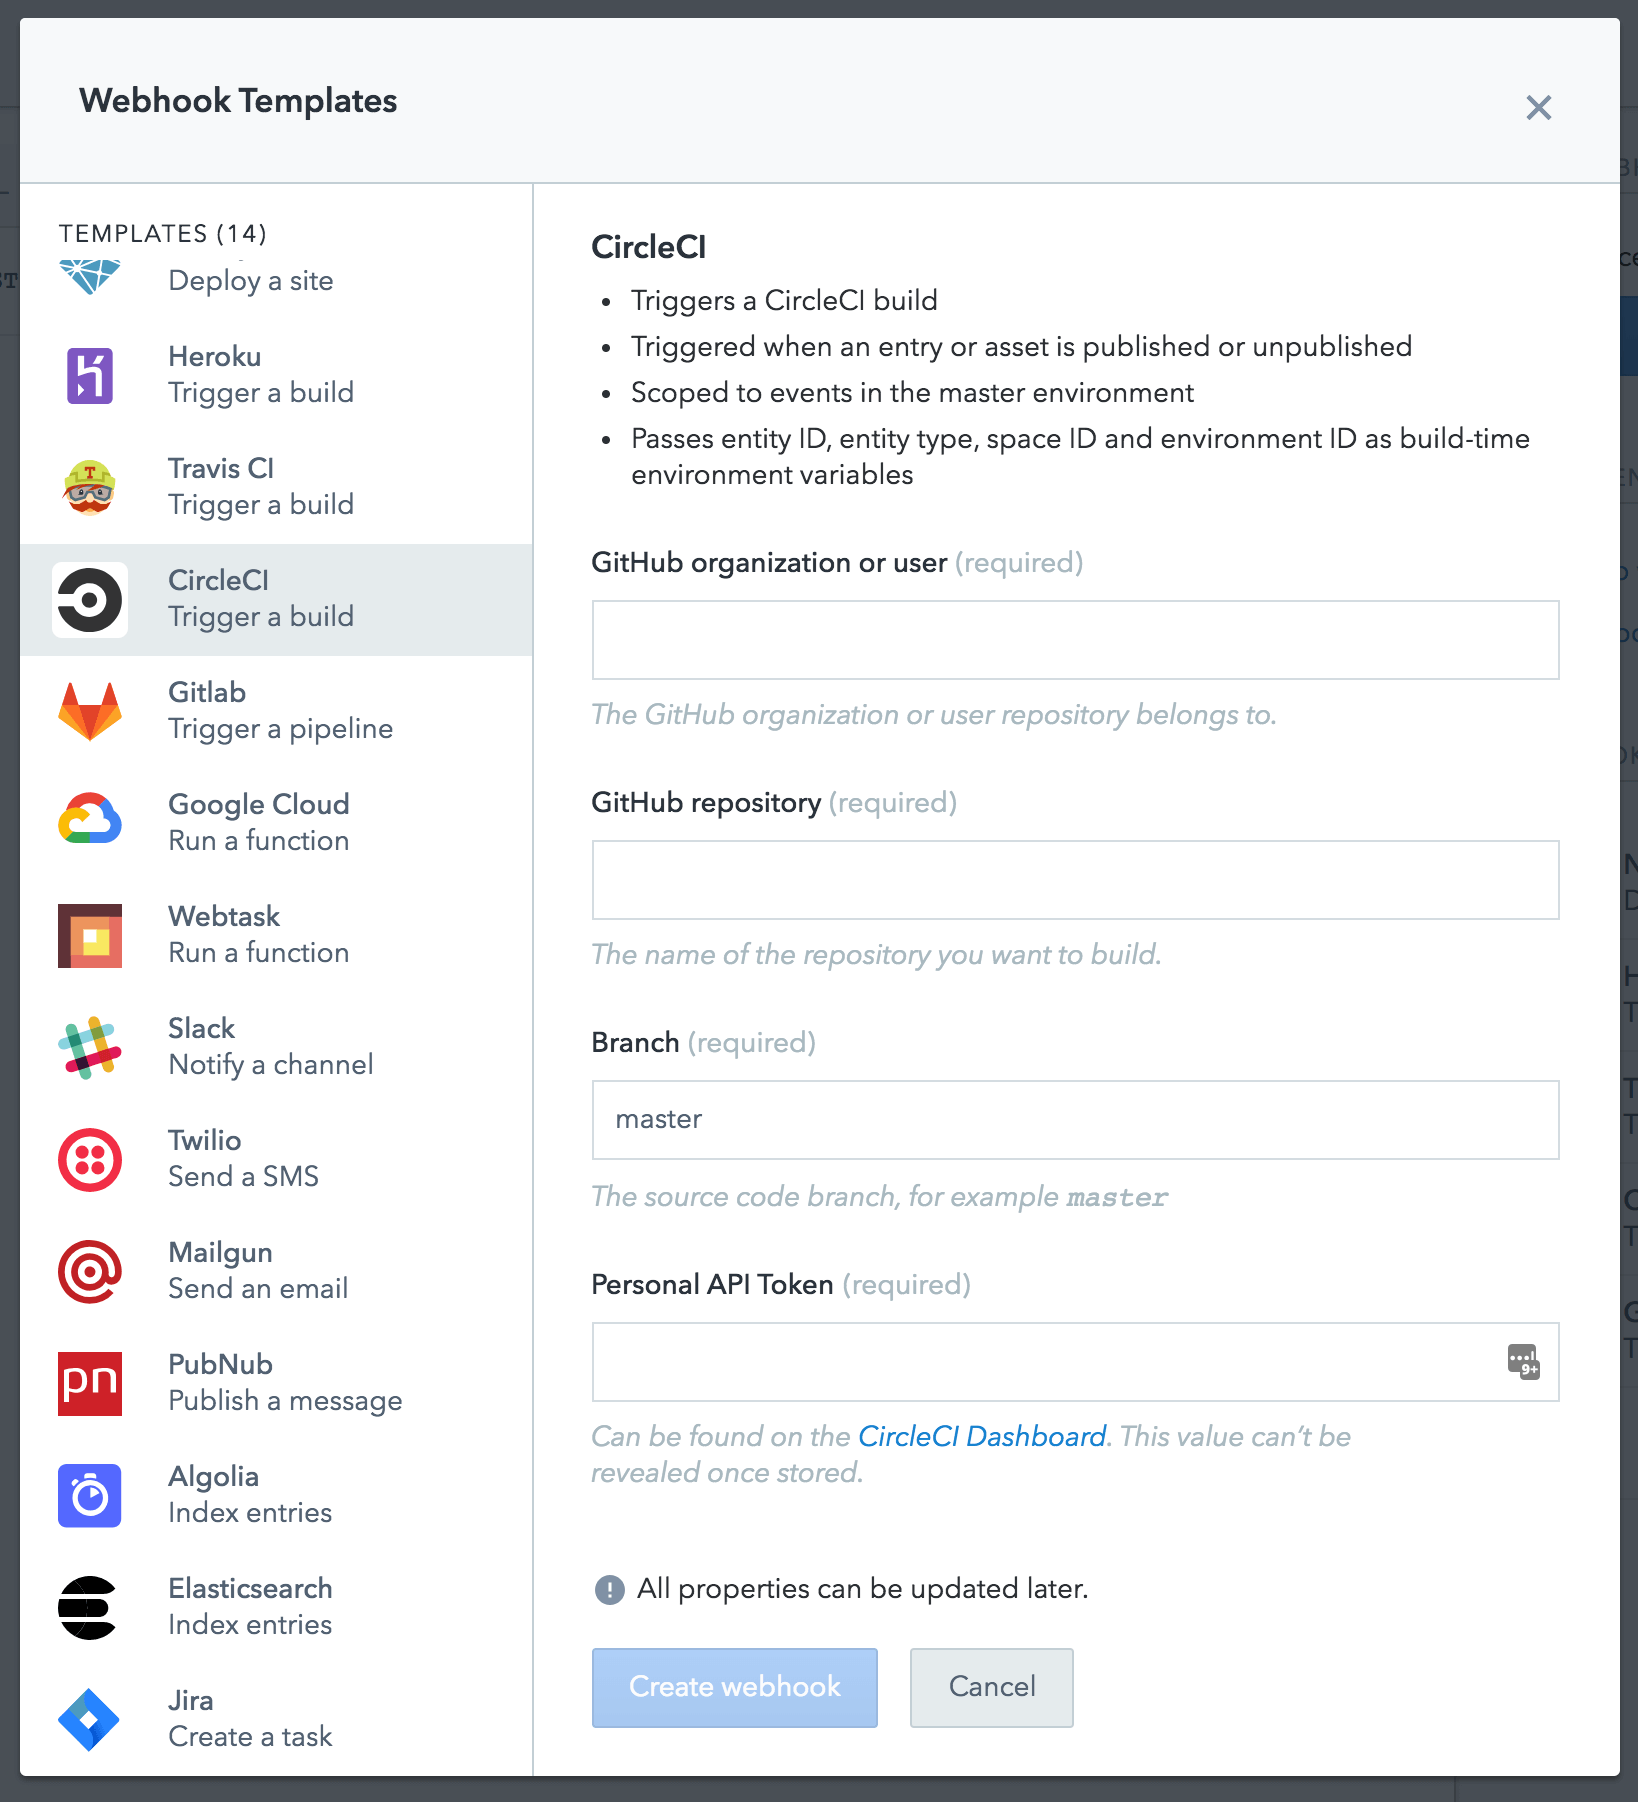
You need to provide:
- the GitHub organization and repository
- the branch to build
- your personal access token for Circle CI
After the template has created your webhook, you can choose to filter which events in Contentful should trigger CircleCI builds. For this example, we only trigger builds when entries and assets have been published or unpublished.
Save the webhook and now when you publish a content change, a CircleCI job gets triggered which builds and deploys your Heroku site.
