Continuous Integration Tutorial
To Skip the tutorial and navigate to the code, see the example repo on GitHub.
Introduction
Like handling changes to a database, integrating Contentful into a continuous integration (CI) pipeline enables changes to a content model and migrating data as part of a deployment process. Further, it enables testing content changes and canceling a deploy process thereby preventing interruptions or downtime, in case the tests fail.
Using the Contentful CLI’s space migration command, it is possible to create, delete, and edit content models and entries programmatically entirely in JavaScript. By using the Migrations DSL tool over the Contentful web app, updating a content model becomes a repeatable process. Changes made to a content model can also be tracked by integrating it to the version control.
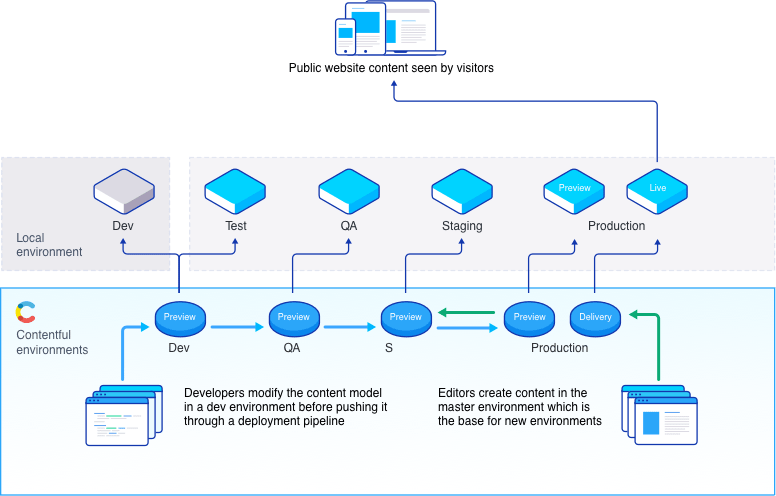
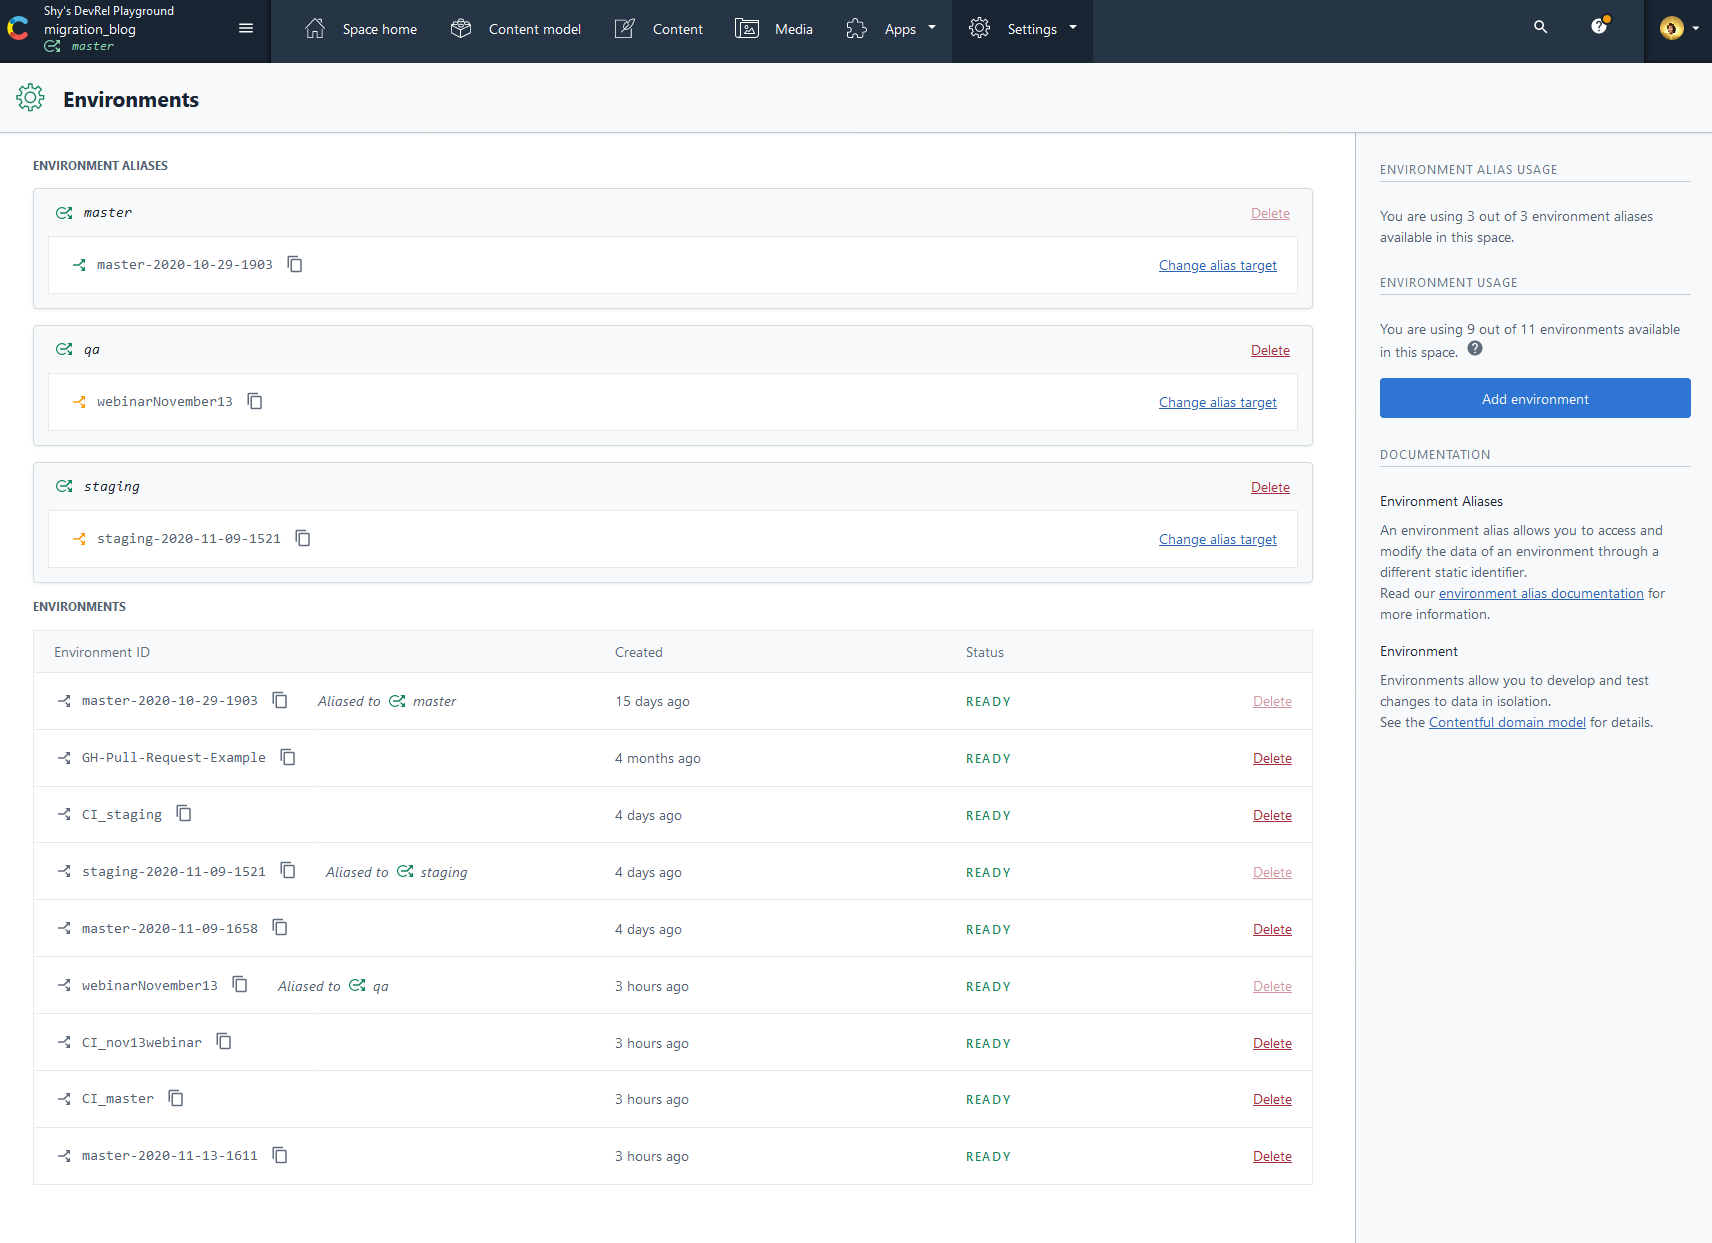
Space environments are entities within a space that allow a developer to create and maintain multiple versions of space-specific data, and make changes to them in isolation. This promotes teams to work on modifying a Contentful space, as any changes made to an environment do not affect production data. Every time you create a new environment, you’re creating a copy from the current version of your master space. Contentful migration tooling, when combined with space environments, starts integrating Contentful into the CI Pipeline.
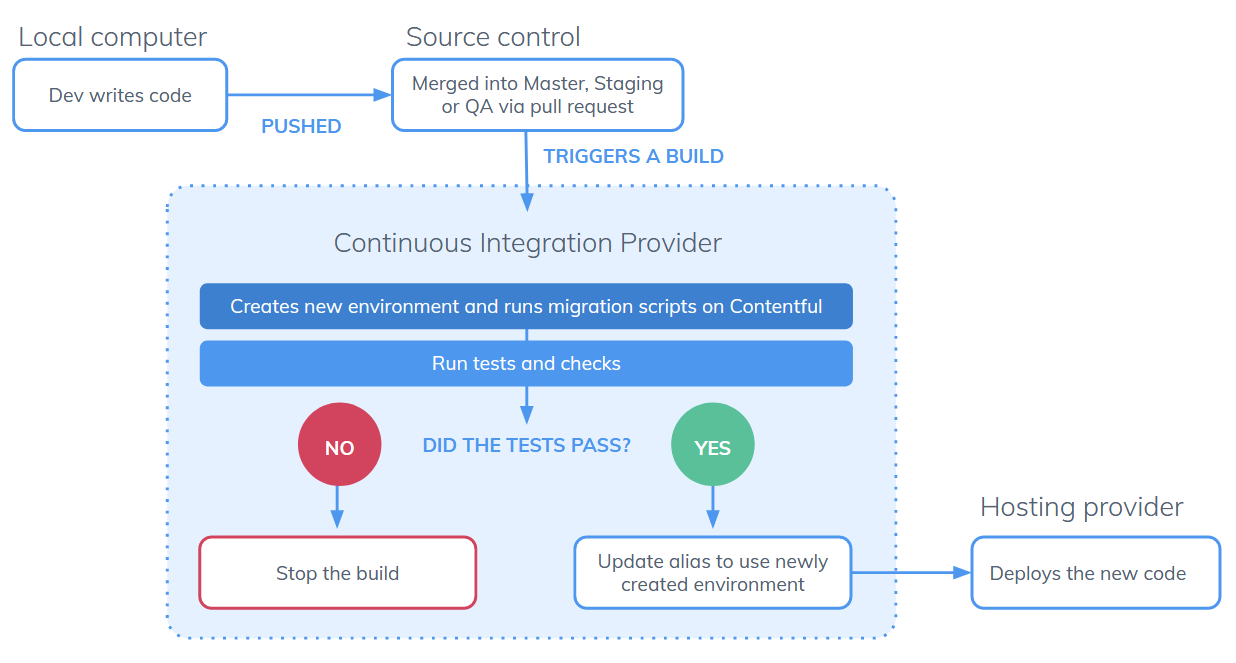
A typical continuous integration pipeline creates a build and runs tests against it, before deploying code. You may have different server environments such as production, staging and qa. Integrating content migrations into that pipeline requires a few additional steps.
In the build phase, add a step to programmatically add a new environment, while running any needed migrations as part of deployment on that new environment. During the testing phase, utilize the newly-migrated environment. Assuming everything passes, we’ll create a new environment, run those migrations and update our aliases to target this created environment, and then deploy the code to the correct server.
Pre-requisites
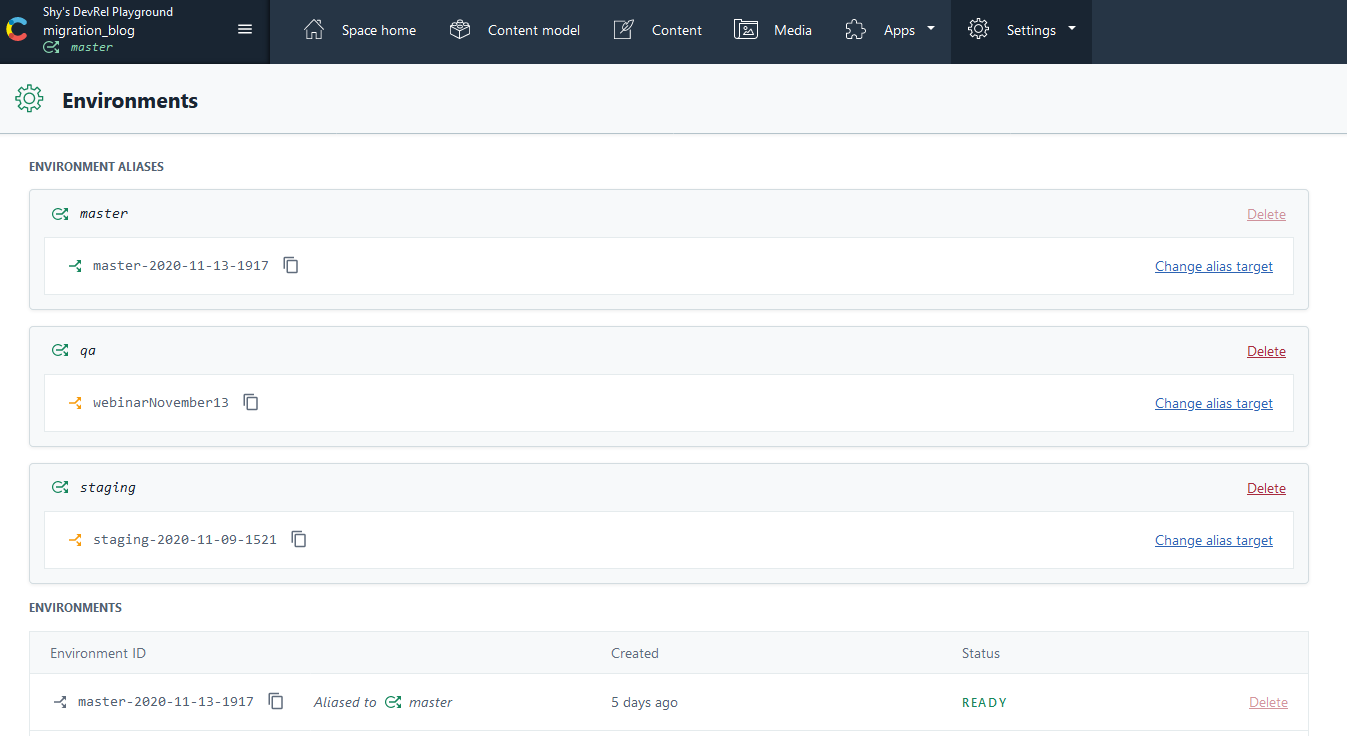
- Understanding of the Contentful CLI to write migration scripts, Space Environments and using Environment Aliases to update an alias. Additionally to optionally deploy to a staging, or qa you’ll need two Custom Aliases named staging and qa in addition to the default master alias. Creating additional custom aliases is only available for Premium/Enterprise customers on current pricing plans.
- A CircleCI account, but it’s possible to modify the project to work with Jenkins, Travis, Buildbot or any other Continuous Integration software.
- A GitHub to host your code and Heroku for the deployment stage of this project.
Setting up Continuous Integration
Step 1: Fork and clone our example repo and configure it to utilize a Contentful space
For this project we’ll be setting up a Continuous Integration pipeline for a barebones Flask App. The tutorial repository includes the Flask site and an export of a Contentful space which has a single content type.
After cloning our tutorial repository, create a new Contentful space and import the tutorial content model.
The Contentful part (required)
- Create a new space using the
contentful-cli
Note: Creation of a space may result in additional charges if the free spaces available in your plan are exhausted.
- Set the newly-created space as the default space for all further CLI operations. This will present a list of all available spaces – choose the one we just created
- Import the provided content model
(./import/export.json)into the newly-created space
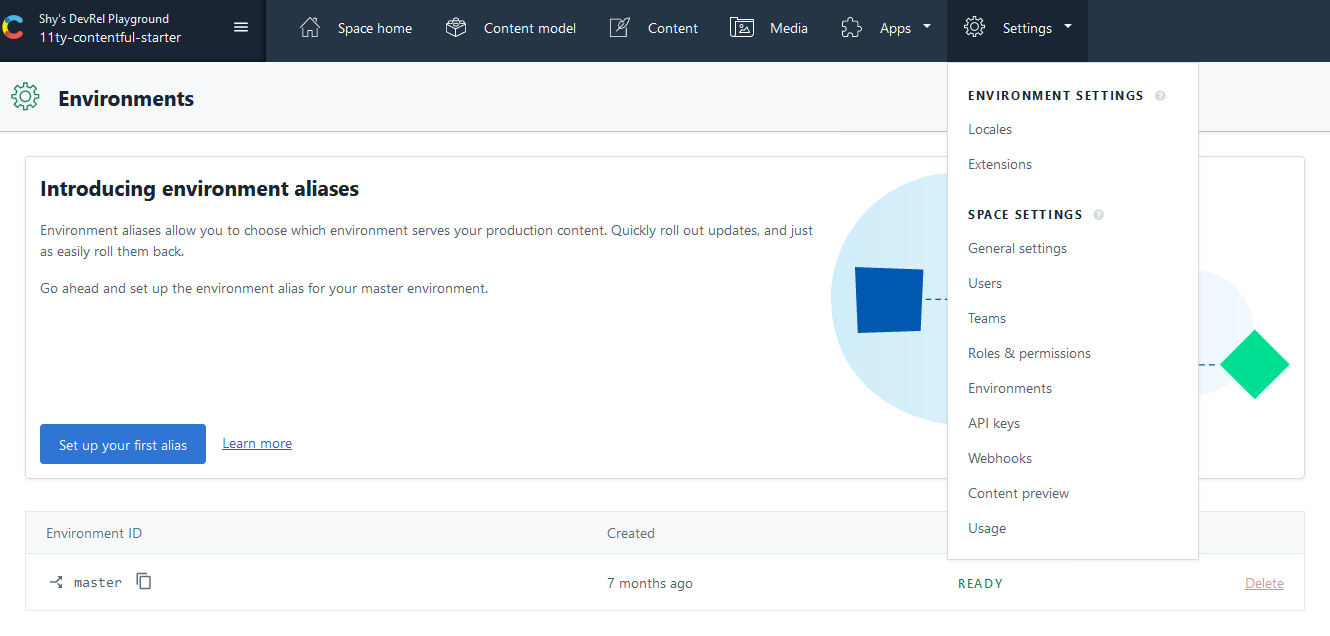
Next head into your Contentful environments settings and make sure you’ve opted into using environment aliases. If you’re a Premium/Enterprise Contentful customer, create an additional qa and staging alias.
These following steps to get the Flask site up and running are completely optional as it will only be used to test and build in our CI Pipeline. We won’t be making changes to the Python code outside of our tests in this example.
Local development environment (optional)
- Create a virtual environment
- Activate the virtual environment
- Install all Python dependencies
- Start the Flask app
- Rename config file .env.example to .env and add missing keys
Step 2: Enable CircleCI to create a new Environment
Using CircleCI, we’ll create a list of steps that are run as part of the build, test and deployment phases. For this project, whenever we trigger a build phase, we want CircleCI to create a new environment, run a migration against that environment and then run our tests against that migrated environment. For each of those steps, we’ll need to write code that CircleCI can run to execute that step. Create a folder named scripts and inside it, a Javascript file called migrate.js.
To begin, we’ll need to import our dependencies and connect to Contentful via the content management client library.
Next we’ll check if this script is running a feature branch on GitHub or if it’s going to hit one of our deploy stages and need to cause an alias to be updated. In this example we’ve hardcoded our aliases as being labeled master, staging or qa. For any aliases used, we’ll add a UTC timestamp to the name of the environment we’ll be creating.
Since enviroment names have strict requirements about allowed characters we’ll need to have a function a that can format our timestamps for us. Given that multiple deployments to master can occur in a day, our timestamp will have granularity down to the minute.
Next we’ll check if an environment already exists and if it does, to destroy it. When we call this script, we’ll provide it with the name of the branch that it will use to create the new environment. Then, a new environment that’s a copy of master is created and polled until we received confirmation that it exists.
Lastly we’ll update our API keys to have access to the newly created environment so that our tests will be able to utilize it with the existing delivery API key we’ll configure later in CircleCI.
Step 3: Create a new Content Type named versionTracking
For CircleCI to know which migrations it should run, we’ll need to track which migrations have been run by adding a version number into Contentful. We accomplish this in Contentful by creating a new content model with an ID of versionTracking that has a single short-text-field named version.
You’ll also need to create one entry of your new content model with the value 1. We’ll be using integers in this demo to track migrations.
![]()
Step 4: Create migrations
The Contentful Migration DSL allows us to:
- Create, delete and edit content models and content entries all in JavaScript.
- Establish a repeatable process of updating content model (where the Contentful web app does not)
- Track changes by integrating them into our version control; hence implementing CMS as Code.
The provided space in the example repo contains a list of Marvel superheroes; each having a name, GIF, first appearance and slug. For our first migration, we’ll modify the content model to include an author field.
Start by creating a new folder in the root directory named migration—this is where we’ll place all our migrations. We’ll need to create an empty migration file to represent the initial import that we did in step 1. Create 1.js and include the following code:
Next, create a JavaScript file named 2.js with the following code to add an author field to our content model:
Lastly, we’ll create a second migration named 3.js to set the newly created author field of each hero as Stan Lee.
Since we’ve changed our content model, we’ll also need to update our tests. Update the test_content_type_post function in the test_app.py file with the following:
And add the following test into our function:
Step 5: Update migrate.js to run our migrations.
Now that we have a directory of migrations to run against our space, we’ll need to update our script so that CircleCI can run those migrations for us.
First we’ll append to migrate.js code to set our default locale, check what migrations we have available and the finally detect what migrations need to be run by looking at our versionTracking entry.
Lastly we’ll run all the migrations that we’ve evaluated as being necessary and update the version number.
Step 6: Update migrate.js to update our alias during deployment.
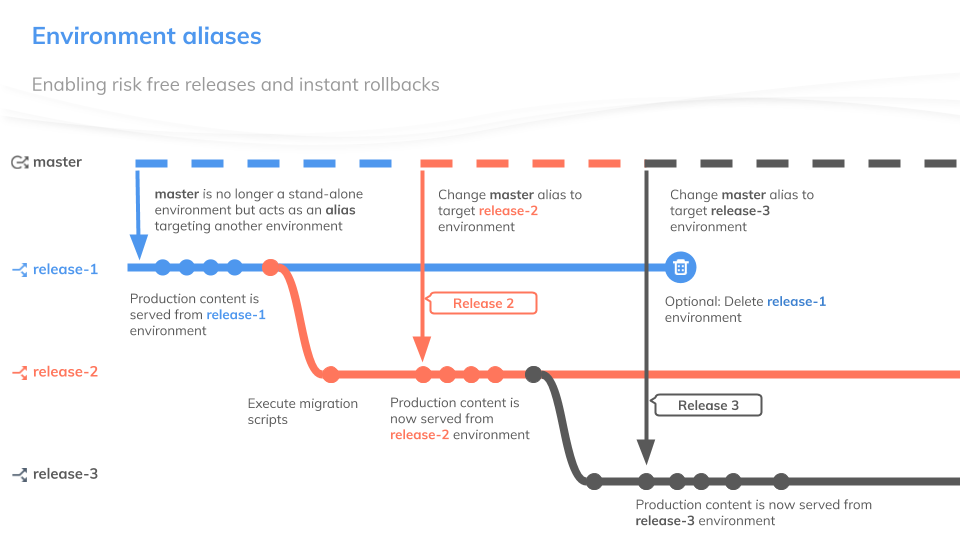
If this migration script was called as part of a deployment we’ll have created a new environment. Since this example uses a staging, qa and master, it’ll create a new enviroment with the name of whatever aliases is being updated, a dash and then a timestamp appended to the end. For example if we trigger a deploy out to staging we’ll create something named staging- and the date and time.
Next we’ll need to add some code to update our environment alias with the ID of master to refer to this created enviroment.
The finalized migrate.js file should be identical to the version in our completed example.
Step 6: Create CircleCI Config File
The final step before we can push our code to GitHub is to create a CircleCI config file. We’ll start with the default CircleCI config file, which is included in the example directory, and make a few changes. As CircleCI instructs, save, the config.yml file is inside a folder named .circleci on the root directory.
We’ll need to add several modifications to the default config.yml provided by CircleCI.
Start by updating the image to include a version that comes with Node since we’ll need that to use the migration DSL:
Update the install dependencies step to additionally install the requirements listed in the package.json provided in the repo:
Add a step to prepare the environment for testing immediately after installing dependencies, but before running the tests. This step will utilize the previously created migrate.js file we created in steps 2.
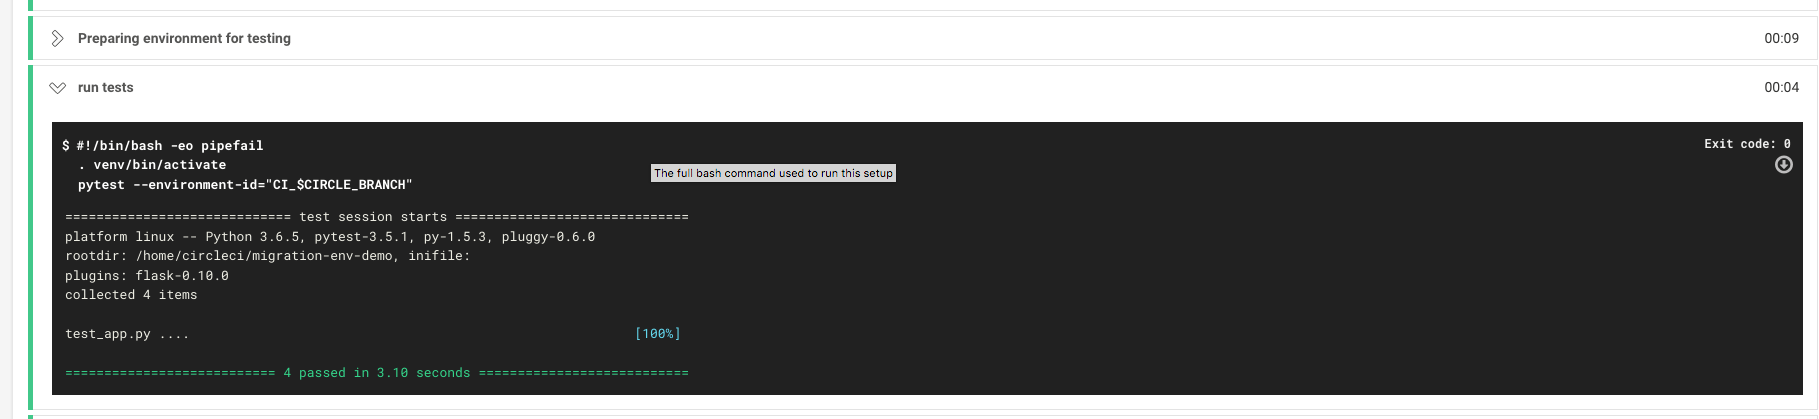
Update the test step to utilize the new environment.
Once completed the config.yml file should look like this.
If we want to optionally include the deployment to Heroku in our initial CI rollout, we can do so utilizing the example deployment config and Heroku setup files that CircleCI provides for Flask deployments.
Using the workflow section of the config.yml, we’re able to setup a filter that will cause our deploy to only occur whenever we update the master, staging or qa branch on GitHub.
Given that our tests could potentially take upto a few minutes, we’ll be reruning our migration against a clean copy of master to pick up any content changes that might have occured during this process. In the event of any issues our previously enviroment will still exist and we can manually change the enviroment alias back to a previous version.
Step 7: Push code to GitHub and configure CircleCI
Now that we’ve made the changes needed for the project, we can push the code to GitHub on master. After logging in into the CircleCI website, click “Set Up Project” on the repository we’re using.

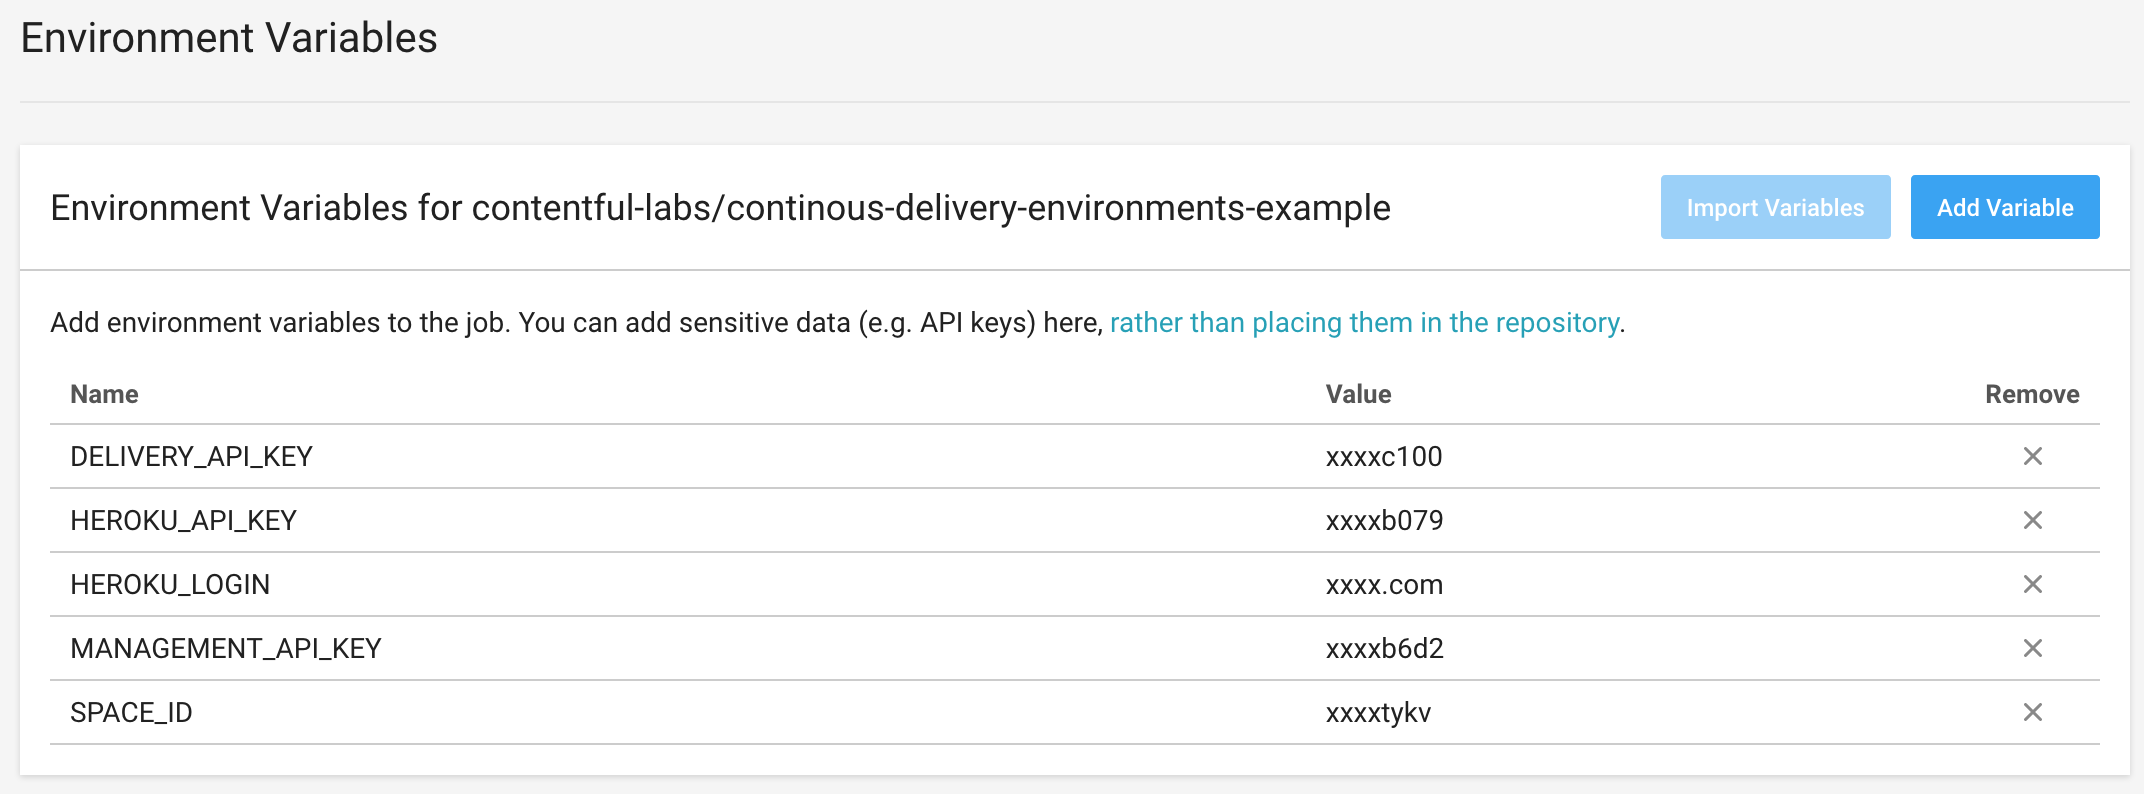
Click “Start building”—this first build will fail because it’ll be missing environment variables. From this screen, click the gear icon to be taken to the project settings. The project settings page allows us to access the environment variables where we can add the following keys: DELIVERY_API_KEY,
MANAGEMENT_API_KEY, SPACE_ID, HEROKU_LOGIN and HEROKU_API_KEY.
Rerun the build and everything should pass!

Going forward when we create any pull request, GitHub will trigger CircleCI. The CircleCI config.yml will evaulated how a PR should be handled. If something is triggered on a feature branch or in a pull request only the build stage will occur. When a branch is merged into master, staging or qa, CircleCI will trigger a build and deploy. The deploy stage will cause the relevant aliases on Contentful to be updated and our code to be deployed out to Heroku.
What’s next?
After following these steps, we’ll have a fully-functional CI pipeline integrated with Contentful. Any time someone make a PR, CircleCI will automatically run tests and create a new environment based on the branch name that will be used to verify code quality. If all our tests pass and a deploy occurs we’ll create a new environment and update our environment alias to the branch that we PR into to target that new environment. While this tutorial most likely won’t match 1 to 1 with your current CI/CD pipeline, hopefully it’ll serve as an inspiration to add Contentful’s migration tooling and alias features into your pipeline. Given the differences in labeling when it comes to pipelines you’ll need to adjust the migration.js file and config.yml file to match the pipeline and branches that you’re using in your own project.

Using this example, to run a migration against Contentful create a new migration file inside the migration folder and bump up the version number. With this method, if we need to revert, it’s simple to do so by updating our enviroment allias to it’s previous iteration. However, any bad migrations should not affect a production space since any failed tests will cause the build phase of this CI pipeline to not trigger, and thus our aliases to stay constant and our code to not deploy. In fact, since CircleCI runs tests and migrations that are part of the PR review process, a bad migration should theoretically never hit production assuming it isn’t accidentally merged on GitHub.