Getting started with Rich Text
Enabling the Rich Text
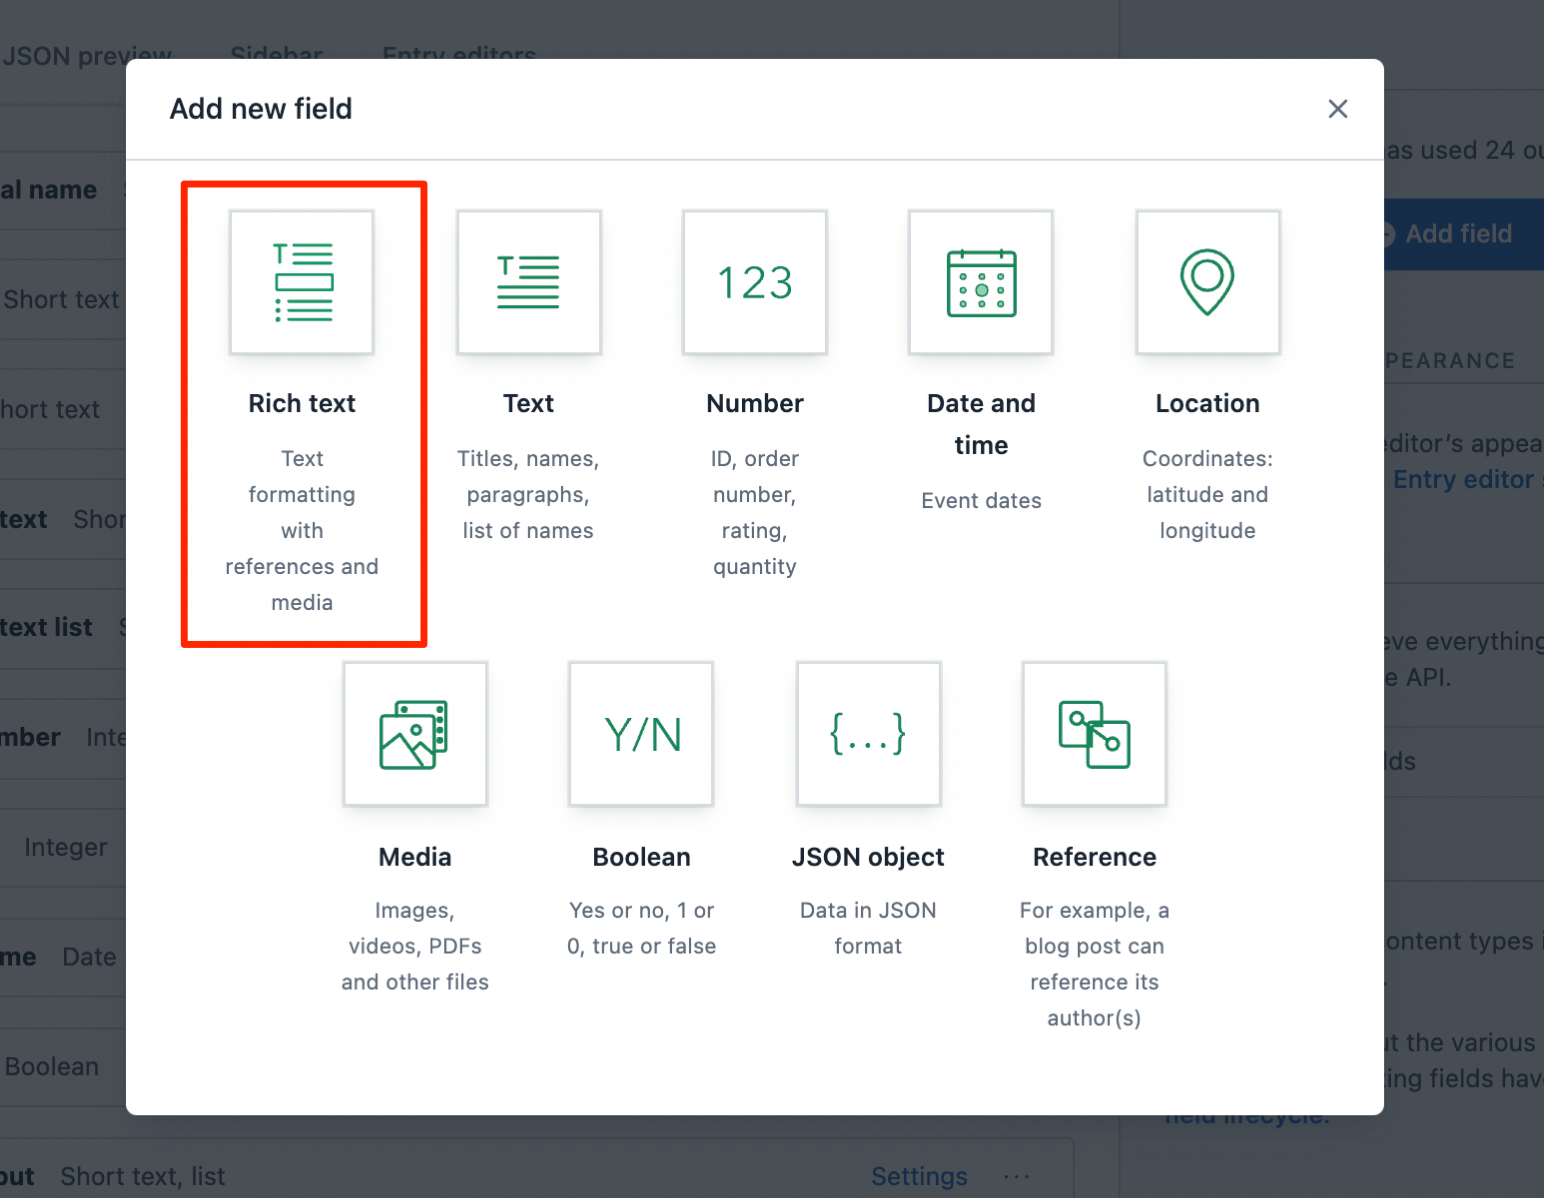
- Select the desired content type from the Content model tab.
- Create a new field by clicking Add field and select Rich Text as the field type.
Customize the formatting options
Customization assists in selecting relevant options for the authors in the toolbar while using the Rich Text editor. It can be done with an API call or on the web app.
Customization with an API call
A content type using Rich Text can be customized by making a Content Management API (CMA) call.
For example, following is the API call to only allow paragraphs and specific formatting in them:
{
  "id": "YOUR_CONTENT_TYPE_ID",
  "name": "Rich Text Field",
  "type": "RichText",
  "validations": [
    {
      "enabledNodeTypes": ["paragraph", "text"],
      "message": "Please choose a valid node type (should be a paragraph or text)."
    },
    {
      "enabledMarks": ["bold", "italic"],
      "message": "Please remove any extraneous document markup - only bold and italics are supported."
    }
  ]
}
Similarly, to limit the type of content types that an author could hyperlink to:
{
  "id": "YOUR_CONTENT_TYPE_ID",
  "name": "Rich Text Field",
  "type": "RichText",
  "validations": [
    {
      "enabledNodeTypes": ["paragraph", "text", "entry-hyperlink"],
      "message": "Please choose a valid node type (should be a paragraph, hyperlink or text)."
    },
    {
      "nodes": {
        "entry-hyperlink": [
          {
            "linkContentType": ["page"],
            "message": "You can only hyperlink to Pages."
          }
        ]
      }
    }
  ]
}
Refer to the CMA reference to learn more about the other available validation options.
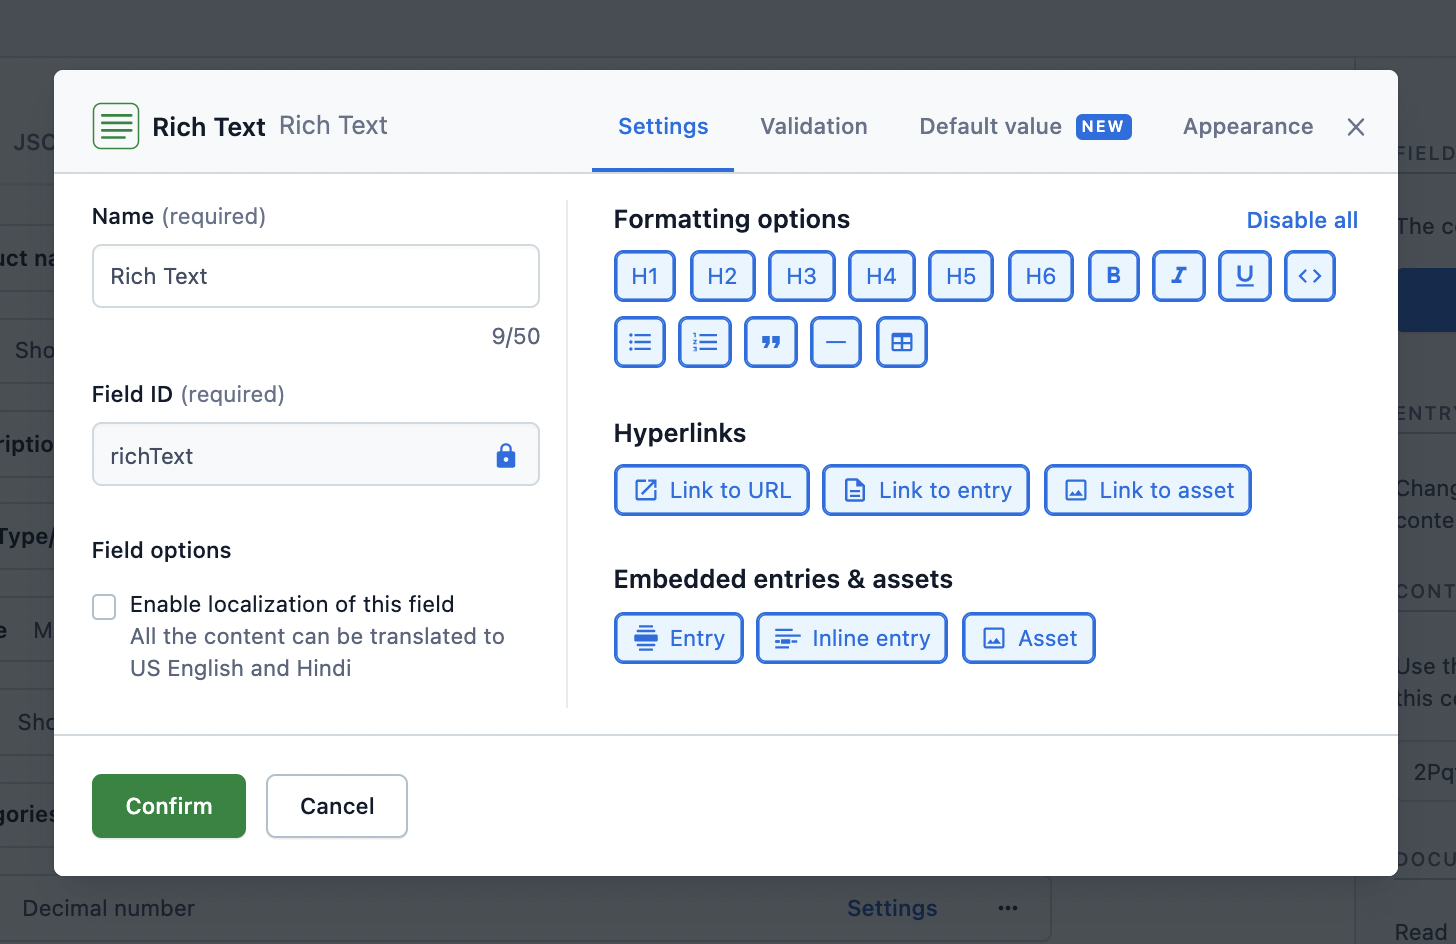
Customization on web app
To customize the field on the web app:
- Select the desired content type from the Content model tab.
- Edit the Rich Text field's Settings and select the relevant formatting options.
Render the response in HTML
The content added to the Rich Text field can be consumed from the API response and rendered further in the desired application.
Rendering the API response (a JSON object) is not easy and requires effort to be converted to HTML. Hence, helper functions are created that allow to:
- Render all the contents of a JSON response to HTML.
- Apply a custom rendering function to an embedded entry.
- Apply a custom rendering function to a default node, like a heading or a link, thereby applying personalized style and logic to the markup of an application.
Use-cases around rendering the API response
Add custom CSS classes to HTML elements
Following is an example of adding CSS classes to paragraph tags in JavaScript in order to alternate their background color:
import React from 'react';
import ReactDOM from 'react-dom';

import { BLOCKS } from '@contentful/rich-text-types';
import { documentToReactComponents } from '@contentful/rich-text-react-renderer';

const richTextDocument = {
  nodeType: 'document',
  data: {},
  content: [
    {
      nodeType: 'paragraph',
      content: [
        {
          nodeType: 'text',
          marks: [],
          value: 'I am an odd paragraph.',
          data: {},
        },
      ],
      data: {},
    },
    {
      nodeType: 'paragraph',
      content: [
        {
          nodeType: 'text',
          marks: [],
          value: 'I am even.',
          data: {},
        },
      ],
      data: {},
    },
  ],
};

const options = {
  renderNode: {
    [BLOCKS.PARAGRAPH]: (node, children) => (
      <p className={paragraphClass(node)}>{children}</p>
    ),
  },
};

function paragraphClass(node) {
  const className = 'odd';
  //alternate logic for 'odd' | 'even'
  return className;
}

const rootElement = document.getElementById('root');
ReactDOM.render(
  documentToReactComponents(richTextDocument, options),
  rootElement
);
// -> <p class='odd'>I am an odd paragraph.</p>
// -> <p class='even'>I am even.</p>
Link to entries
Following is an example of how to render links to entries:
import React from 'react';
import ReactDOM from 'react-dom';

import { INLINES } from '@contentful/rich-text-types';
import { documentToReactComponents } from '@contentful/rich-text-react-renderer';

const richTextDocument = {
  nodeType: 'document',
  data: {},
  content: [
    {
      nodeType: 'paragraph',
      content: [
        {
          nodeType: 'entry-hyperlink',
          data: {
            target: {
              sys: {
                type: 'Link',
                linkType: 'Entry',
                id: '3vNbx1hjcsESSICSu2KuWs',
              },
            },
          },
          content: [
            {
              nodeType: 'text',
              marks: [],
              data: {},
              value: "I'm linking to an entry",
            },
          ],
        },
      ],
      data: {},
    },
  ],
};

const options = {
  renderNode: {
    [INLINES.ENTRY_HYPERLINK]: (node, children) => {
      // If you are using contentful.js client library, the referenced entry is resolved
      // automatically and is available at `node.data.target`.
      const referencedEntry = getEntryWithId(node.data.target.sys.id);

      return <a href={`/pages/${referencedEntry.fields.slug}`}>{children}</a>;
    },
  },
};

function getEntryWithId(entryId) {
  const mockEntry = {
    fields: {
      slug: 'entry-slug',
    },
  };

  return mockEntry;
}

const rootElement = document.getElementById('root');
ReactDOM.render(
  documentToReactComponents(richTextDocument, options),
  rootElement
);
// <a href='/pages/entry-slug'>I'm linking to an entry</a>
Render custom widgets
Following is an example to render a custom widget, such as a Carousel, within your flow of text, in JavaScript:
import React from 'react';
import ReactDOM from 'react-dom';

import { BLOCKS } from '@contentful/rich-text-types';
import { documentToReactComponents } from '@contentful/rich-text-react-renderer';

const richTextDocument = {
  nodeType: 'document',
  data: {},
  content: [
    {
      nodeType: 'embedded-entry-block',
      data: {
        target: {
          sys: {
            type: 'Link',
            linkType: 'Entry',
            id: '3vNbx1hjcsESSICSu2KuWs',
          },
        },
      },
      content: [],
    },
  ],
};

const options = {
  renderNode: {
    [BLOCKS.EMBEDDED_ENTRY]: (node) => <CustomCarousel node={node} />,
  },
};

function CustomCarousel({ node }) {
  // Render the Carousel component from your Component Library
  return <div />;
}

const rootElement = document.getElementById('root');
ReactDOM.render(
  documentToReactComponents(richTextDocument, options),
  rootElement
);
// <CustomCarousel />
Render tables
Table support comes out of the box with all of the renderers plus client libraries. Table nodes are subject to the same rules of Rich Text as other node types.
Table node types include:
BLOCKS.TABLEBLOCKS.TABLE_ROWBLOCKS.TABLE_CELLBLOCKS.TABLE_HEADER_CELL
Tables node types don't include first class <thead />, <tbody /> or <tfoot /> abstractions. You can supply these yourself by extending the renderers as in the the examples below.
Some constraints apply to the way table nodes are structured in the data type. These are enumerated in the the list of container relationships, but in short, a TABLE element must contain only TABLE_ROW children, which must contain only TABLE_CELL or TABLE_HEADER_CELL children, which must render a BLOCKS.PARAGRAPH as its immediate child node (at which point the usual rules for paragraphs apply).
Contentful's table node types map onto HTML5 abstractions for tabular data. The table below displays the table node types and the corresponding to them HTML elements.
| Table node type name | HTML element |
|---|---|
TABLE |
<table /> |
TABLE_ROW |
<tr /> |
TABLE_CELL |
<td /> |
TABLE_HEADER_CELL |
<th /> |
Our renderers make the basic assumptions above. For example, the JavaScript HTML renderer will convert a Rich Text document like this:
{
  "nodeType": "document",
  "data": {},
  "content": [
    {
      "nodeType": "table",
      "data": {},
      "content": [
        {
          "nodeType": "table-row",
          "data": {},
          "content": [
            {
              "nodeType": "table-header-cell",
              "data": {},
              "content": [
                {
                  "nodeType": "paragraph",
                  "data": {},
                  "content": [
                    {
                      "nodeType": "text",
                      "data": {},
                      "marks": [],
                      "value": "Countries"
                    }
                  ]
                }
              ]
            }
          ]
        },
        {
          "nodeType": "table-row",
          "data": {},
          "content": [
            {
              "nodeType": "table-cell",
              "data": {},
              "content": [
                {
                  "nodeType": "paragraph",
                  "data": {},
                  "content": [
                    {
                      "nodeType": "text",
                      "data": {},
                      "marks": [],
                      "value": "Germany"
                    }
                  ]
                }
              ]
            }
          ]
        }
      ]
    }
  ]
}
into markup like this:
<table>
  <tr>
    <th><p>Countries</p></th>
  </tr>
  <tr>
    <td><p>Germany</p></td>
  </tr>
</table>
Rendering tables using React renderer
You may want to structure tables differently, depending on your use case. For example, for some applications, you may want to represent table header rows as a semantic <thead /> element. This is easy to enforce by following the customization guide above in one of Contentful's renderer library of your choice. For example, using the React Renderer, you can supply a custom renderer like:
const options = {
  renderNode: {
    [BLOCKS.TABLE_ROW]: (node, children) => {
      if (
        children.every((node) => node.nodeType === BLOCKS.TABLE_HEADER_CELL)
      ) {
        // all children are header cells, so we should wrap the row
        // with a <thead /> tag
        return (
          <thead>
            <tr>{children}</tr>
          </thead>
        );
      } else {
        // not a header row, so we can render an ordinary <tr />
        return <tr>{children}</tr>;
      }
    },
  },
};
This would result in markup like:
<table>
  <thead>
    <tr>
      <th><p>Country</p></th>
    </tr>
  </thead>
  <tr>
    <td><p>Germany</p></td>
  </tr>
</table>
Get started with various platforms
The helper functions are available for the following platforms:
