Analytics for Personalization users
Introduction
This guide explains how Contentful Personalization customers can use their existing integration to quickly implement Contentful Analytics.
This guide assumes that your application implements Contentful Personalization in a React-based frontend. It covers the following steps:
- Select the content types to extend with Contentful Analytics dashboards.
- Install the Insights Plugin. Use version 7.17.6 or later.
- Optional: Wrap additional components in
<EntryAnalytics />. - Validate your setup with Live Events.
- Enable the Built-in AI Features option.
Step 1: Select content types to extend with Contentful Analytics dashboards
You decide what content types display Content Analytics dashboards by enabling them.
To select the content types you want to extend with Analytics:
- Log in to the Contentful web app.
- Click Apps and select Installed apps. The list of apps installed in your environment is displayed.
- Click Configure next to Contentful Personalization. The app configuration page is displayed.
- Navigate to the “Analytics content types” tab.
- Select the content types you want to extend with Contentful Analytics (e.g., Page). Each content type you select will include an additional “Analytics” tab in the entry editor for any entry of that content type.
- Click Save. The “Analytics” tab is displayed in the entry editor for any entry of that content type.
Step 2: Install the Insights Plugin
Identify the Experience SDK version that you’re using and install the Insights Plugin.
Step 3: Wrap additional components in <EntryAnalytics />
The Experience SDK provides the following components that can be used to wrap your React components: <EntryAnalytics /> and <Experience />.
A wrapped component will automatically send a component event to the Experience API if a user views it.
Contentful Analytics will then use these events to calculate actionable insights.
- Wrap content in an
<Experience />component if you want to enable both Contentful Personalization and Contentful Analytics for it. - Wrap content in an
<EntryAnalytics />component if you exclusively want to enable Contentful Analytics for it.
<Experience /> or <EntryAnalytics /> component is ignored by Contentful Analytics.Step 4: Validate your setup with Live Events
We recommend using Live Events to validate your Contentful Analytics setup and confirm that Contentful is receiving the event types required for Analytics.
A correct setup displays:
pageevents when a user views a page.trackevents when a user performs an action you want to measure.componentevents when a user views a tracked Contentful entry.identifyevents only if your implementation identifies known users. These events are optional.
In most setups, you should expect to see more component events than page events, because a single page usually renders multiple tracked Contentful entries.
Validate your setup
To validate your setup:
- Log in to the Contentful web app.
- Navigate to the “Optimization” tab.
- In the left sidebar, click Live Events.
- Enable the Live event streaming toggle.
- Load a page that contains Contentful tracked content, and trigger a user action that sends a
trackevent. For example, clicking a button on the page.
If your setup is working correctly, you should see at leastpage,track, andcomponentevents displayed in the event stream on the Live Events page.
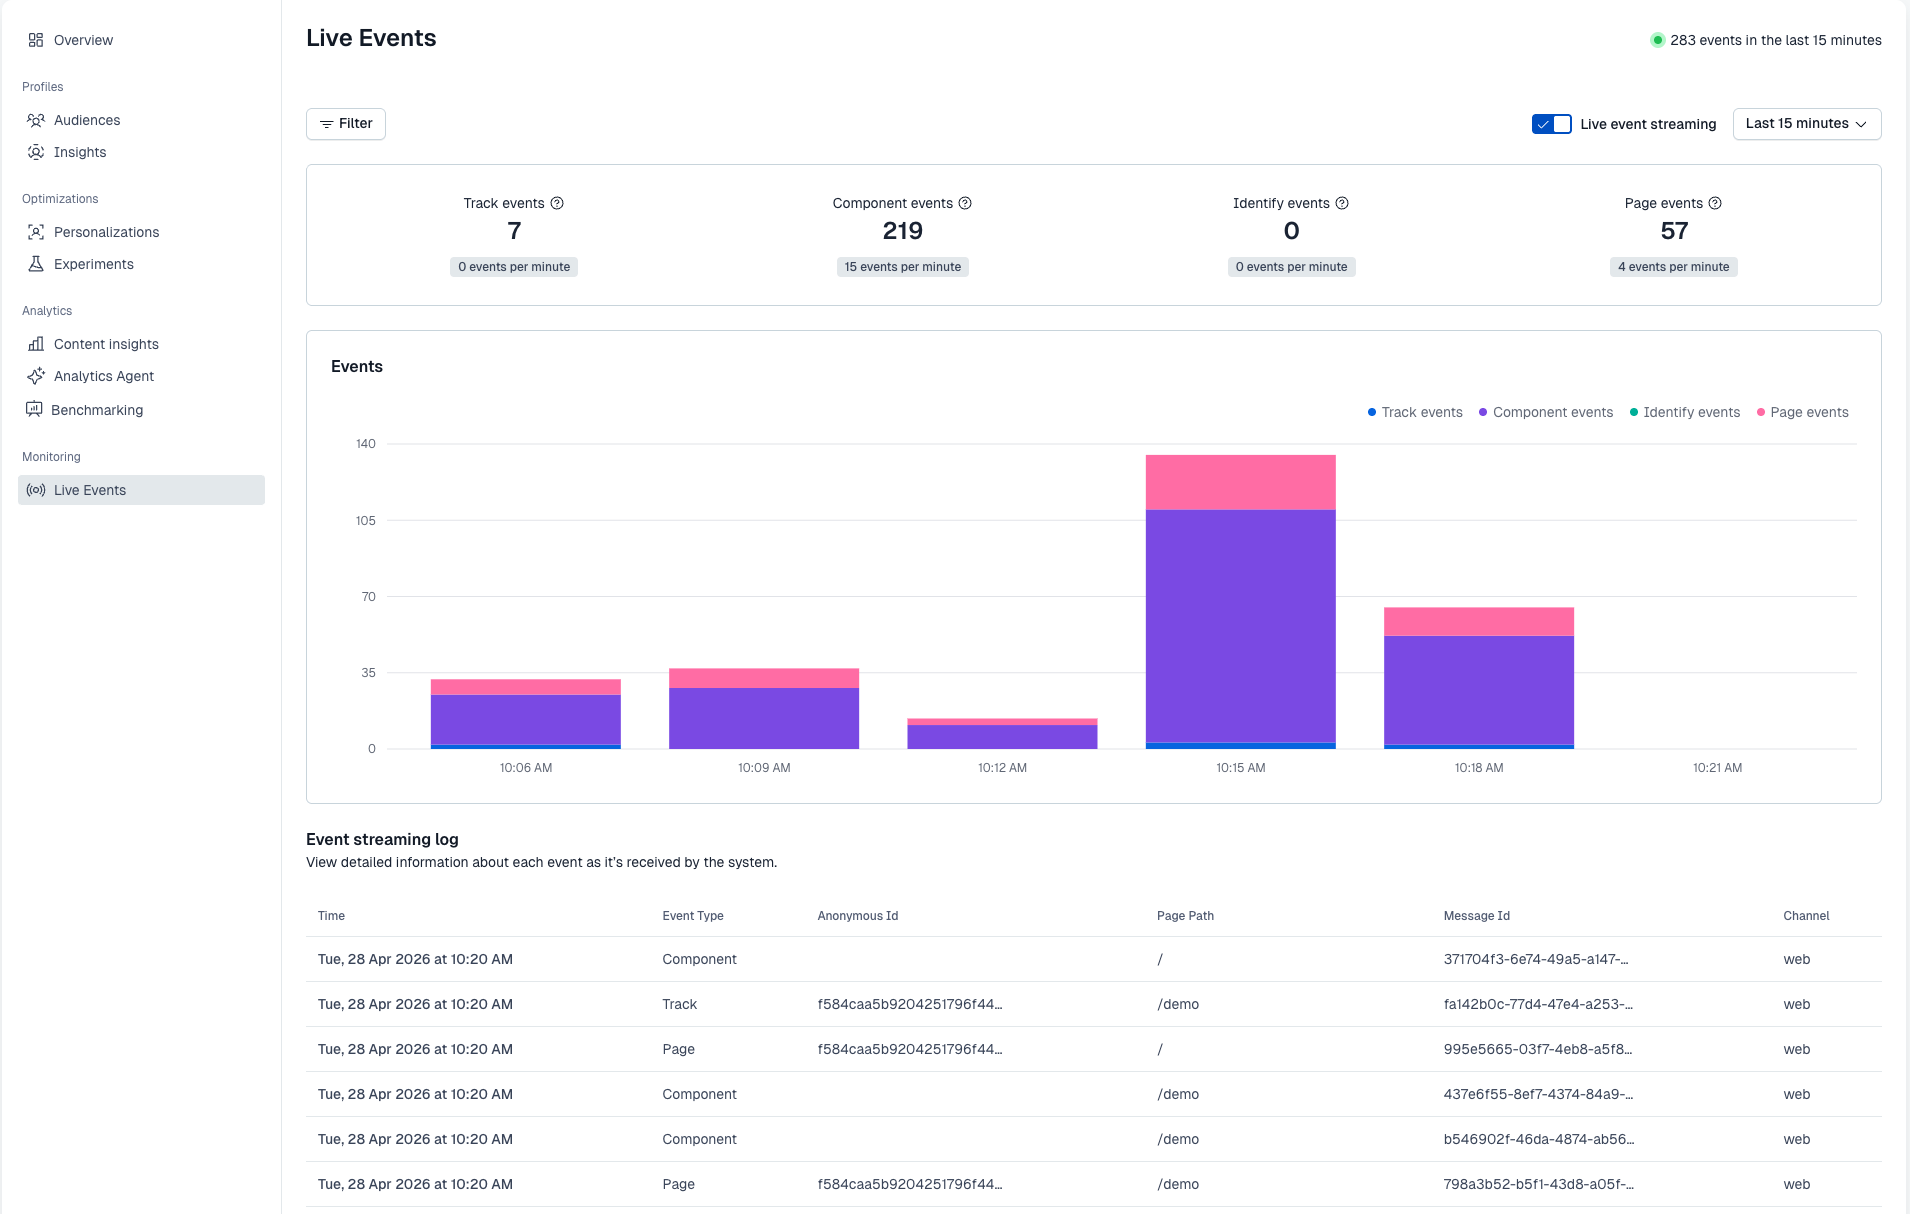
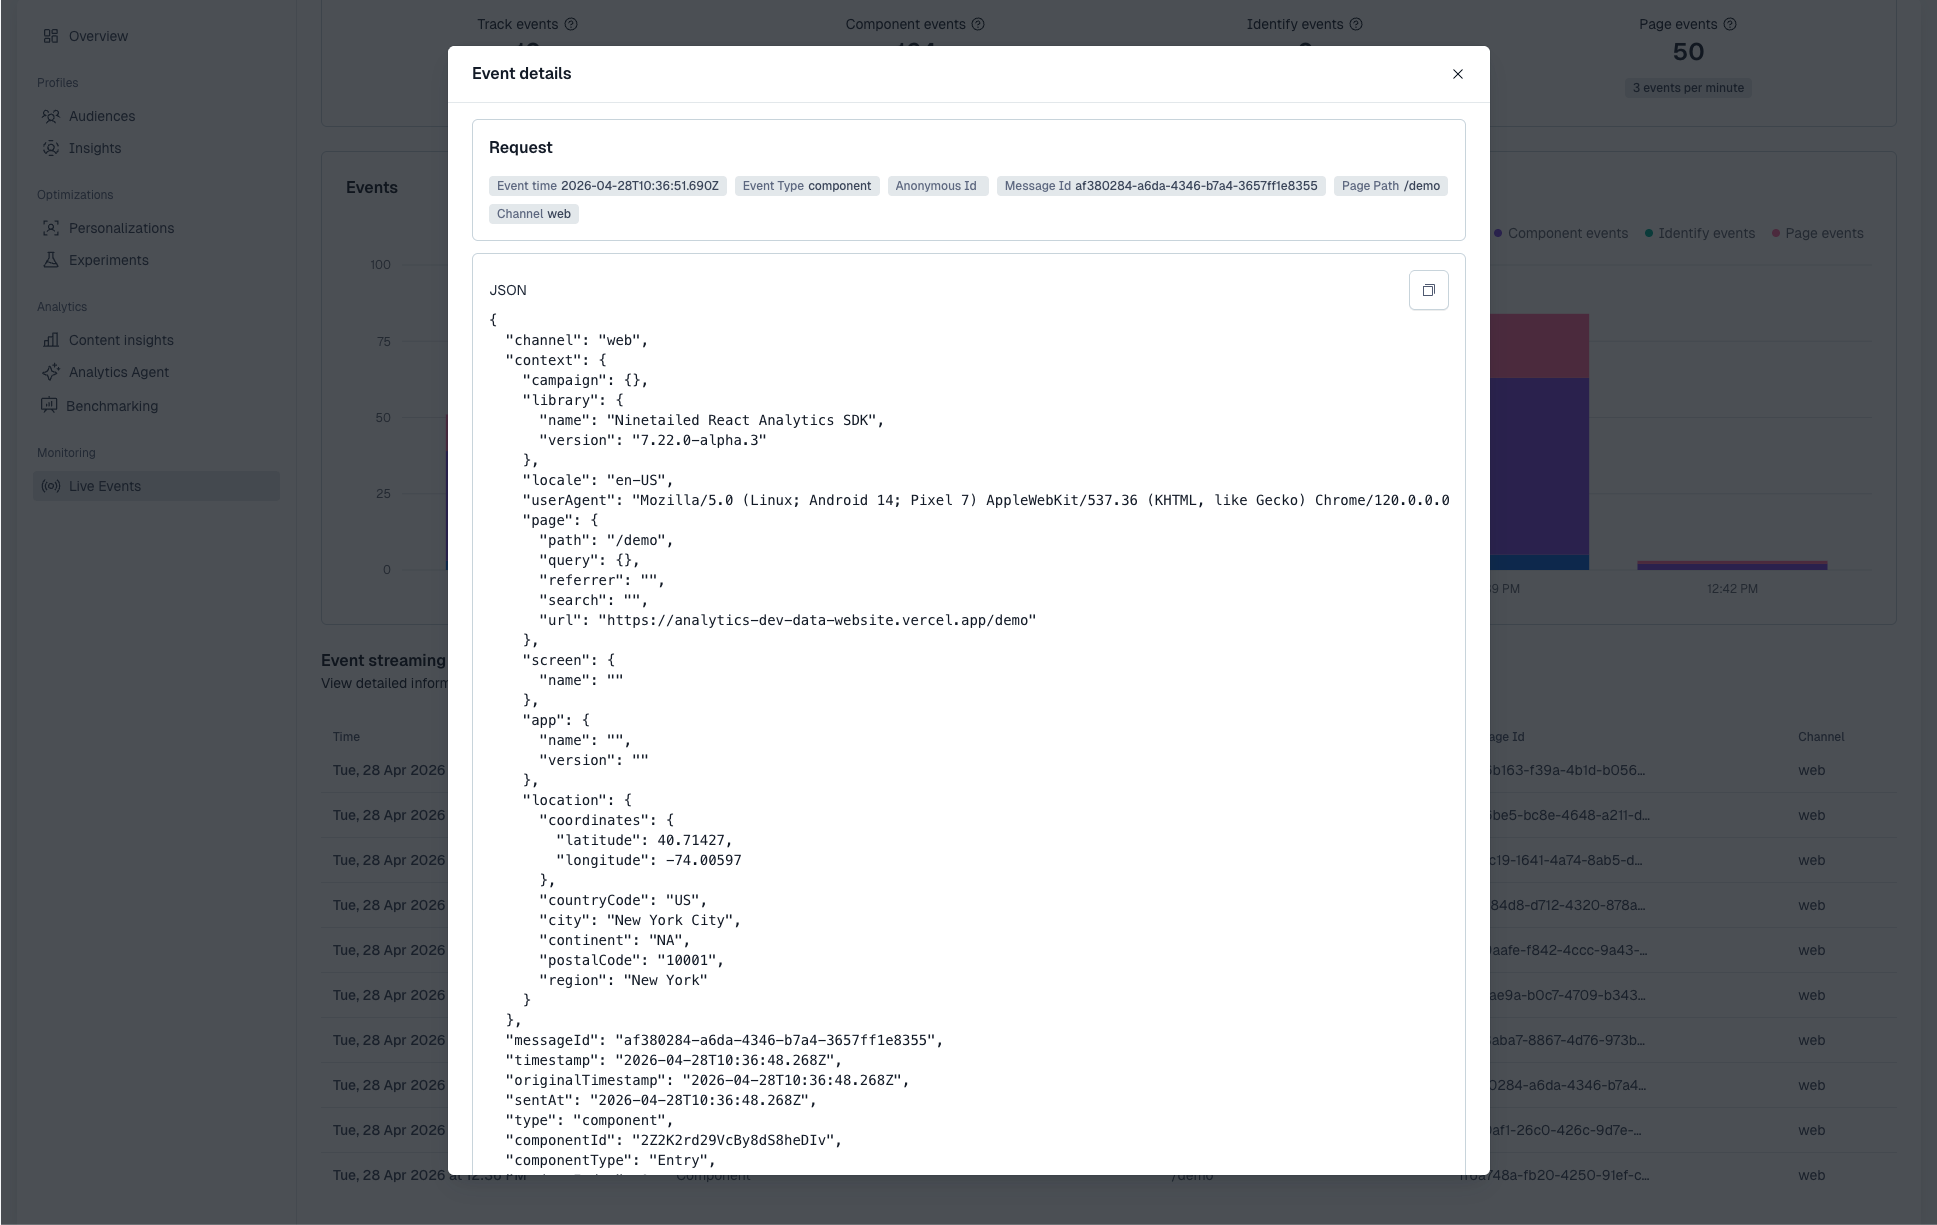
The Events dashboard displays the type of events that Contentful Analytics receives over time, and the Event streaming log lists individual events. If you want to inspect an event more closely, open its event details and review the JSON payload.
Only organization admins can access the Event streaming log and the event details.
When checking the JSON payload for component events, confirm that the payload identifies the viewed component correctly. If the component was rendered as part of a personalization or experiment, also confirm that the payload includes the associated experience metadata, such as experienceId. This is especially important for sticky variant persistence, where experienceId and variantIndex must be present.
Troubleshoot
If no events appear
If no events appear in Live Events, check that your setup is sending events at all. The most common issues are:
- an incorrect SDK API key
- the wrong environment
- not triggering any events in the application.
Make sure the Live event streaming toggle is enabled, then reload a tracked page and trigger a user action that should send a track event.
If component events are missing
If only page and track events are displayed, but no component events, the most common cause is that your components are not being tracked correctly.
For React-based setups, make sure Contentful entries are wrapped in <EntryAnalytics /> or <Experience />, and that the Insights Plugin is installed since it is required for component events to be generated and sent.
Step 5: Enable built-in AI Features for the Optimization agent
The Optimization Agent is the AI assistant that allows you to ask contextual questions about your content and instantly receive AI-powered content answers, both as text and visual elements. The Optimization Agent relies on Contentful’s AI features, so you must first enable them at the organization level.
To enable AI features at the organization level:
- Log in to the Contentful web app.
- Navigate to the “Optimization” tab.
- Under Analytics, select the Optimization Agent tab.
- Click Go to Organization Settings.
- Click Continue to organization settings.
- Enable the Built-in AI Features option.
- Review the pricing and number of approved output words modal, then click Next.
- Review Contentful’s AI Terms of Service. If you agree, click Accept terms to enable built-in AI features.