Managing access to environments
Space Administrators can tightly control who has access to environments and aliases, thereby securing, simplifying and speeding up the development process. This guide explains which levels of access to environments can be provided with a custom role and gives guidance and tips on how to set up fine grained environment access restrictions.
Options overview
Customers on Premium/Enterprise plans can create custom roles that allow them to define access to environments and environment aliases according to the following options:
Master environment only
A role with this permission can only access entities inside the master environment or the target environment of the master alias. Content level permissions (e.g. restrictions on which entries, assets or content types can be edited) apply to the master environment.
This is the default and most restrictive option. It should be used for all roles which don’t interact at all with environments, e.g. editors.
Selected environments
This option allows you to select specific environments and environment aliases that a given role can access. Content level permissions apply in all specified environments and aliases, but creation or deletion of environments or aliases is not allowed.
This option can be useful for different scenarios - for example, for editors who need to edit content on distinct non-master environments or QA engineers who need access to staging and master environments only.
Manage and use all environments
A role with “Manage and use all environments” permission has full CRUD (create, read, update and delete) rights for all environments in the space. This role has full access to all content in sandbox environments. In the master environment or the target environment of the master alias, the role’s access to content is defined by its content and media permissions.
This is the least restrictive option. It is recommended for developers who need to not only access entities inside of environments as part of their workflow, but also create and delete environments.
Access to environments endpoints
A role’s access to environments applies only to the entities contained in environments. A user is able to access environments and environment aliases endpoints irrespective of the selected access to environments option.
When a user sends an API request to get all environments within a space, the full list of the existing environments is returned, including those that the user’s role is not allowed to access.
Access to the target environment of the master alias
Access to the target environment of the master alias is defined via the master alias ID, and not via the ID of the target environment.
To better explain how to grant your role access to the target environment of the master alias, let’s consider the following example:
Let’s assume you have a master alias and two sandbox environments - production and staging. production is selected as a target environment for your master alias. Now, for your space role to be able to access production environment, grant this role access to master. If you later change your master alias target environment to staging, the role will lose access to production and will be granted access to staging. Conversely, to deny a role access to an environment which is targeted by the master alias, make sure the role does not have access to master.
Environment permissions override environment policies
In the API, “Manage and use all environments” and “Selected environments” options are referred to as environment permissions and environment policies, accordingly. We do not recommend enabling both options in the same role, because in this case environment policies are not validated, and environment permissions override environment policies. As a result, the role will be allowed to access and manage all environments in a space.
An example role definition below contains environment policies which target specific environment IDs, but has unrestricted access to all environments due to the existence of an environment permissions:
How to set up a role with access to selected environments in the web app
In the example below, we create a role for an editor to grant them access to
master and staging environments. Full CRUD rights for entries and read-only
rights for assets are enforced in both environments. The role is created via the web app.
To create a role with access to master and staging environments:
-
Navigate to the Settings tab and click on Roles & permissions. Click Create a new role.
-
Add a name and a description for your role.
-
Go to the Environments tab.

-
Under the Access to environments area, select the Selected environments option.
-
Under the Allowed environments area, add the environments and environment aliases you want to grant access to. In our example, the role is granted access to a
masteralias that points to a target environmentproductionand to thestagingenvironment.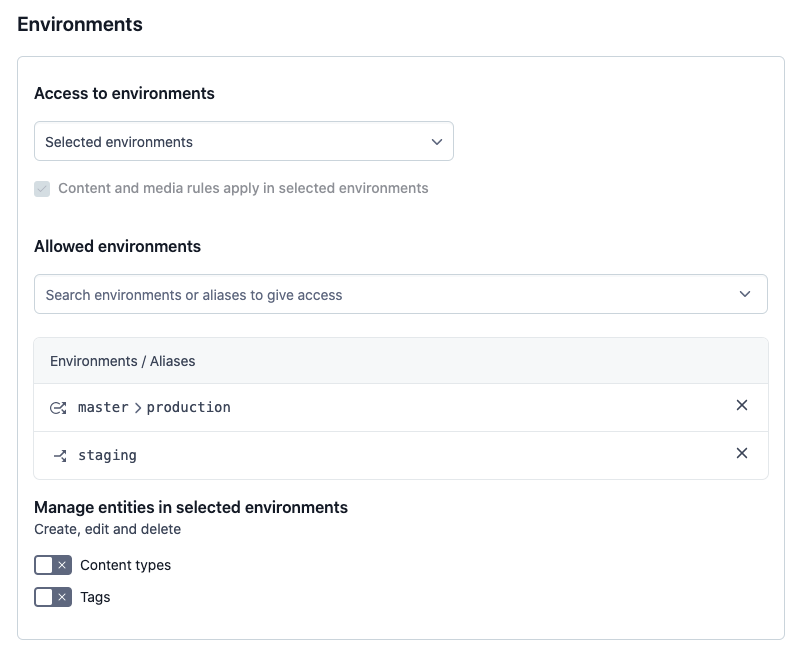
-
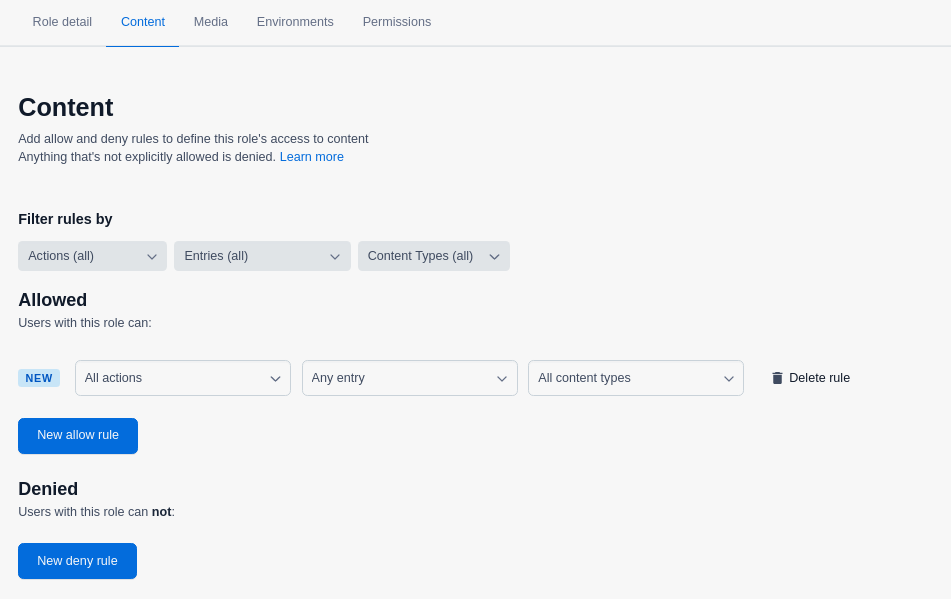
Go to the Content tab and set the rules to define access to content in the selected environments. In our example, we allow all CRUD actions for entries of any content type.
-
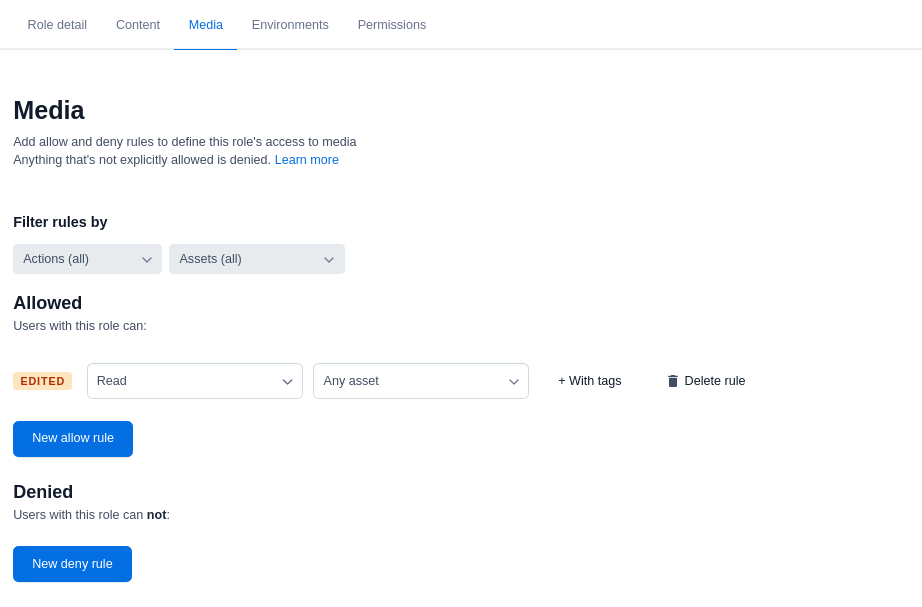
Go to the Media tab and set the rules to define access to media in the selected environments. In our example, we allow read-only access to all assets.
The role editor allows you to set rules based on tags, content types and entries only from your master environment. You can configure rules for tags, content types and entries from your sandbox environments via the API.
- Click Save changes to save your role.
How to set up a role with access to selected environments via API
You can also set up your roles programmatically. In the example below, we create a role with the same access restrictions as set in our example of setting up a role in the web app.
Endpoint: [POST] /spaces/{{ spaceId }}/roles
Base URL: https://api.contentful.com
Description: This endpoint is used to create a custom role.
Response: