Building a website with Compose in Next.js
In this guide you will learn how to develop a website using Compose. Contentful provides an example implementation of a Help Center website in the contentful/compose-starter-helpcenter-nextjs GitHub repository. This is an application built with the Next.js framework which is powered by React.
Routing
Each page entry has a unique slug text field that describes and identifies the given page. You can use slug values as part of page URLs in your website for a user- and SEO-friendly navigation. For example, on the Help Center website the “Introduction to Contentful” article will be available under the /articles/introduction-to-contentful URL.
If your website supports multiple languages you may also want to include a locale param in the URL. See our documentation about Localization with Contentful for more information.
Fetching content
Contentful allows you to fetch all the content needed on a given web page in one request (with certain limits). You can make a GET request to Content Delivery API directly or use the JavaScript client library, as in the following example:
import { createClient } from 'contentful';

const client = createClient({
  space: CF_SPACE_ID, // ID of a Compose-compatible space to be used \
  accessToken: CF_DELIVERY_ACCESS_TOKEN, // delivery API key for the space \
});

type GetPageParams = {
  pageContentType: string;
  slug: string;
  locale: string;
};

async function getPage(params: GetPageParams) {
  const query = {
    limit: 1,
    include: 10,
    locale: params.locale,
    'fields.slug': params.slug,
    content_type: 'page',
    'fields.content.sys.contentType.sys.id': params.pageContentType,
  };
  const { items: [page] } = await client.getEntries(query);
  return page || null;
}
View the full code in /src/lib/api.ts
You can then use the getPage function to fetch a given page. For example, when a user navigates to /articles/introduction-to-contentful URL on the Help Center website, we fetch a Helpdesk Article page with the introduction-to-contentful slug:
const page = await getPage({
  pageContentType: 'page_help_center_article',
  slug: 'introduction-to-contentful',
  locale: 'de-DE',
});
Preview mode
If you want to support previewing unpublished content on your website, create a second Contentful client:
const previewClient = createClient({
  space: CF_SPACE_ID, // ID of a Compose-compatible space to be used
  accessToken: CF_PREVIEW_ACCESS_TOKEN, // preview API key for the space
  host: 'preview.contentful.com',
});
In the Help Center example we rely on a query string parameter ?preview=1 to decide which Contentful client to use for fetching content.
Rendering content
Once the correct page data is fetched, you can render it in your website. In the Help Center example, we traverse the page object recursively and use React to render individual entries that make the page. There’s a React component defined for each Content Type:
const ContentTypeMap = {
  'page_help_center_article': HelpCenterArticle,
  'component_text': Text,
  'component_image': Image,
  'component_video': Video,
  ...
};
View the full code in /src/components/renderer/block-renderer.tsx
Below is an example of a simple React component rendering a Text Content Type. It includes rendering a RichText field as HTML using the @contentful/rich-text-react-renderer package:
import React from 'react';
import { documentToReactComponents as renderRichText } from '@contentful/rich-text-react-renderer';

function Text(textEntry) {
 const { title, text } = textEntry.fields;
 return (
   <>
     {title ? <h2>{title}</h2> : null}
     {renderRichText(text)}
   </>
 );
}
Rendering metadata
In addition to the page content, we can also use the metadata stored in the title and seo fields. Below is an example of how to use those values on a web page:
const seo = page.fields.seo.fields;
const { description = '', keywords = [], title = page.fields.title} = seo;
const robots = [
  seo.no_index === true ? 'noindex' : undefined,
  seo.no_follow === true ? 'nofollow' : undefined,
].filter((x) => x !== undefined);

...

<Head>
  <title>{title}</title>
  {robots.length > 0 && <meta name="robots" content={robots.join(', ')} />}
  {description.trim() !== '' && (
    <meta name="description" content={description} key="description" />
  )}
  {keywords.length > 0 && <meta name="keywords" content={keywords.join(',')} />}
</Head>
View the full code in /src/components/page-head.tsx
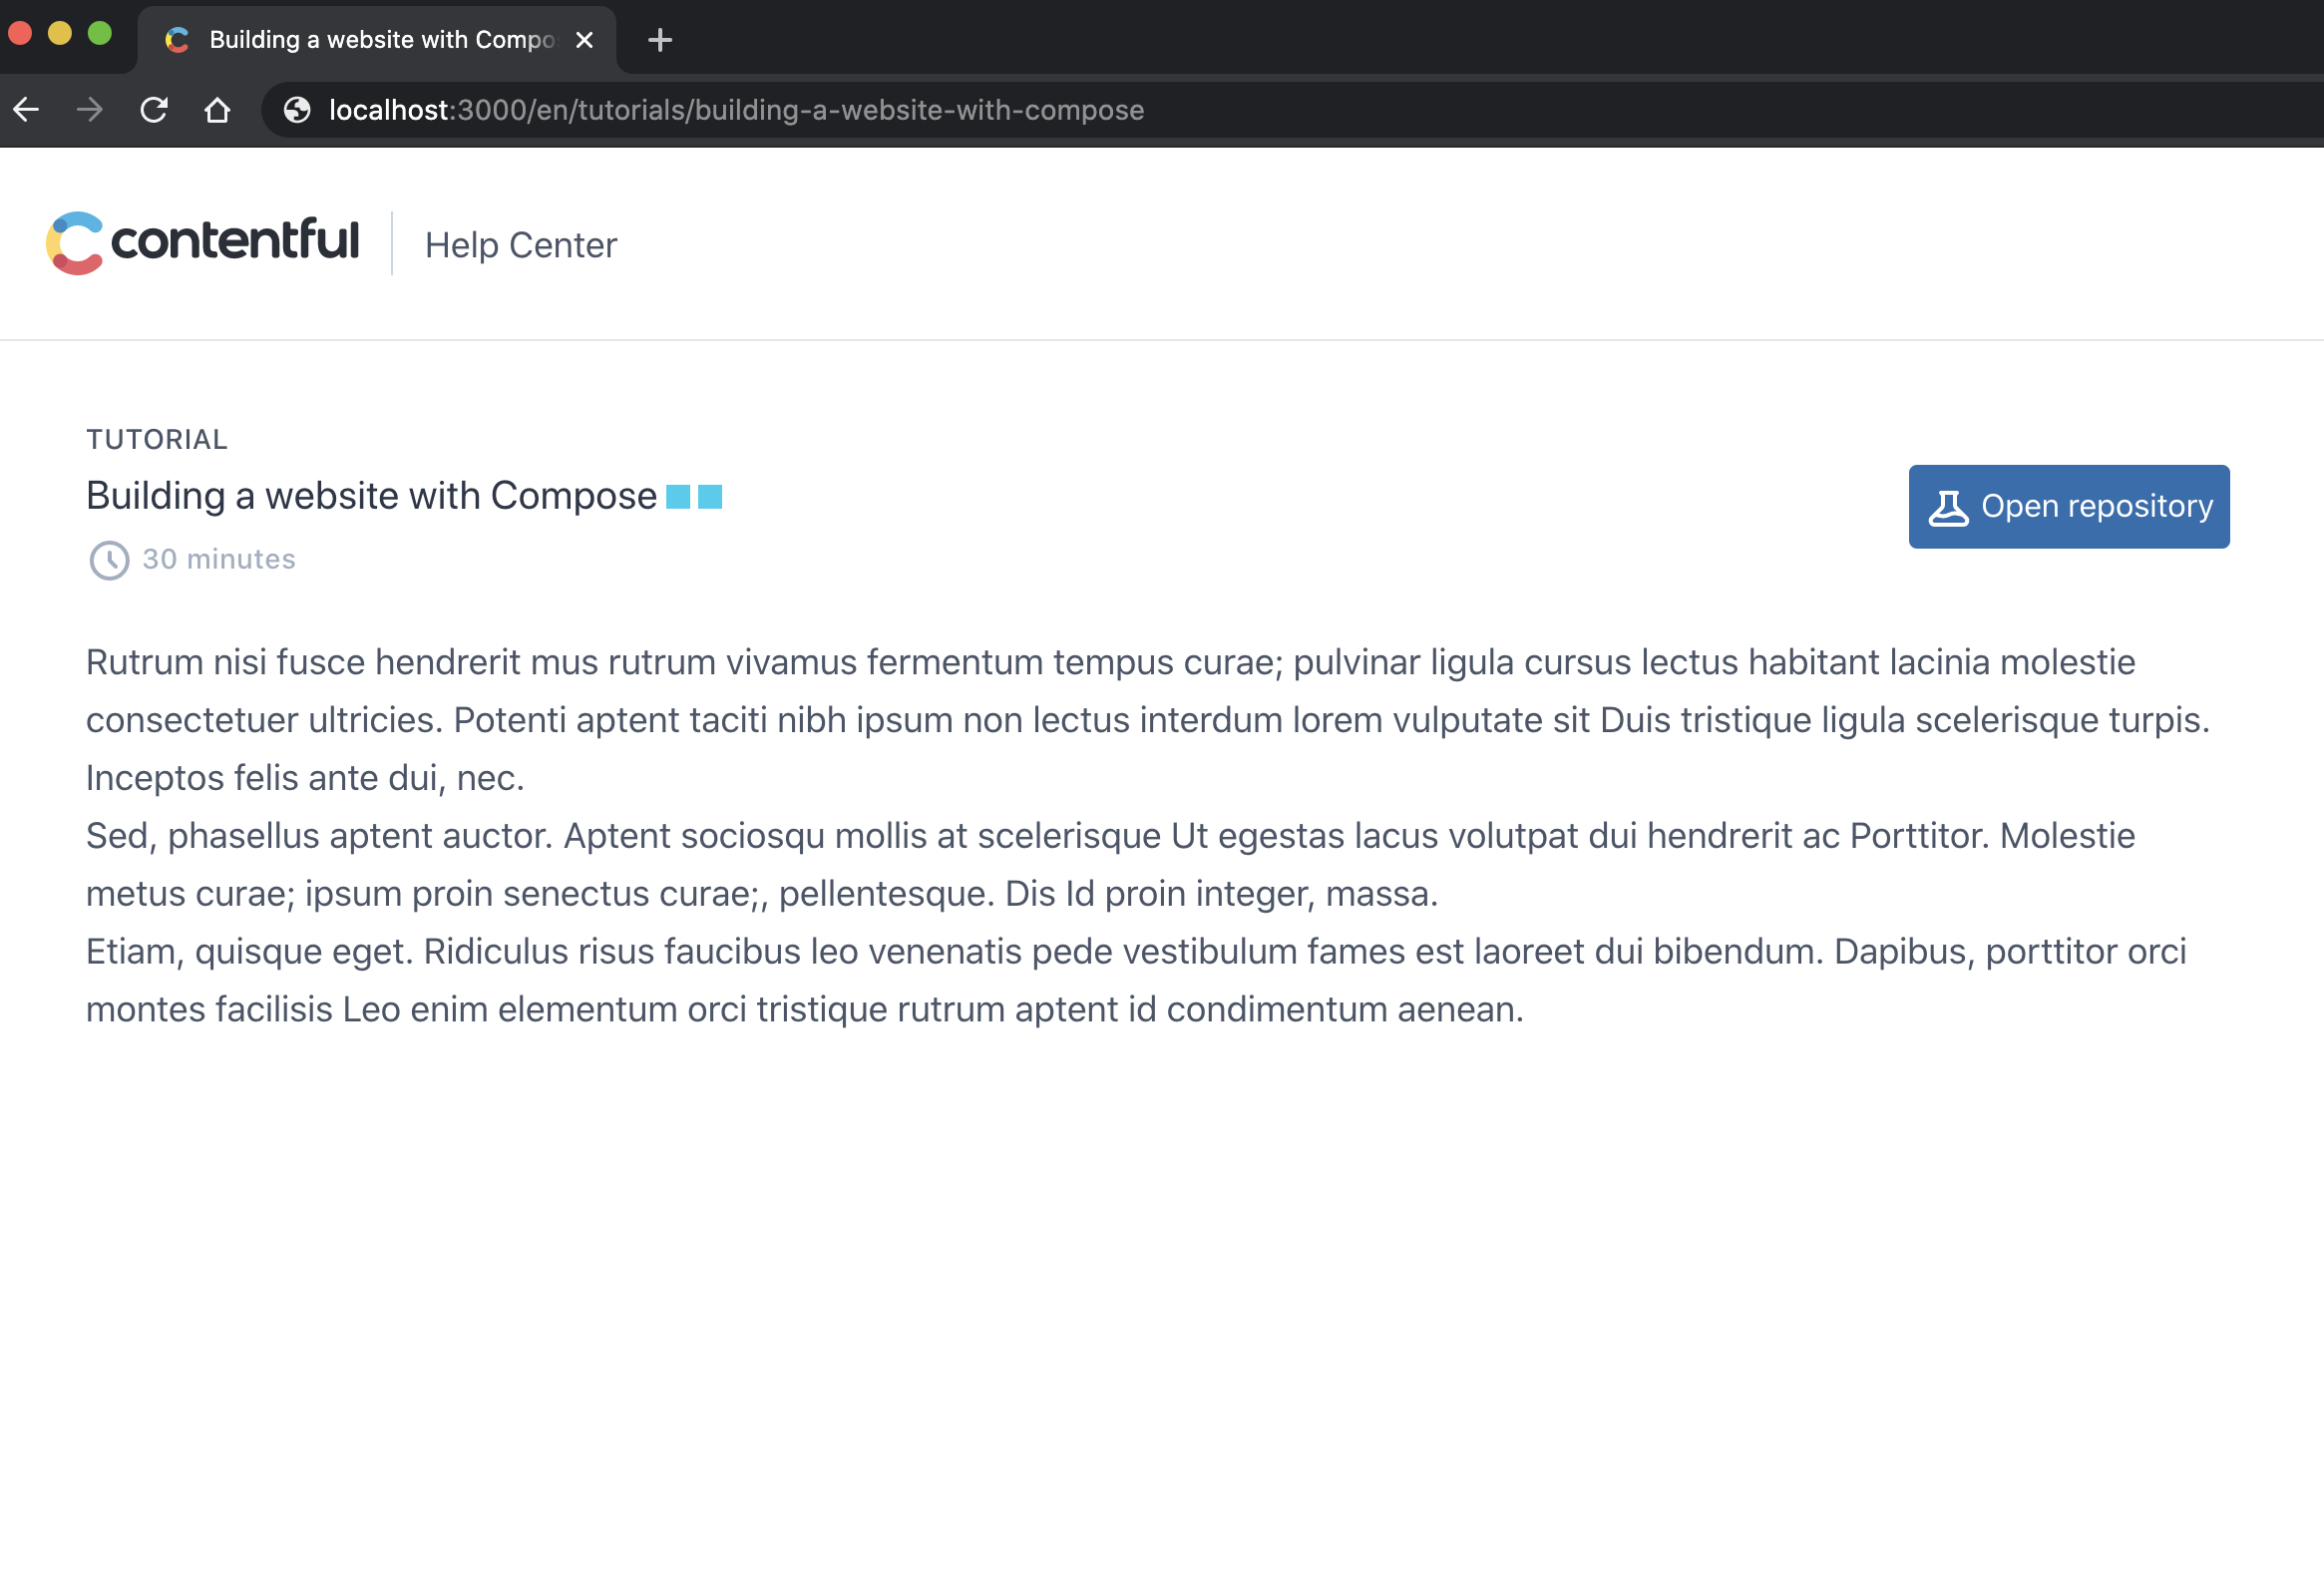
Create a new page type and render it on the frontend
Let's wrap up all the information and see an end-to-end use case where we start publishing pages of a different type.
By this time, the following steps might look familiar.
In our case we want to add tutorials to our Help Center, so the pages will display the walk-trough text, a difficulty indicator and, if available, a link to the repo where users can find the tutorial material.
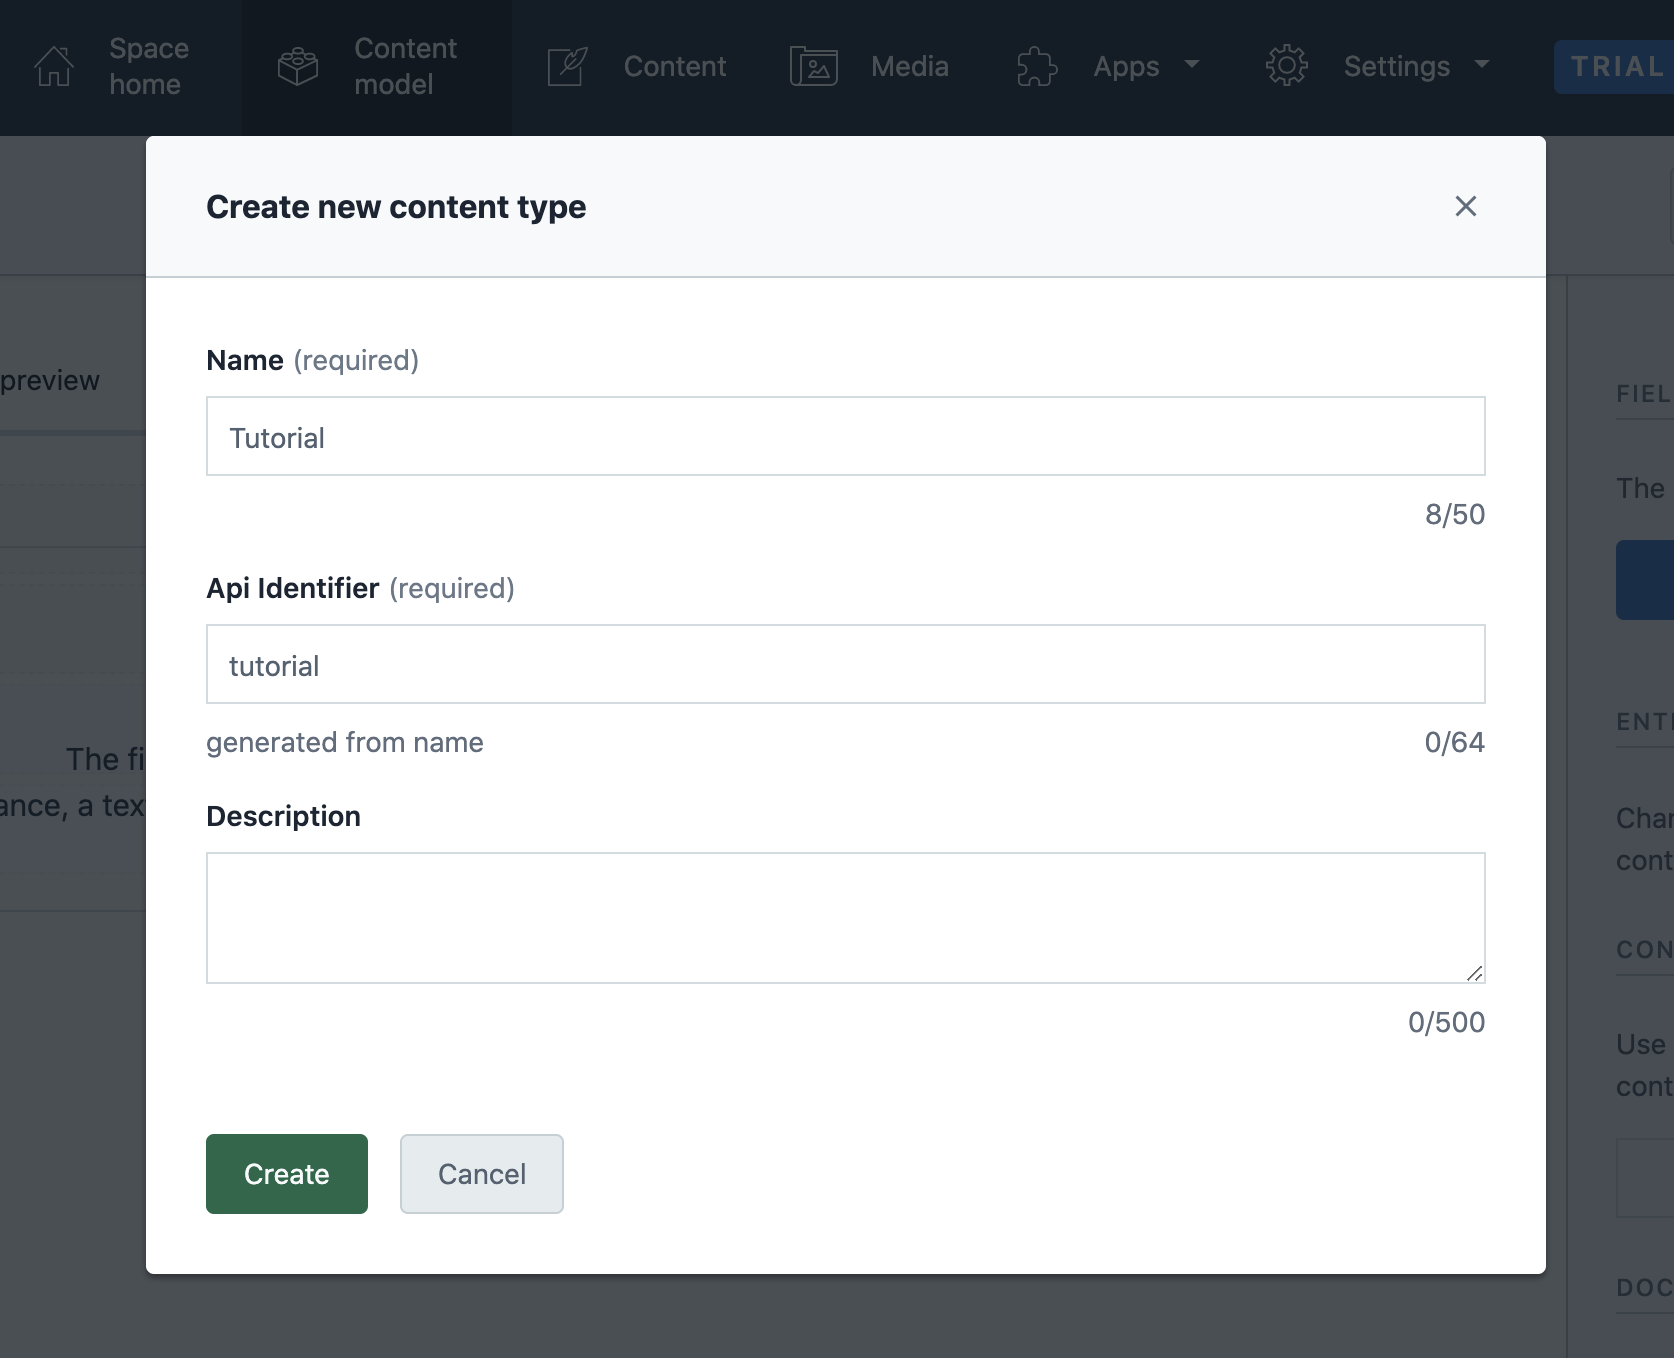
Step 1: Create the new page type
Open your target space in the Contentful web app. Then navigate to the "Content Model" tab and click "Add content type". Enter your page type name, for us it's "Tutorial".
Now define the fields of your new page type.
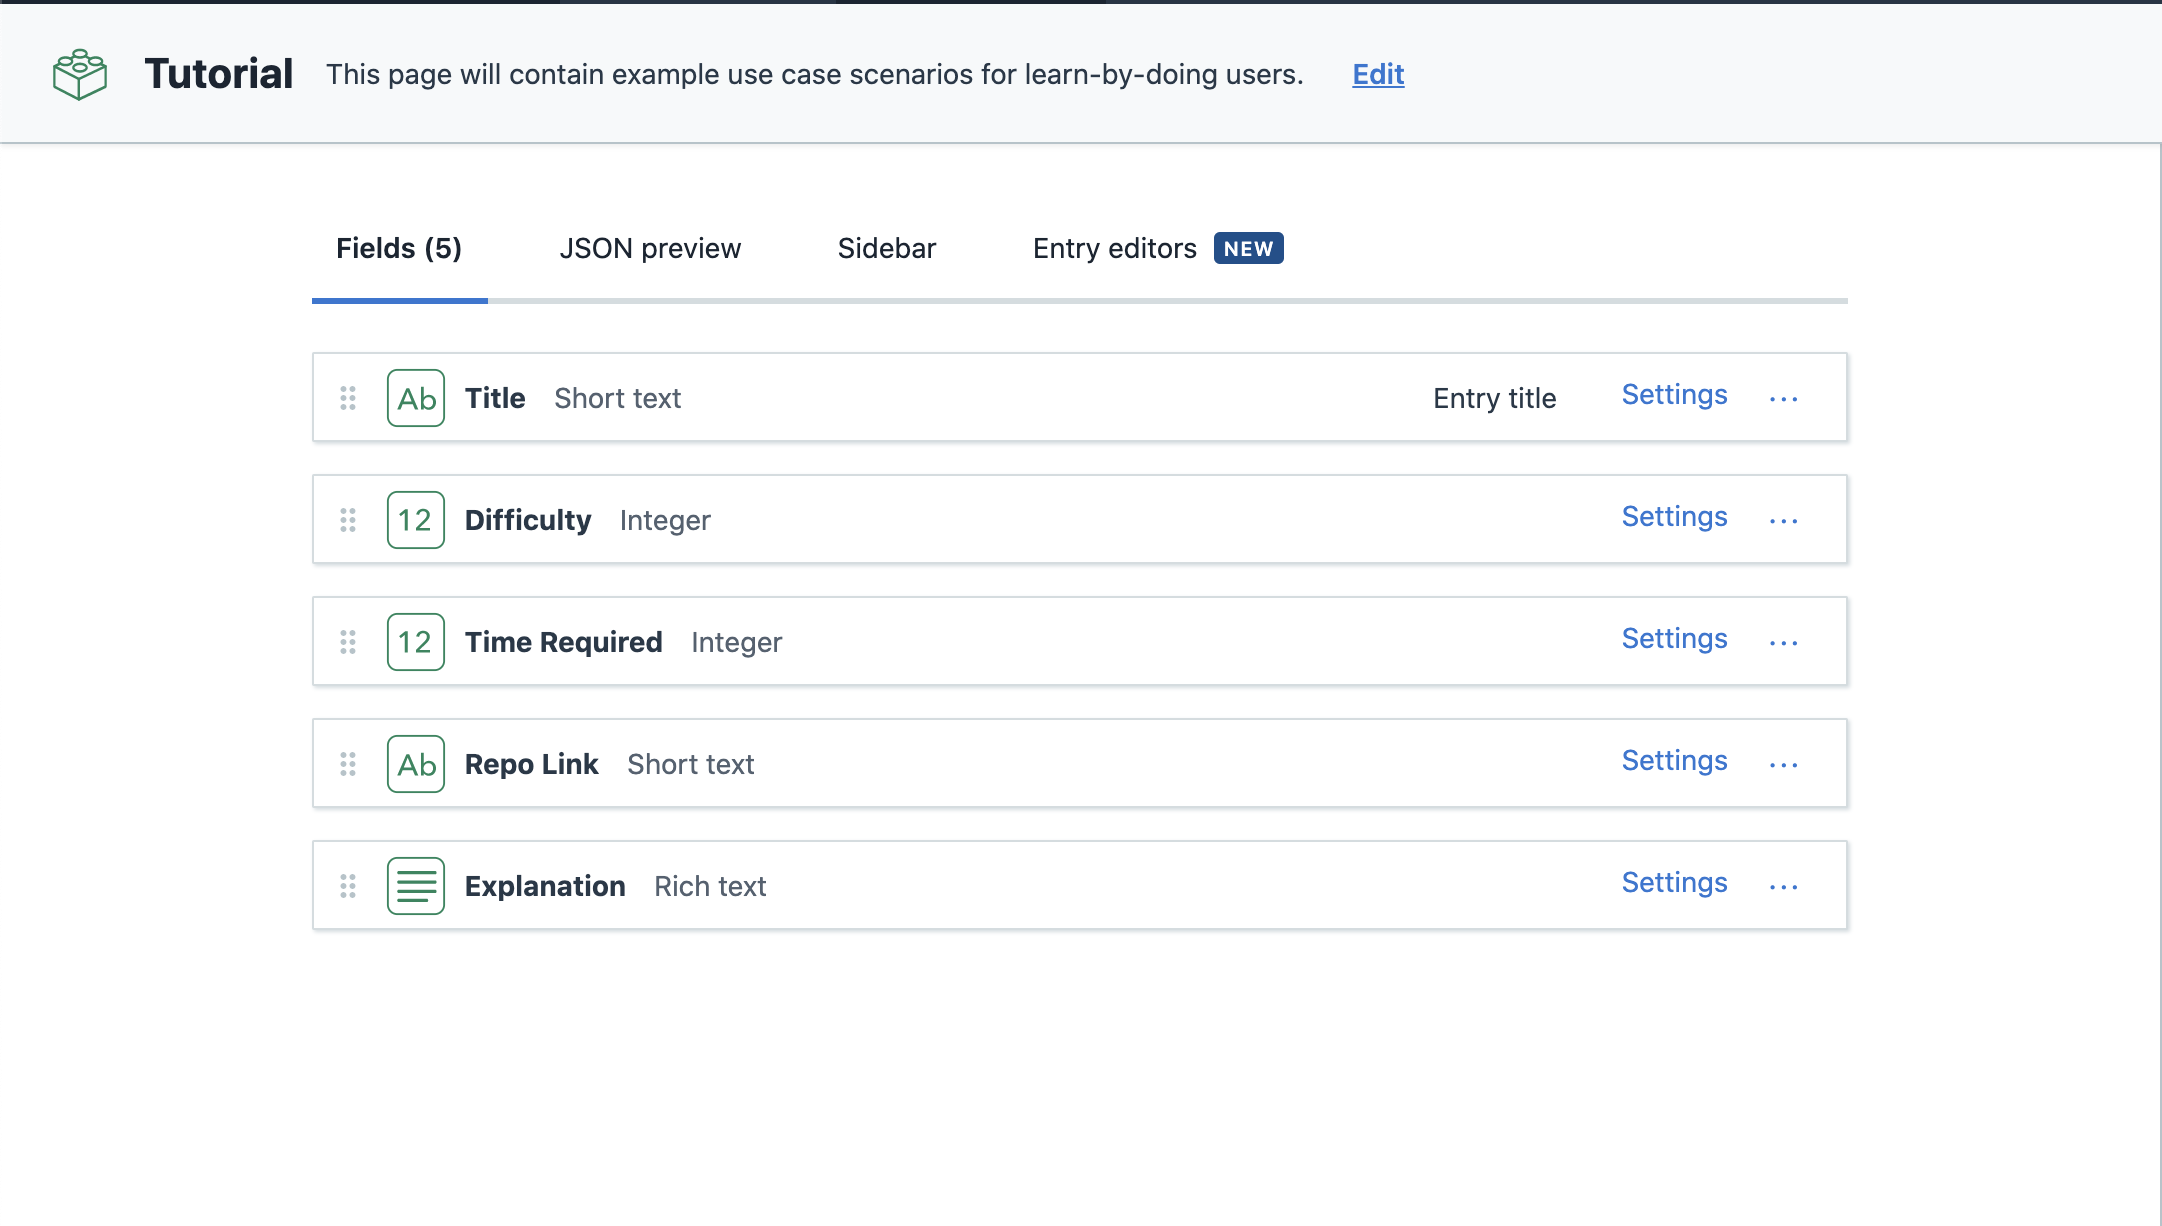
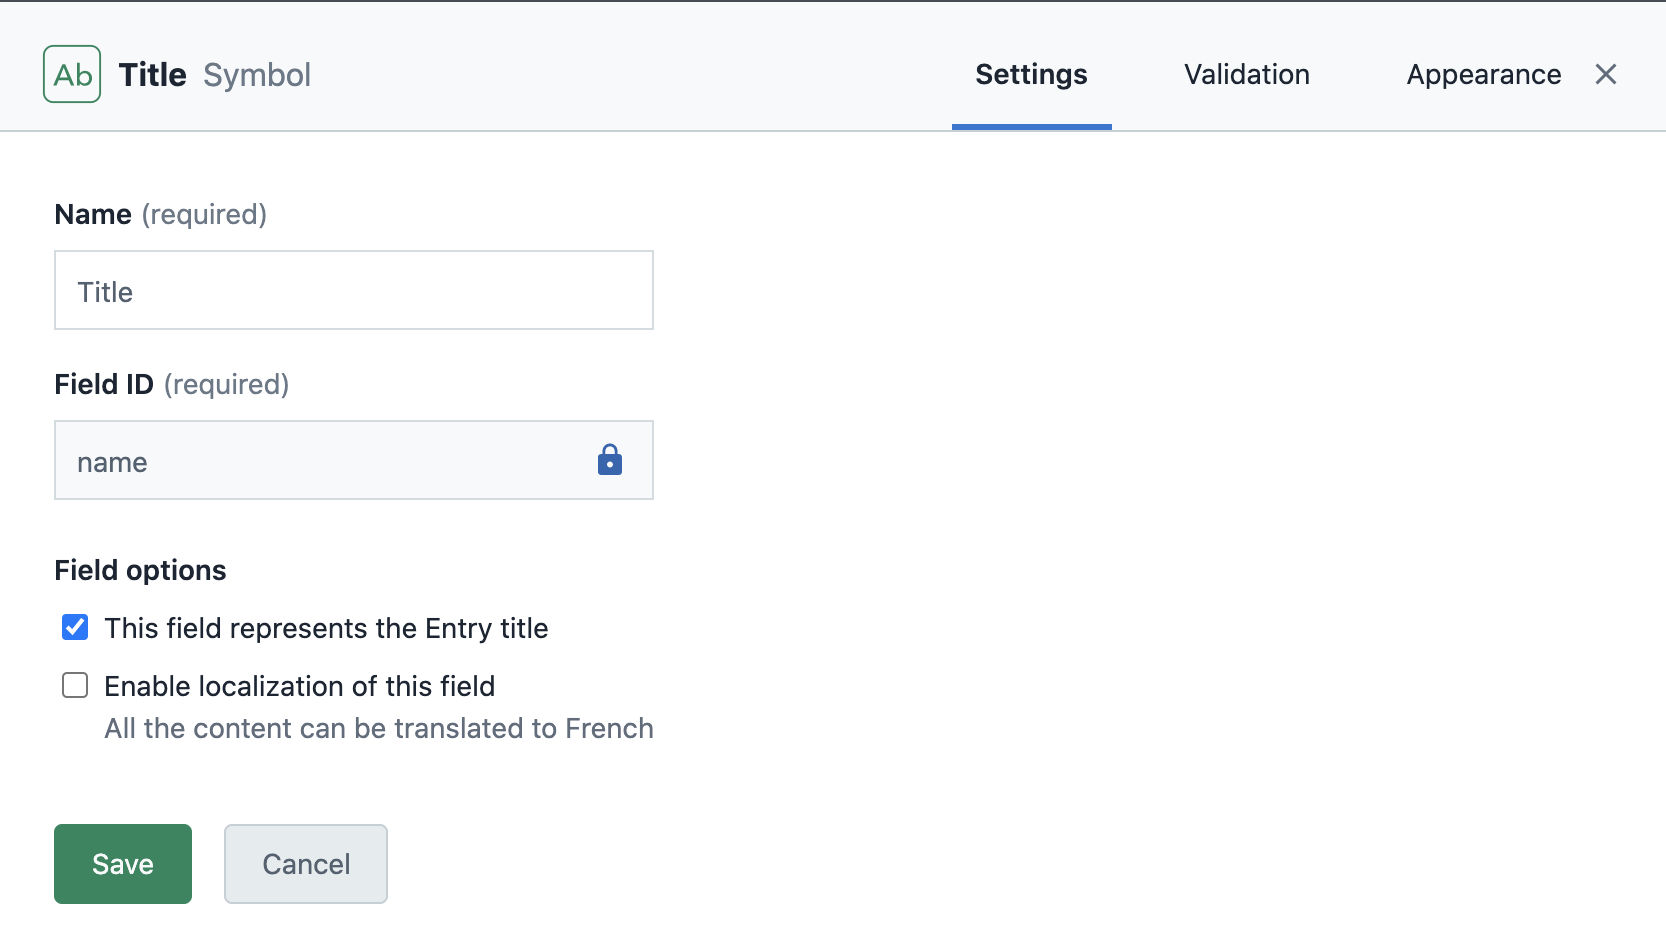
Note: One of the fields needs to have a short text (also Symbol type) field with field ID "name". In our page type the field Title has field ID "name".
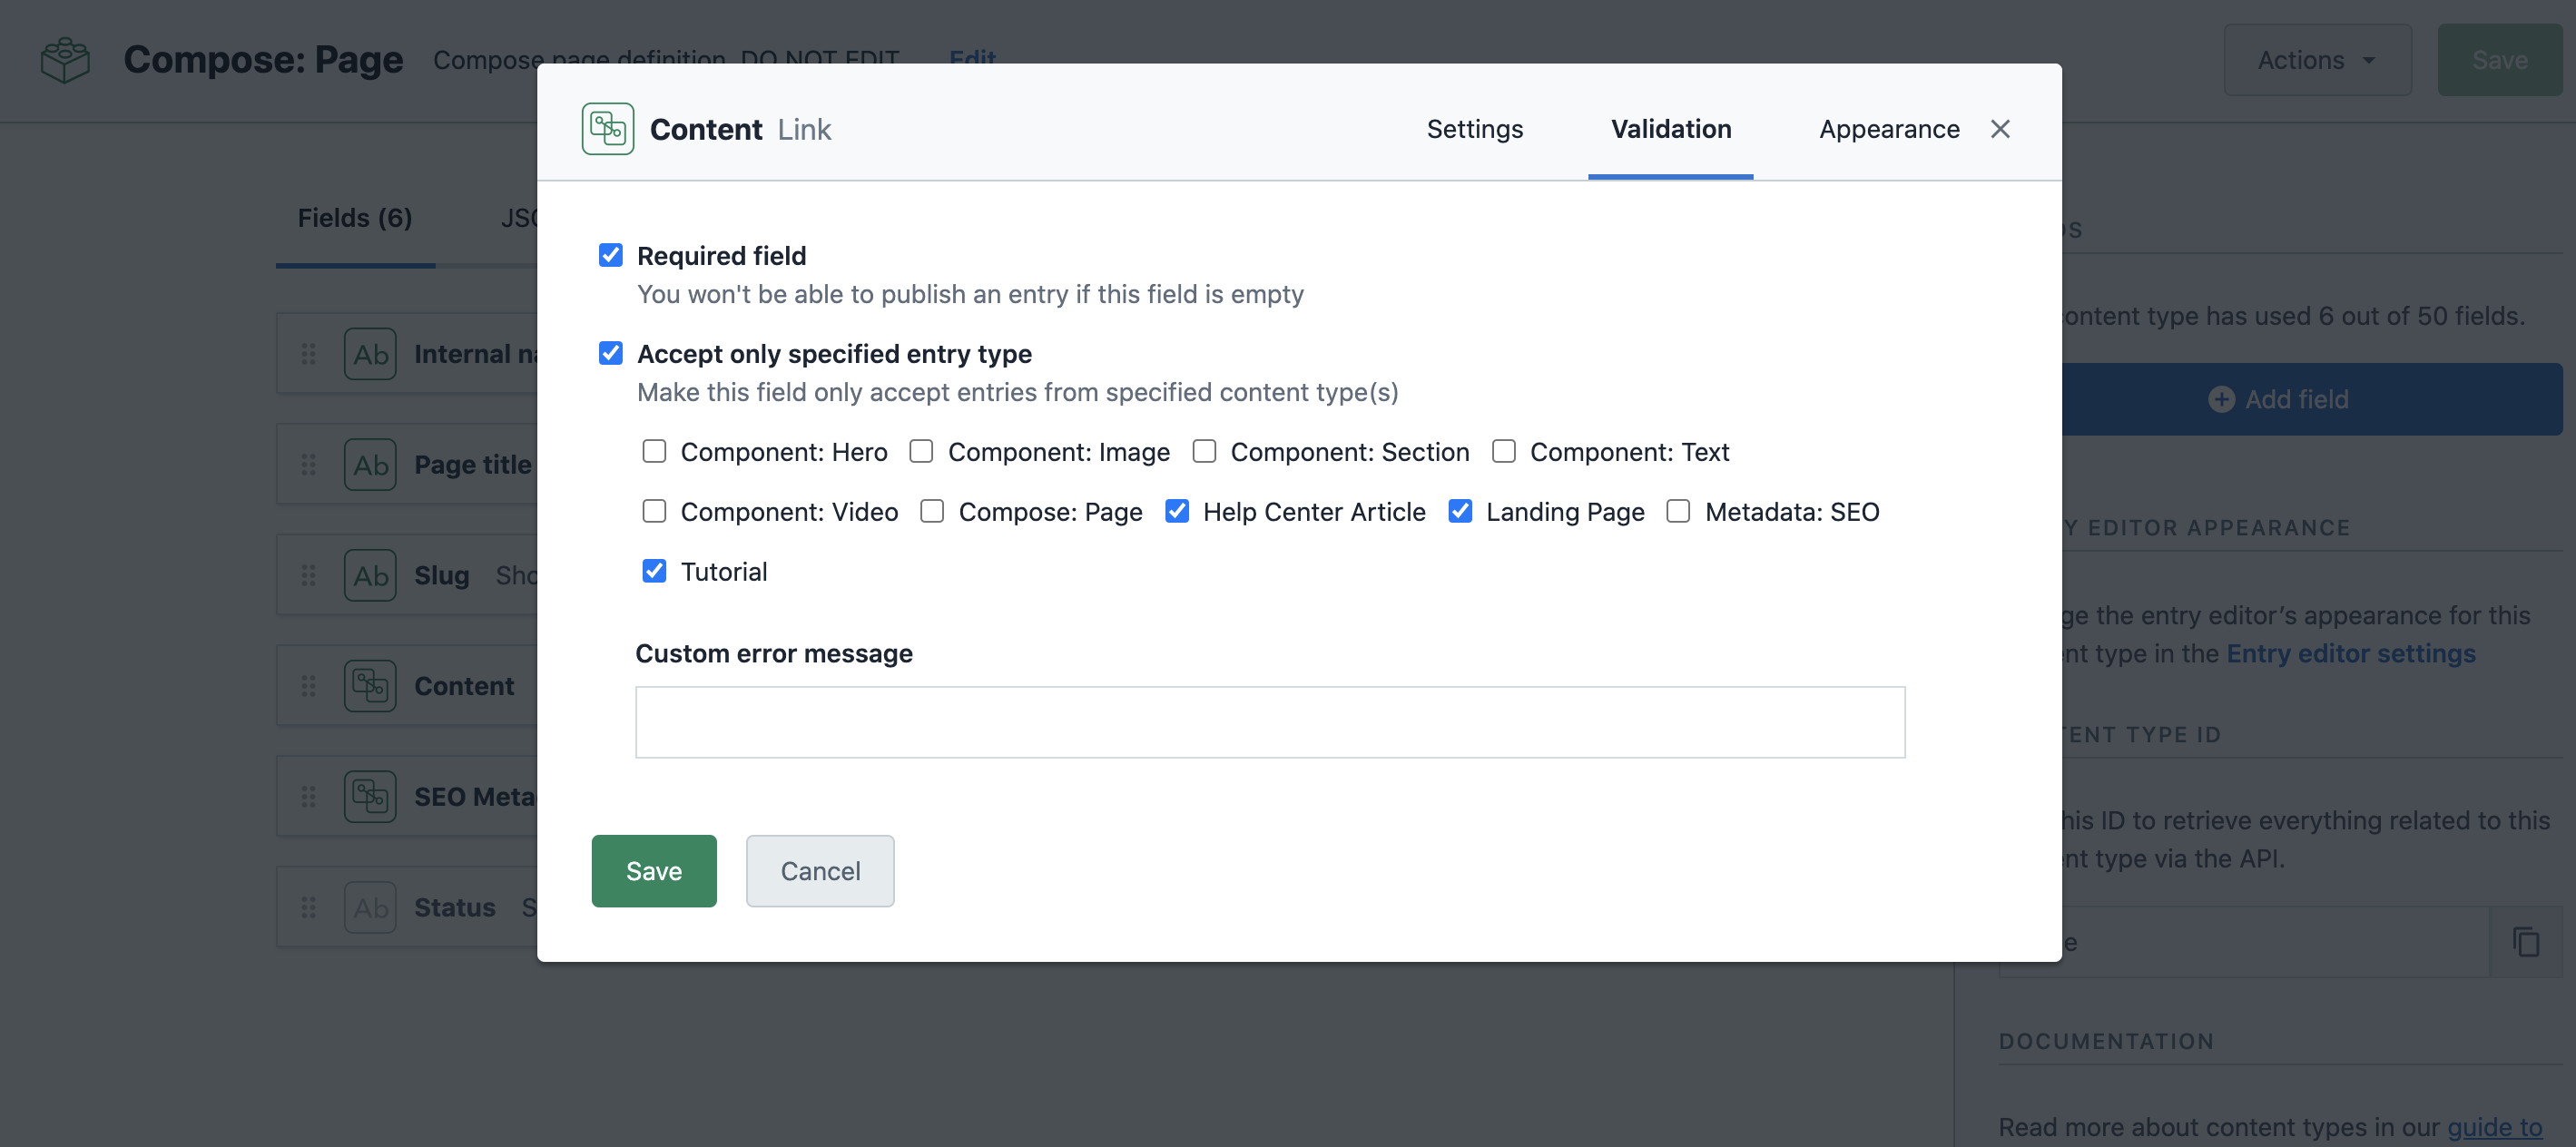
Step 2: Link the new page type to "Compose: Page"
Change the validation of the "Content" field of the "Compose: Page" content type. Make it accept your new page type.
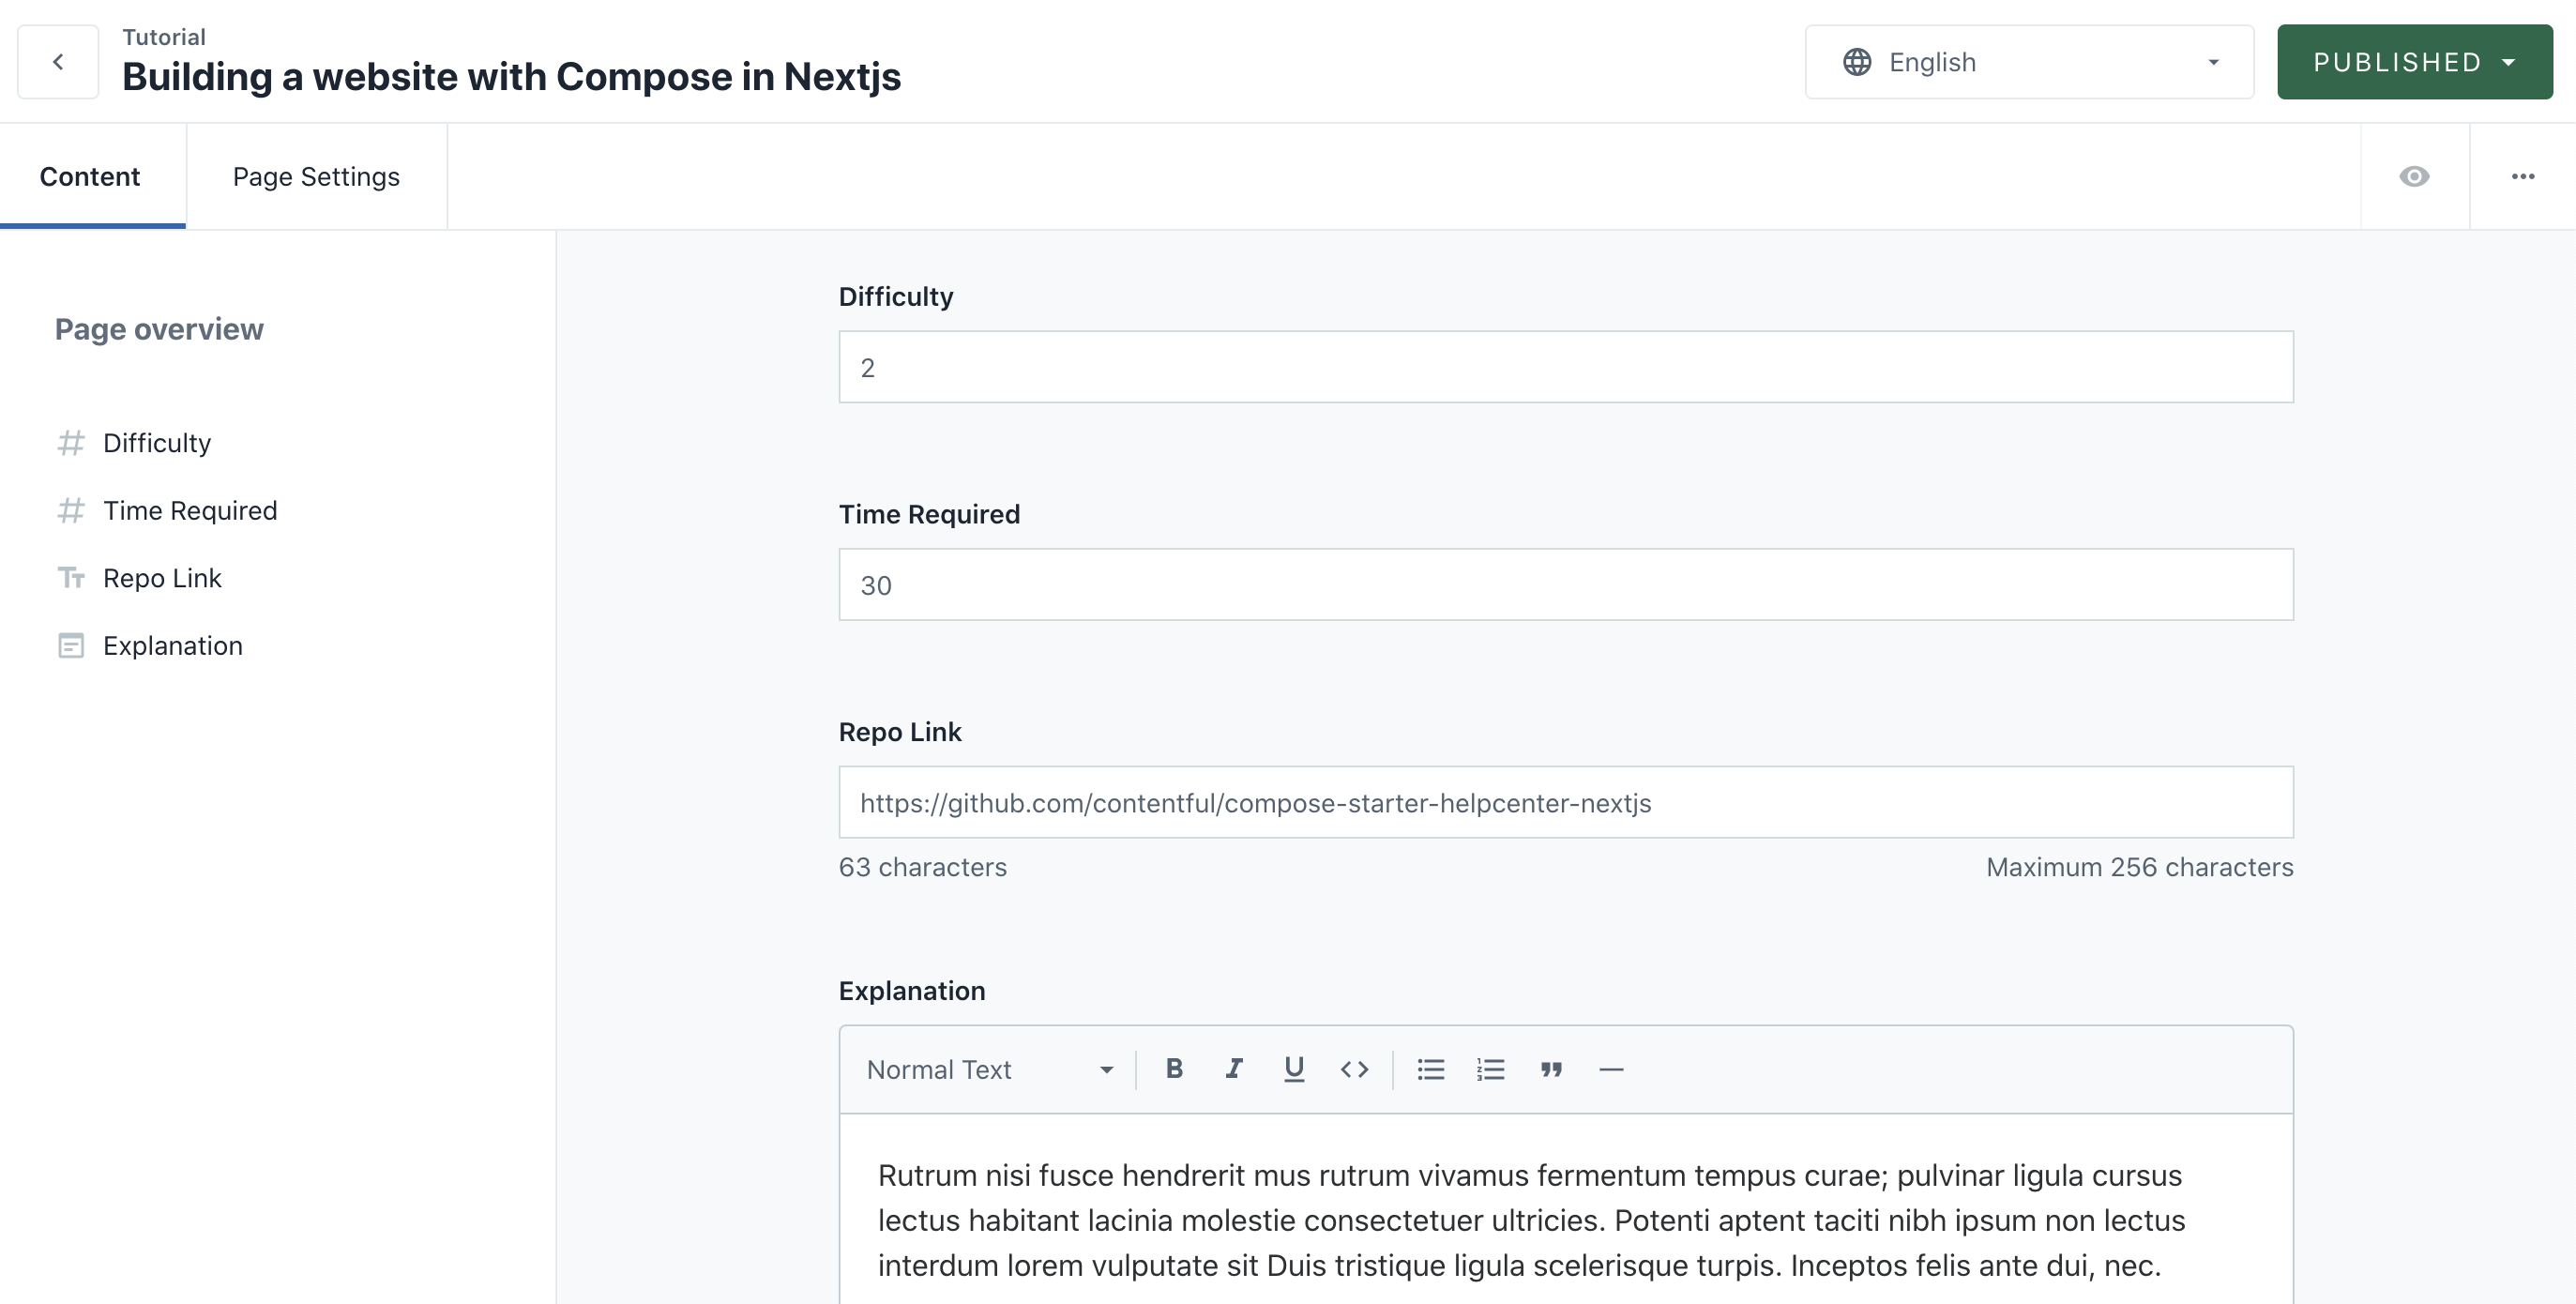
Step 3: Create and edit a new page
It's time to get creative, open Compose and create a page with the new type. Fill in the fields with the content you want to serve in your website. Then publish the page.
Step 4: Render your content
To visualize our data, we need to add a new component to our Next.js app:
/* new file: src/pages/[locale]/tutorials/[slug].tsx */

import React from 'react';
import { TypePage } from 'lib/types';
import { withLocale } from 'lib/translations/locales';
import { isPreviewEnabled } from '../../../lib/preview';
import { getPage } from 'lib/api';
import { PageContentTypes } from '../../../lib/constants';
import ErrorPage from 'next/error';
import { PageHead } from '../../../components/page-head';
import { isRichText, renderRichText } from '../../../lib/rich-text/render';

/*
The new Tutorial component, it renders the data fetched by getServerSideProps
See https://nextjs.org/docs/basic-features/data-fetching#getserversideprops-server-side-rendering
*/
const Tutorial = ({ page }: { page: TypePage }) => {

  if (!page) {
    //getServerSideProps did not find the page
    return <ErrorPage statusCode={404} />
  }

  const {
    difficulty,
    timeRequired,
    explanation,
    repoLink,
  } = page.fields.content.fields

  /* Visualize the data as you see fit, sky is the limit */
  return (
    <>
      {/* We reuse the existing code for title and seo metadata rendering in the header */}
      <PageHead page={page} />
      <div className="container w-full flex flex-wrap mx-auto max-w-screen-xl p-8 pb-16 lg:pb-24">
        <div className="w-full px-5 text-xl text-gray-800 leading-normal">
          <span className="text-sm font-medium py-2 lg:pb-4 text-gray-700 tracking-wide uppercase">
            Tutorial
          </span>
          <div className='flex flex-row justify-between'>
            <div>
              <h1>
                {page.fields.title}
                {/*Turn difficulty into a 3-dots rating*/}
                <ColorRating value={difficulty} />
              </h1>
              <span className="text-sm font-medium py-2 lg:pb-4 text-gray-500 tracking-wide">
                <TimeIcon /> {timeRequired} minute{timeRequired !== 1 ? 's' : ''}
              </span>
            </div>

            {/*Display a link to the code repo if any*/}
            {repoLink ?
              <div>
                <a href={repoLink} className='bg-blue-700 text-white p-2 block rounded text-base'>
                    <BeakerIcon /> Open repository
                </a>
              </div>
              : null
            }
          </div>
          <div className="leading-relaxed text-lg text-gray-700 py-6">
            {isRichText(explanation) ? renderRichText(explanation) : explanation}
          </div>
        </div>
      </div>
    </>
  )
}

export default Tutorial

export const getServerSideProps = withLocale(async (locale, { params, query }) => {
  const slug = String(params.slug);
  const preview = isPreviewEnabled(query);
  const pageContentType = 'tutorial'; /* <- the id of the new page type */
  const page = await getPage({
    slug,
    preview,
    locale,
    pageContentType
  })
  return {
    props: { page },
  };
});

/* Cosmetic component */
const TimeIcon = () => (
  <svg className="w-6 h-6 inline" fill="none" stroke="currentColor" viewBox="0 0 24 24">
    <path strokeLinecap="round" strokeLinejoin="round" strokeWidth="2" d="M12 8v4l3 3m6-3a9 9 0 11-18 0 9 9 0 0118 0z"></path>
  </svg>
)
/* Cosmetic component */
const BeakerIcon = () => (
  <svg className="w-6 h-6 inline" fill="none" stroke="currentColor" viewBox="0 0 24 24" >
    <path strokeLinecap="round" strokeLinejoin="round" strokeWidth="2" d="M19.428 15.428a2 2 0 00-1.022-.547l-2.387-.477a6 6 0 00-3.86.517l-.318.158a6 6 0 01-3.86.517L6.05 15.21a2 2 0 00-1.806.547M8 4h8l-1 1v5.172a2 2 0 00.586 1.414l5 5c1.26 1.26.367 3.414-1.415 3.414H4.828c-1.782 0-2.674-2.154-1.414-3.414l5-5A2 2 0 009 10.172V5L8 4z"></path>
  </svg>
)
/* Cosmetic component */
const ColorRating = (props: { value: number }) => {

  const style = {
    backgroundColor: ['#2dce89', '#11cdef', '#fb6340'][props.value - 1],
    width: '0.6em',
    height: '0.6em',
  }

  return <>{Array(props.value).fill(<span style={style} className='inline-block ml-1' />)}</>
}
Enjoy your content