Create and deploy content type changes
Goal of the tutorial
The goal of this tutorial is to instruct you on how to make changes to your content model and merge them to production using Contentful toolkit. The tutorial provides a step-by-step instruction, where each step can be accomplished using one of the following options:
- The developer's UI (Contentful web app and Merge app).
- Content Management API (CMA).
- Contentful CLI.
- Via a CI/CD pipeline — for details, refer to Continuous Integration Tutorial.
Prerequisites
Tools and accesses
- Contentful account.
- To work with Merge app — Merge app installed.
- To work with CMA – access to CMA.
- To work with Contentful CLI — locally installed Contentful CLI and authentication with Contentful CLI.
Setups
In your space, set up a master alias and target it to the environment that serves production content.
Knowledge
- Familiarity with environments and environment aliases.
- Familiarity with content modeling.
Training course
Take the training course in our Learning Center to learn how to deploy and roll back changes using the environment aliases: Making risk-free releases and instant rollbacks.
Set up environments and make changes
The process of creating changes to your content model and deploying them to production is accomplished with the following major steps:
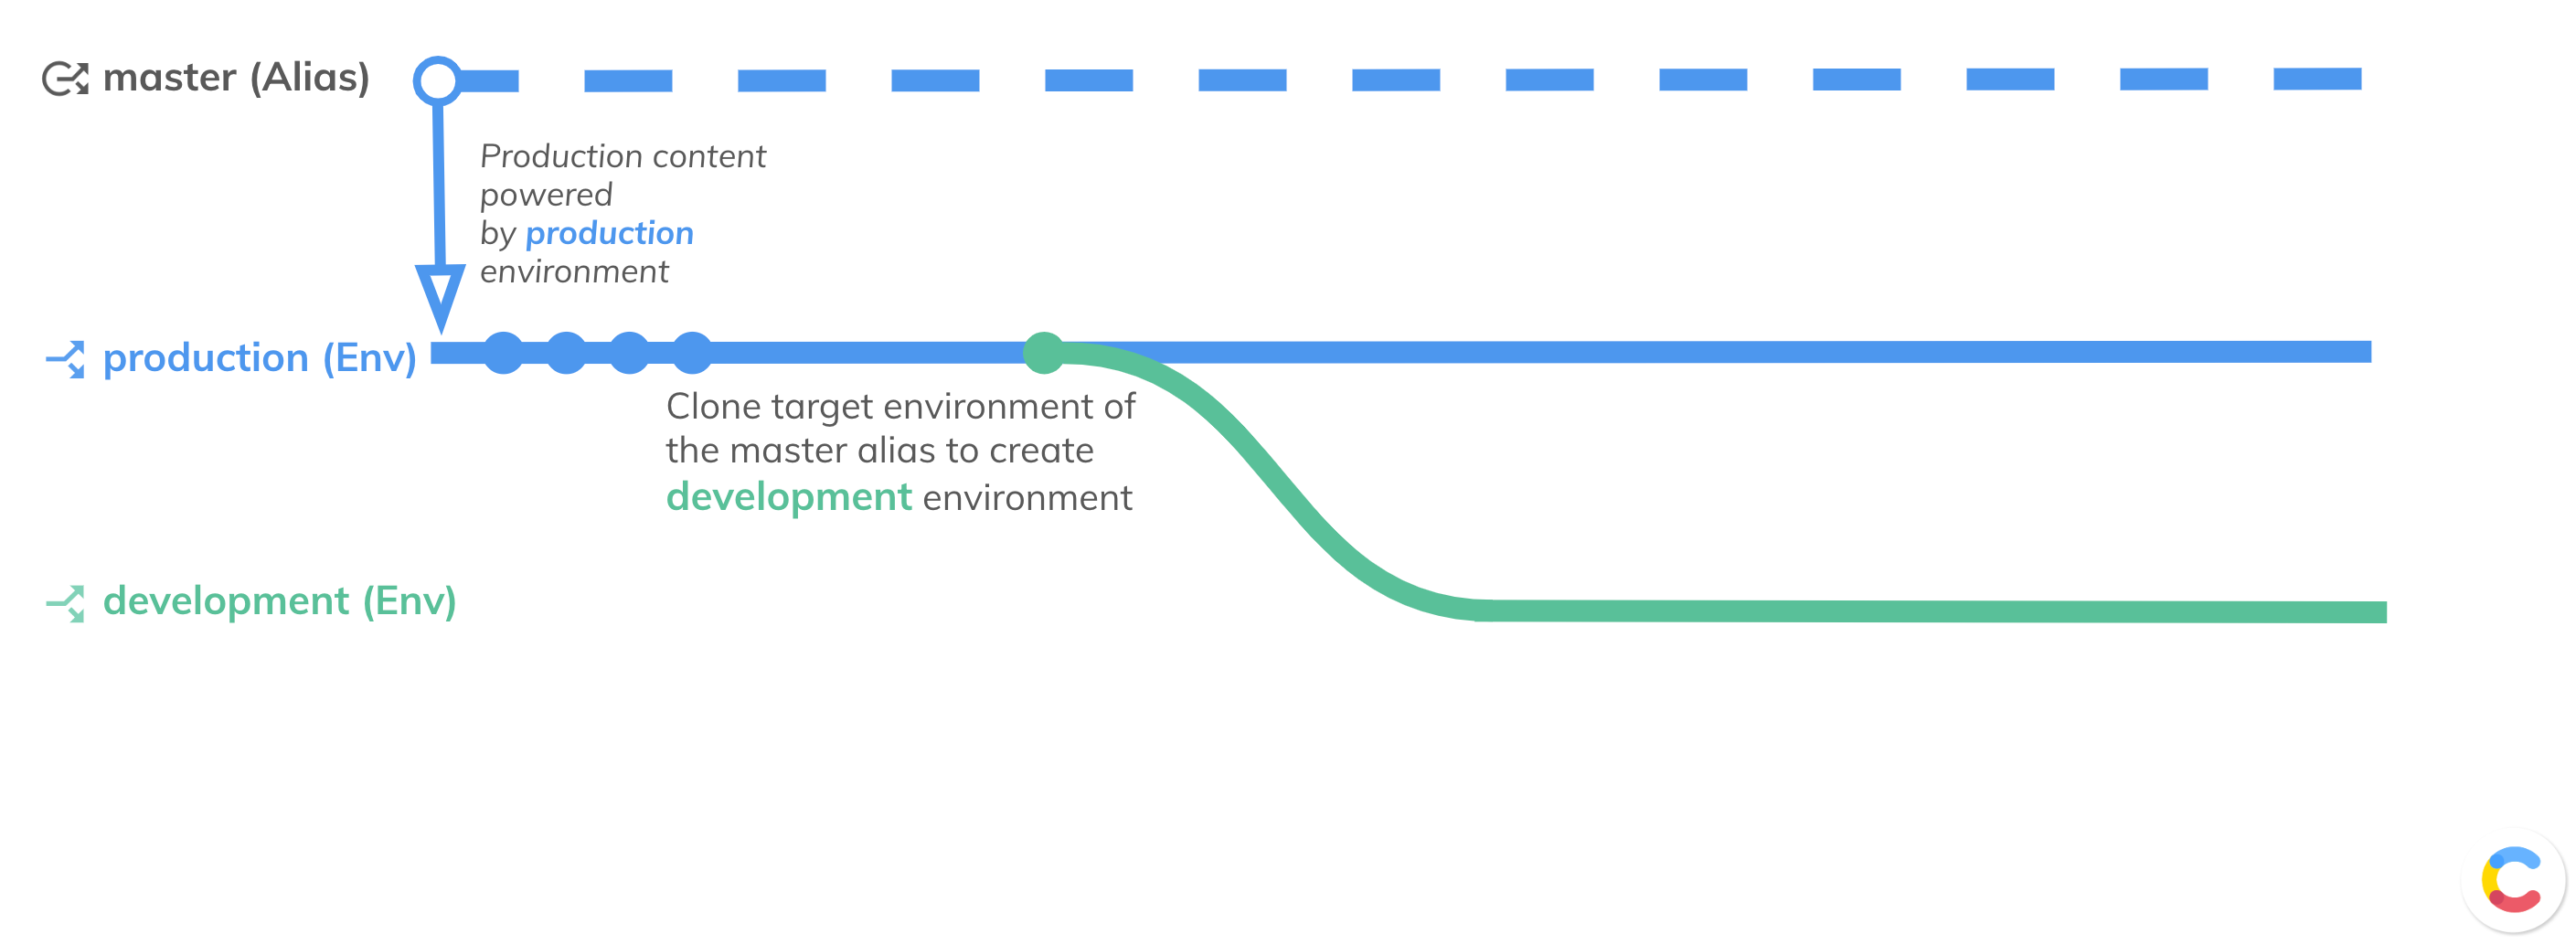
1. Set up a development environment.
Create an environment to be used specifically for development. To create a development environment, clone the target environment of the master alias so you can make and test changes with a latest copy of production data.
You can create an environment according to one of the following options:
- Recommended: Using UI in the “Environments” page of the Contentful web app.
- Recommended for CI pipelines: Set up your CI to spin up a new environment.
- By sending a request to CMA.
- By running a command in the Contentful CLI.
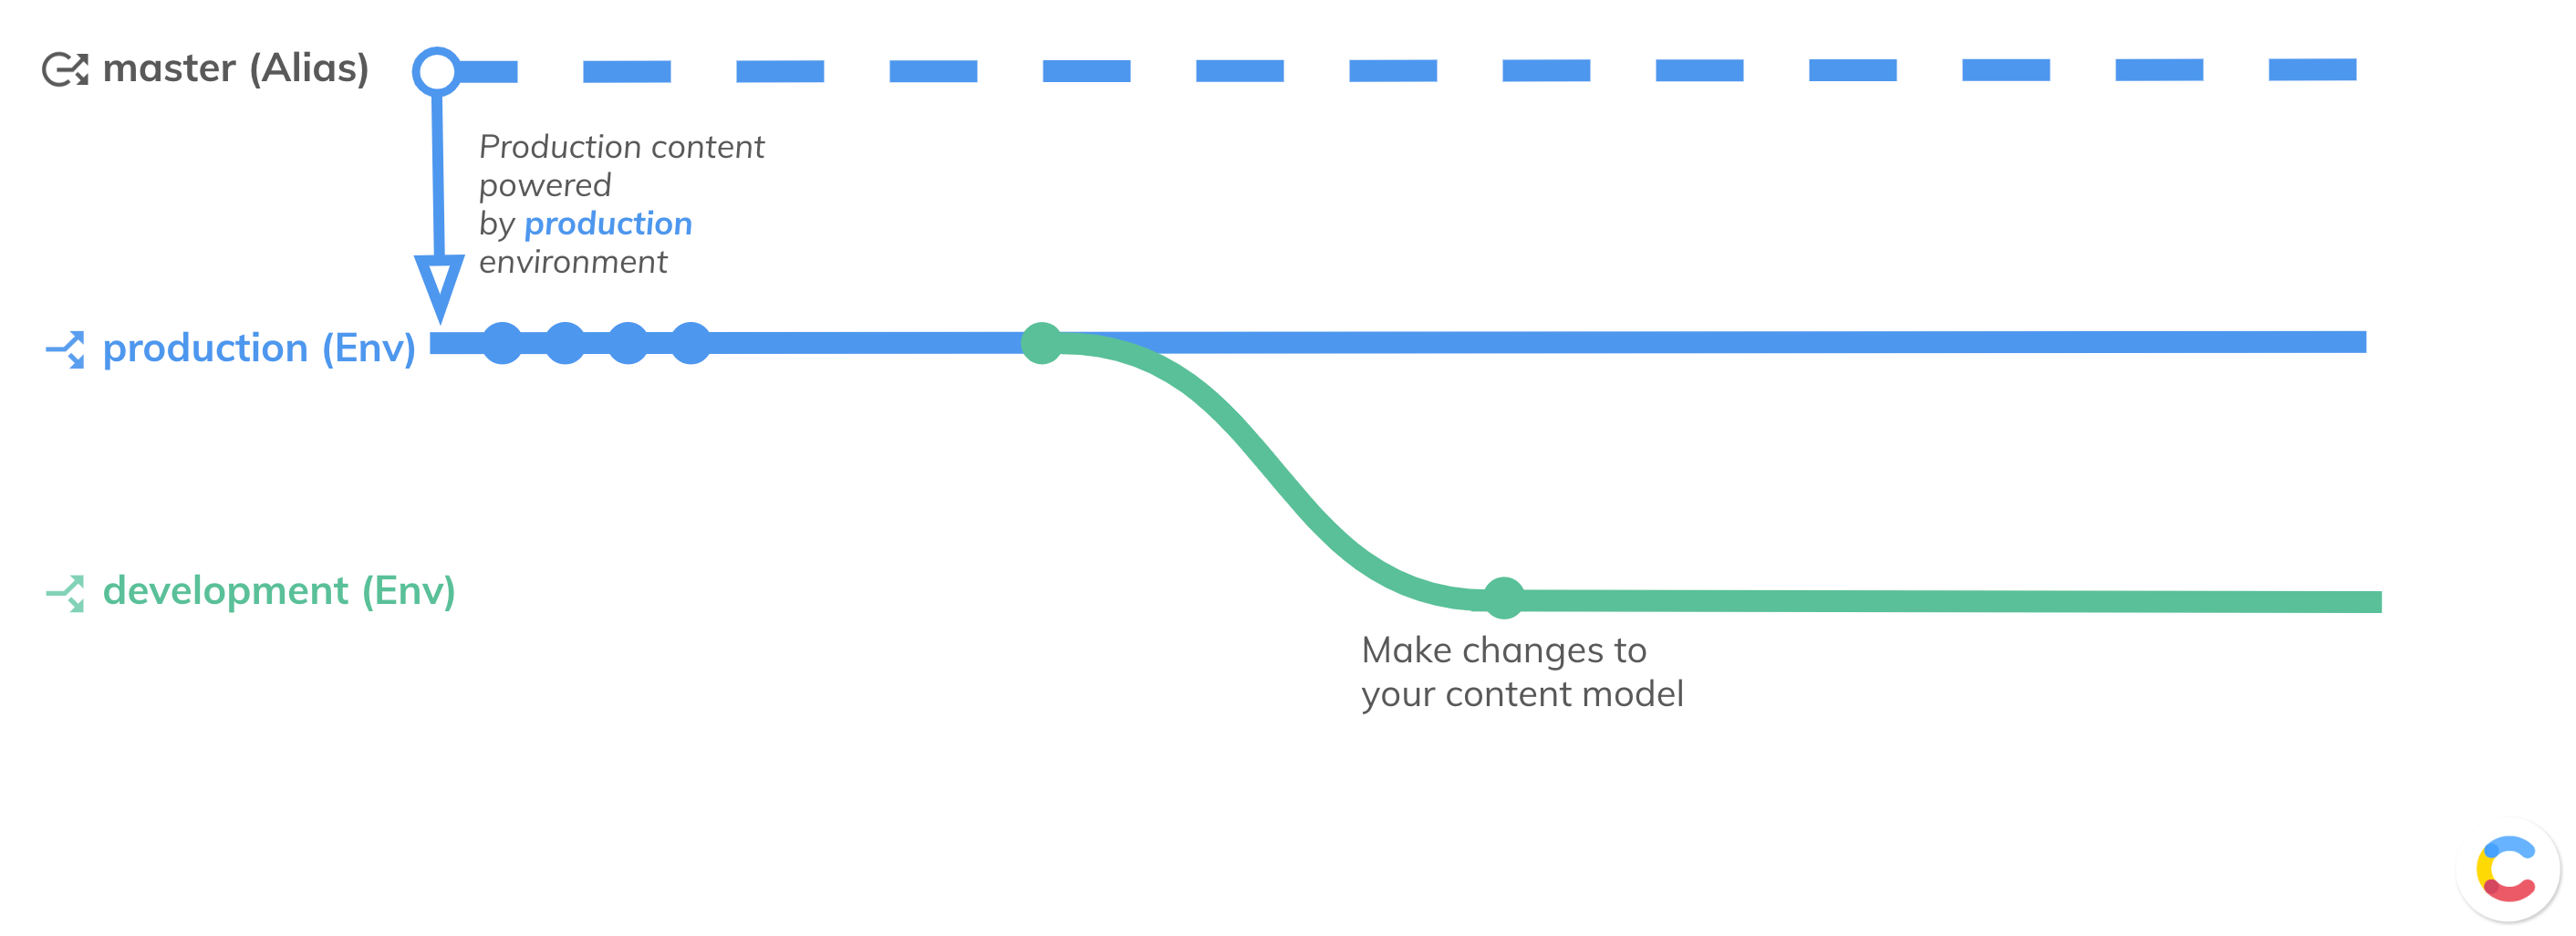
2. Make changes to the content model.
Go to your content model and make the necessary changes. You can set up new content types or edit the existing ones by adding or removing fields or changing the existing fields settings.
Learn how to create a new content type or update an existing one:
- Recommended: In the “Content model” page of the Contentful web app.
- By sending a request to CMA.
- By scripting the changes using the Contentful CLI.
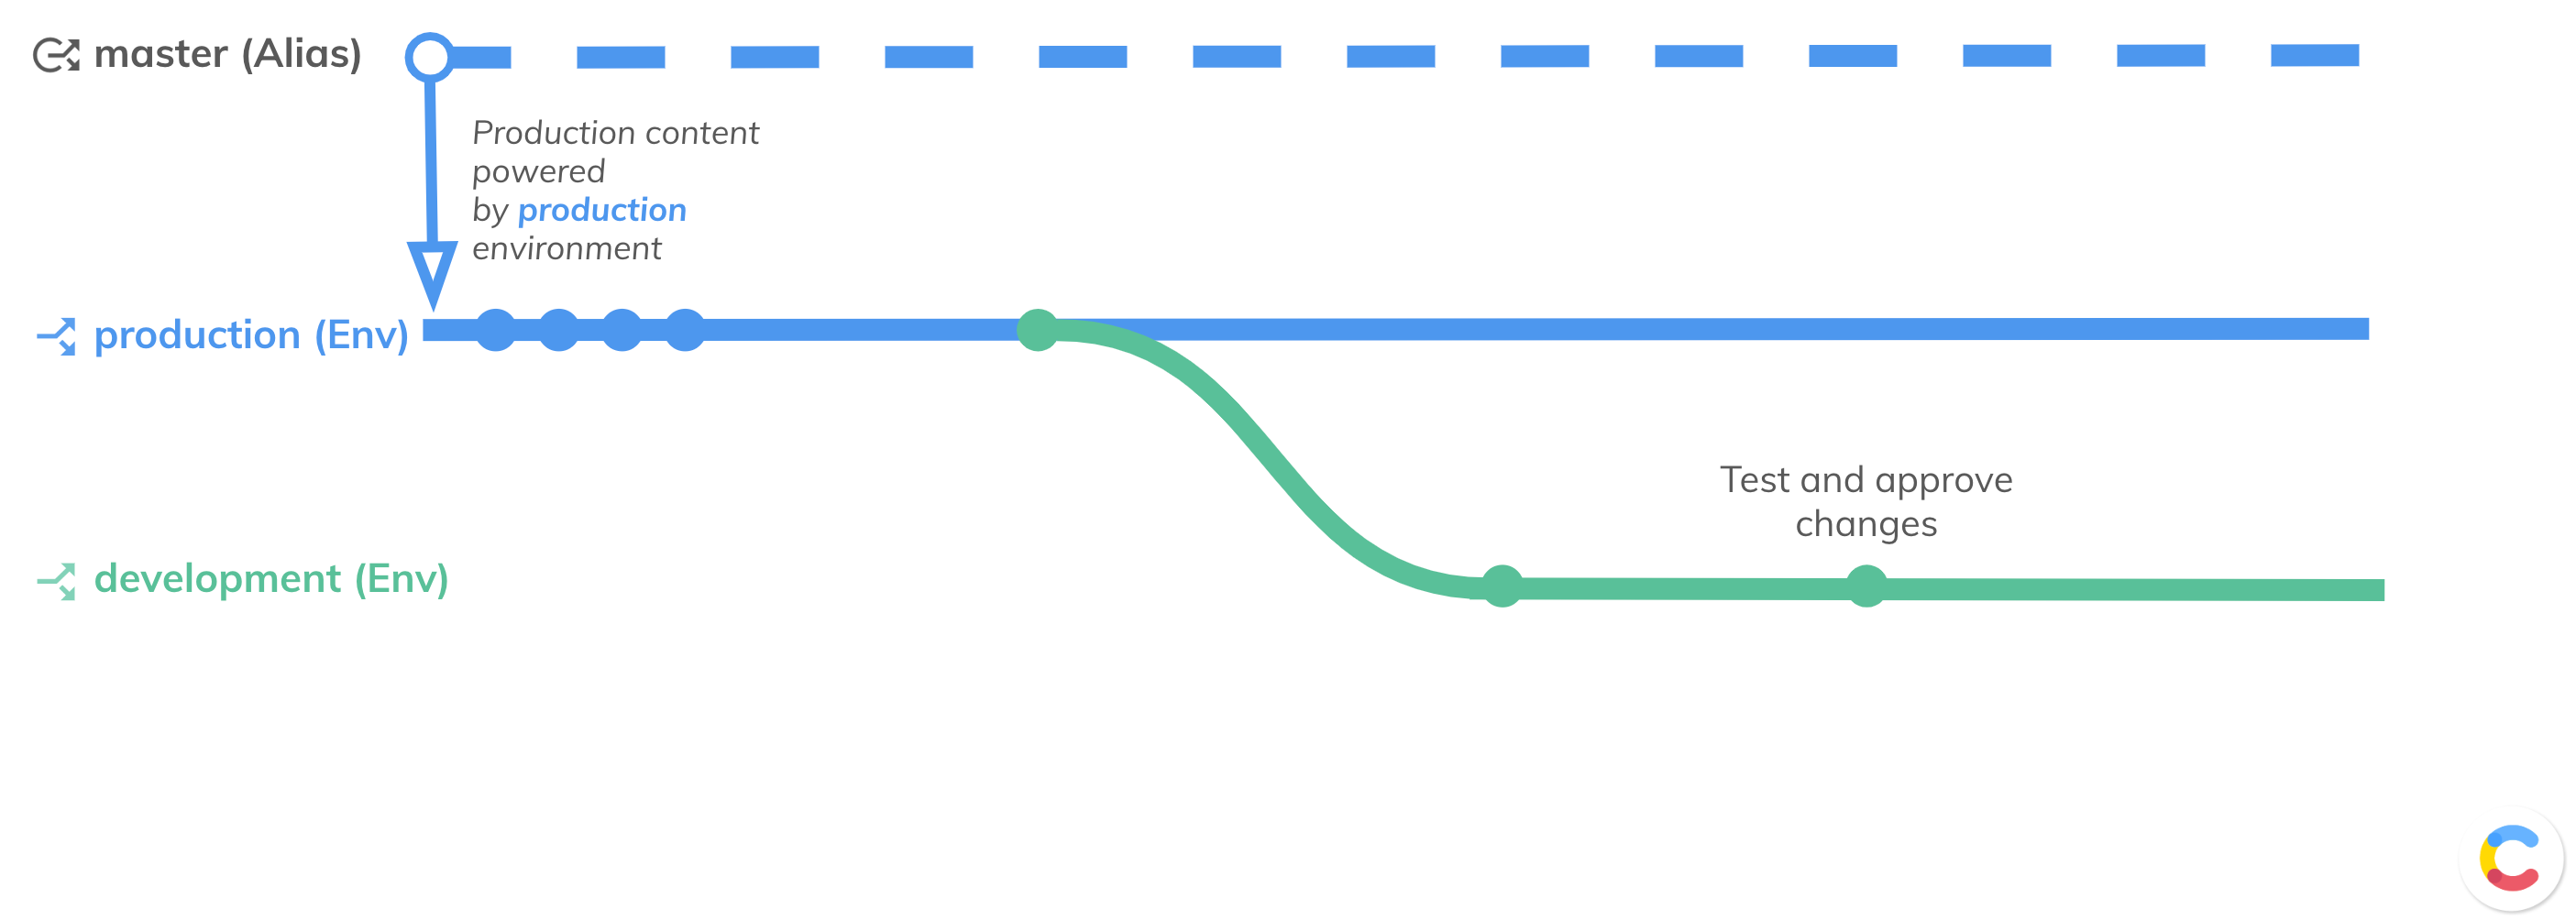
3. Test content model changes.
Test your changes to make sure everything works as expected:
- Manually — Test changes manually in the web app.
- Run automation tests — If you work with automated deployment pipelines, verify your changes by running predefined tests.
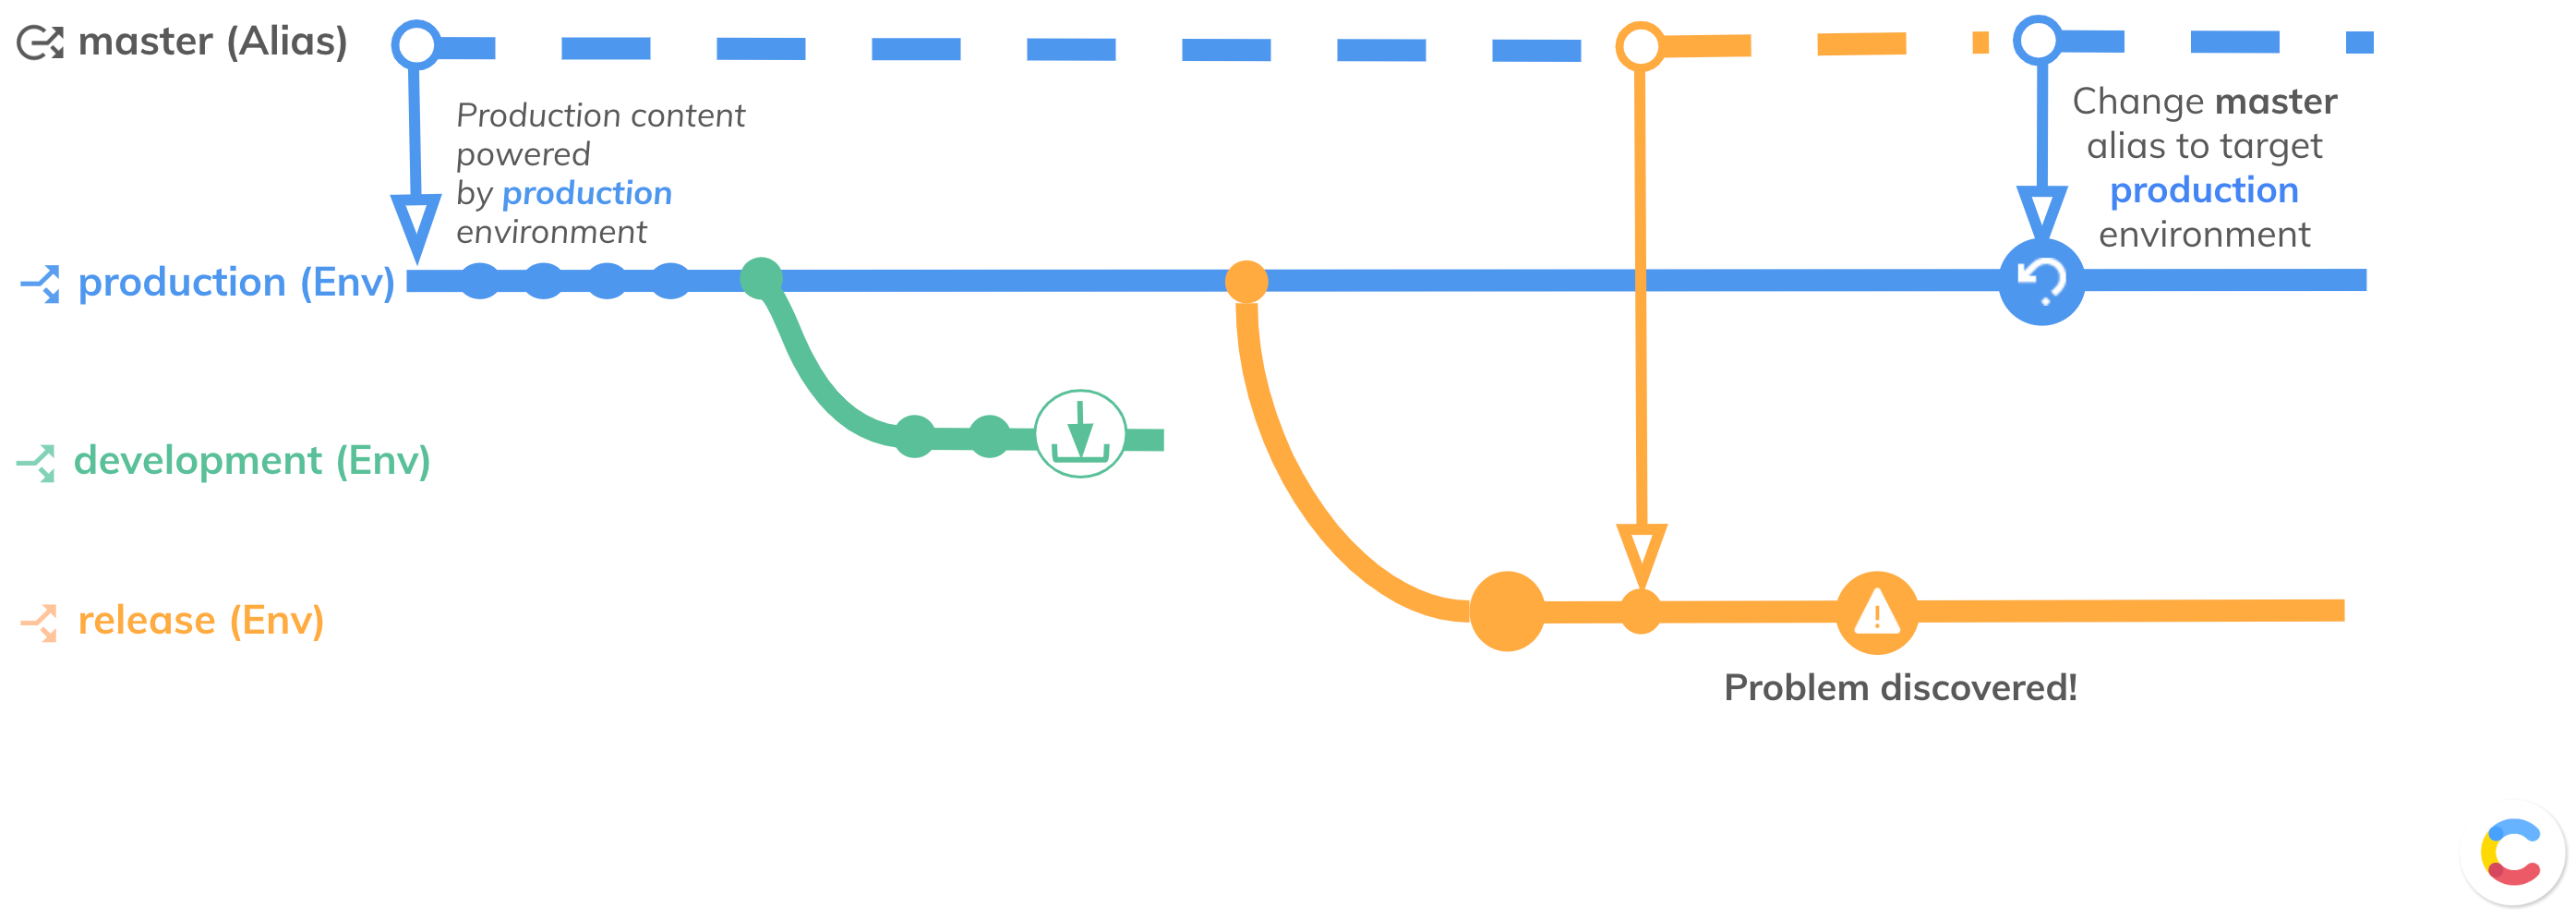
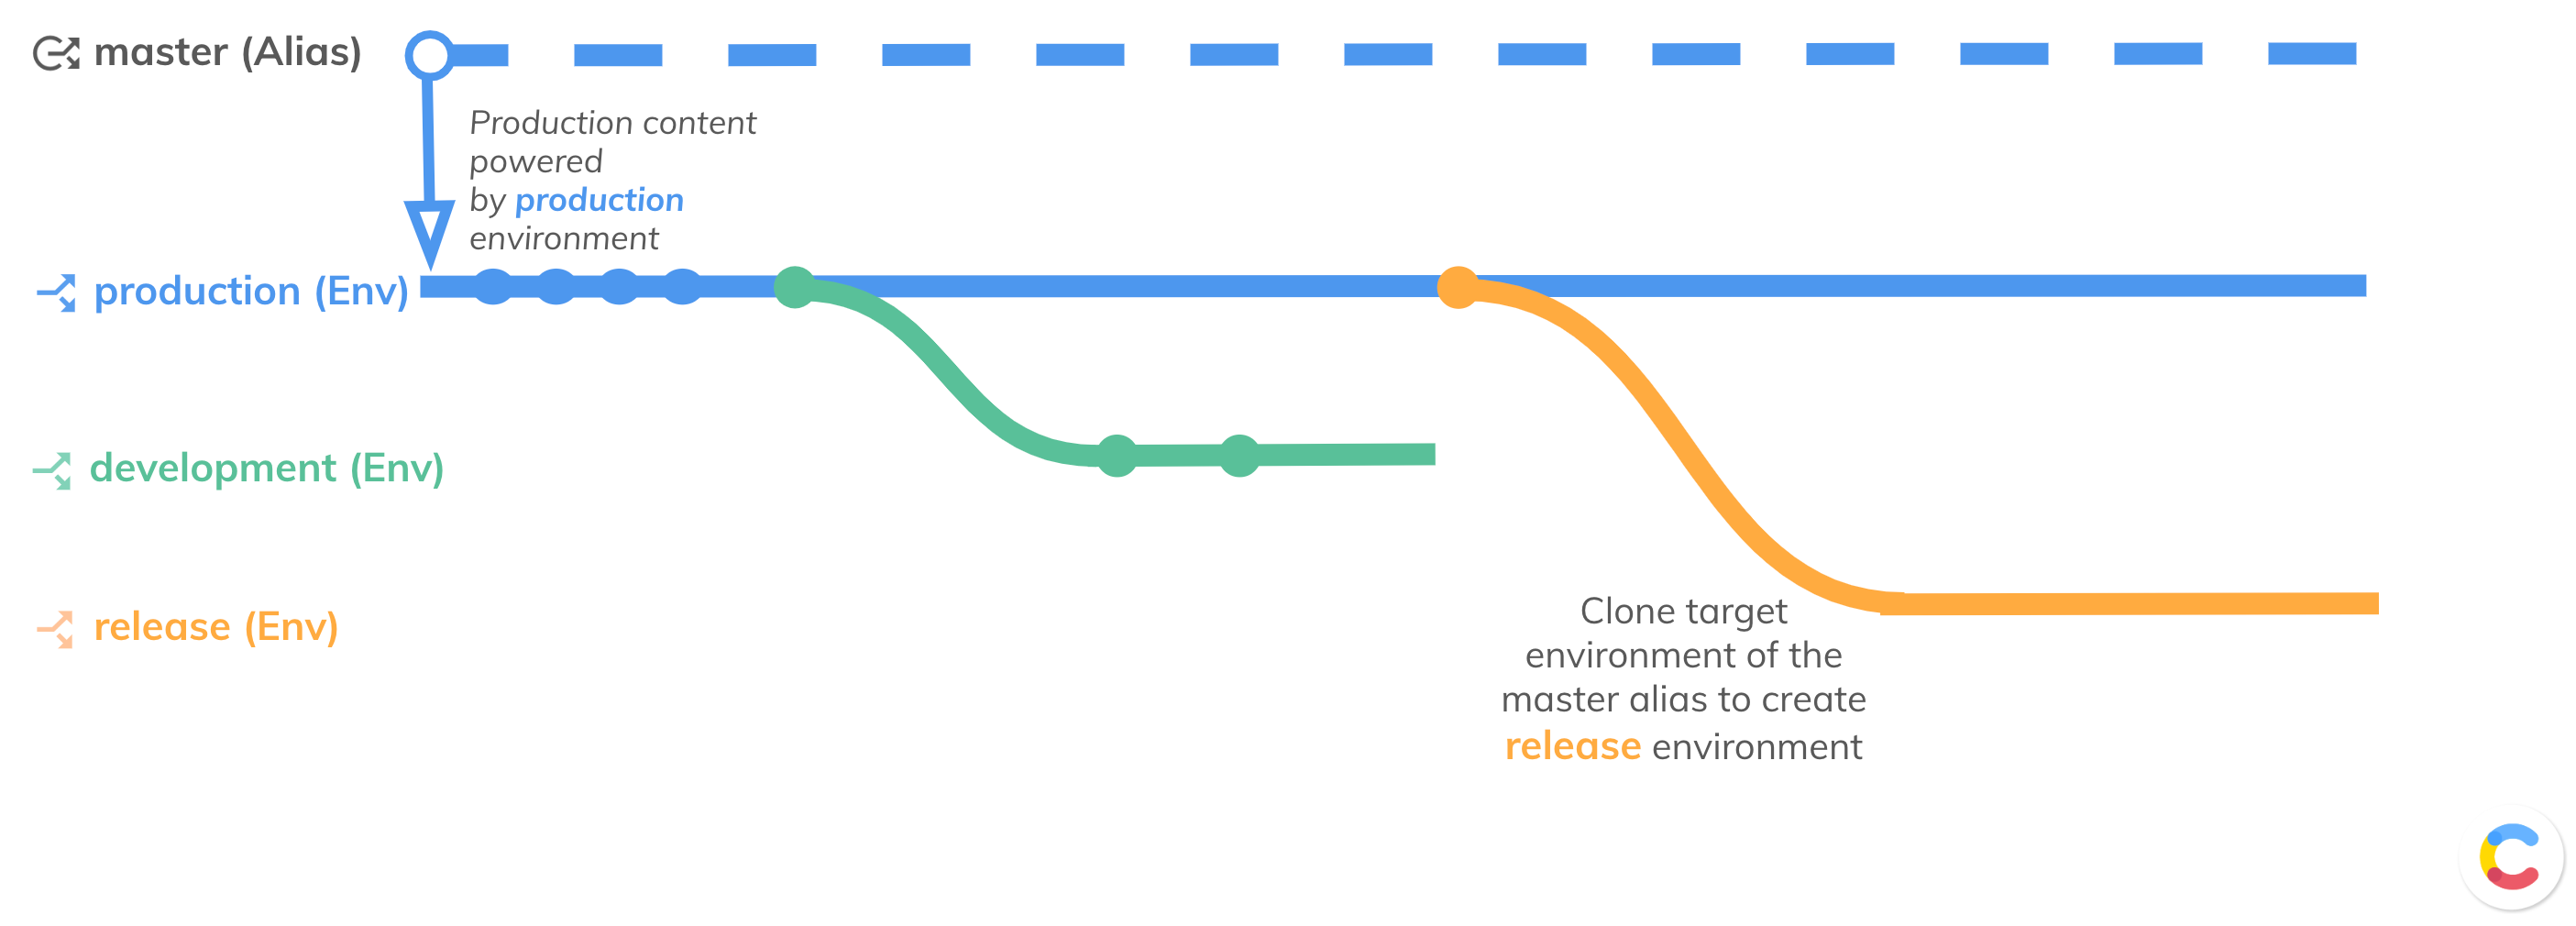
4. Set up a release environment.
The release environment can be used to put together changes from multiple development environments to be reviewed before further moving them to production. To create a release environment, clone a target environment of the master alias to have a fresh copy of production content. To see the options on how to create environments, refer to step 1 of this tutorial.
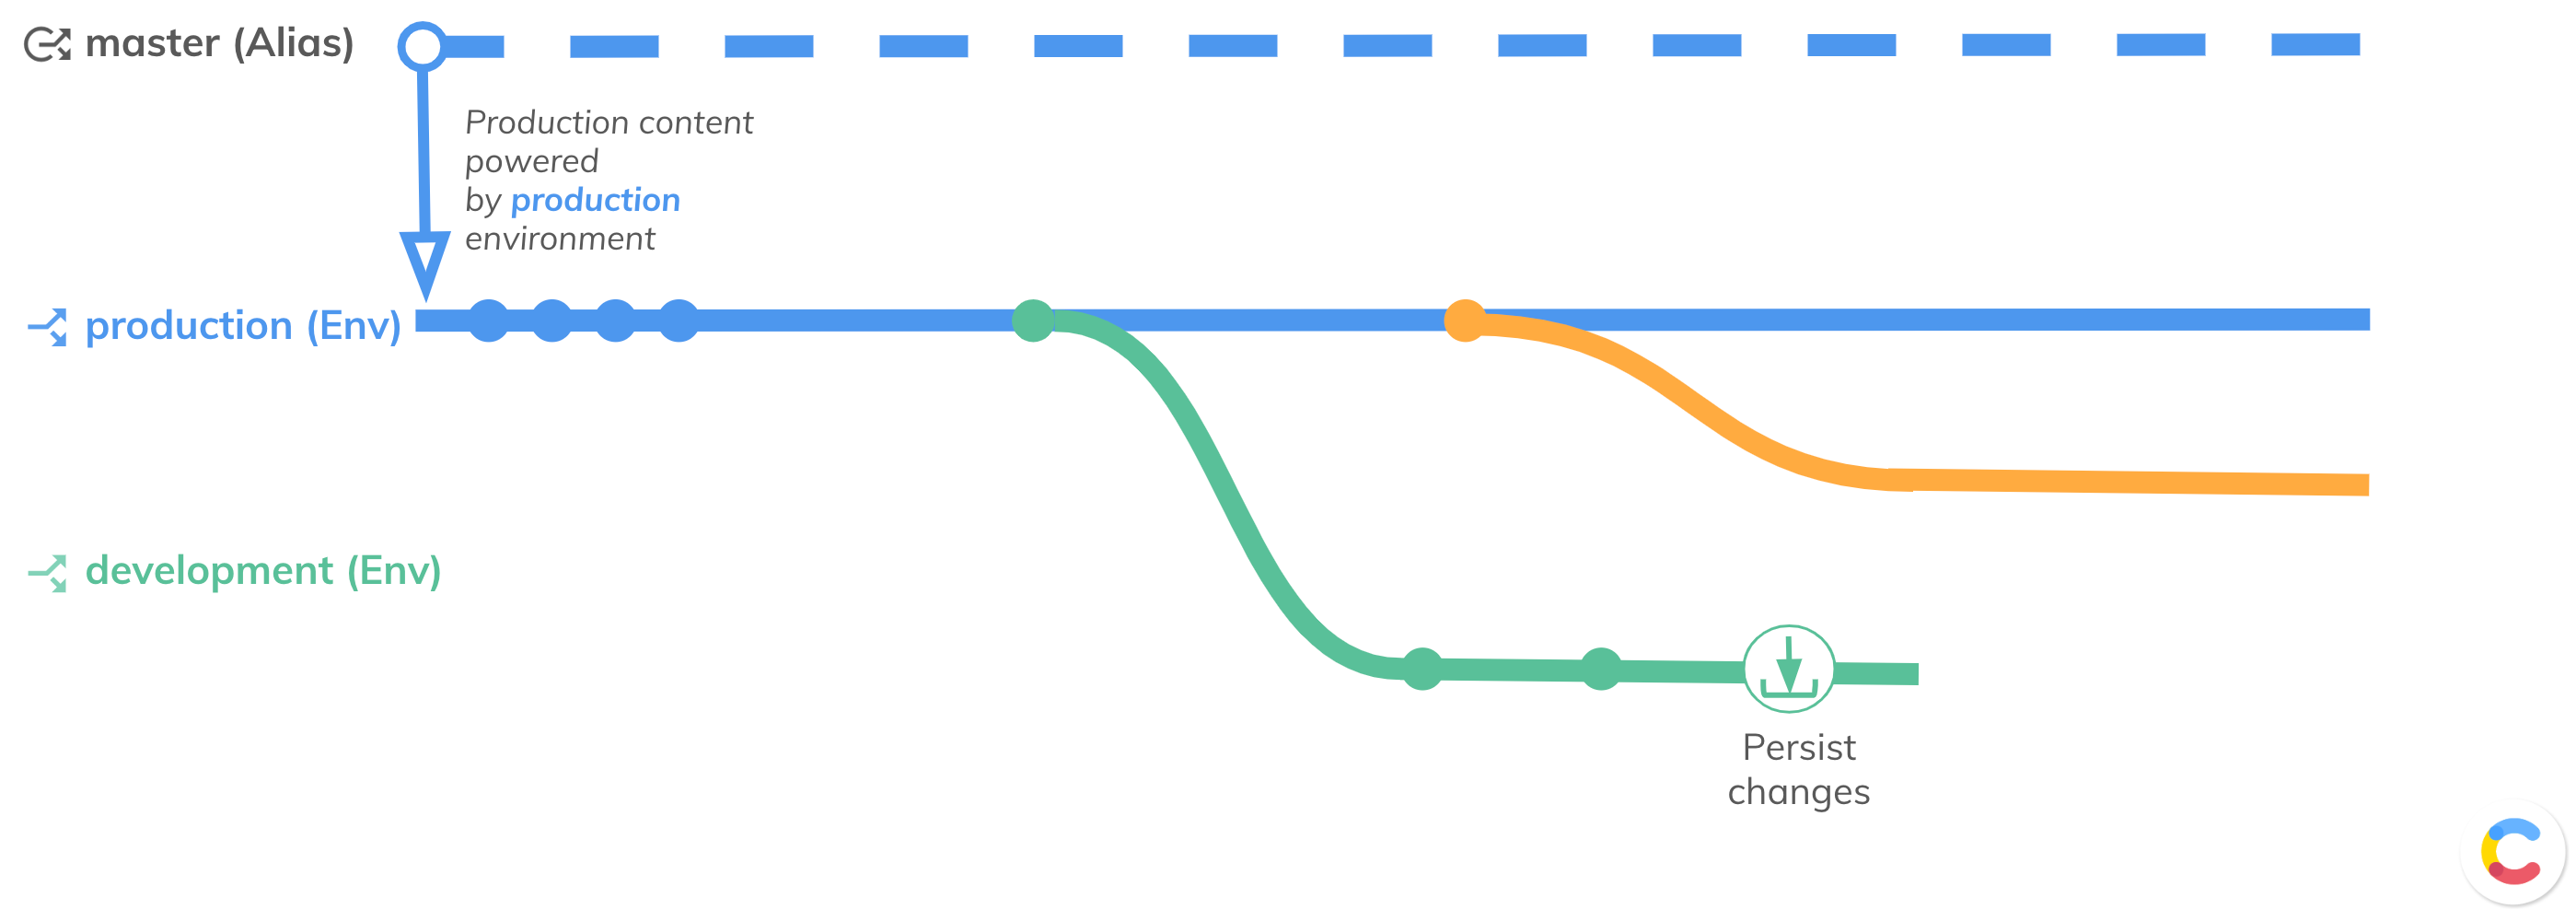
5. Persist content model changes.
You can save your changes to use them in any other working setup by generating and downloading the migration file. For example, it can be saved in your GitHub repository to trigger your CI pipeline and run automation tests in other environments.
The migration file can be created according to one of the following options:
- Recommended: Generate and export the migration file using the Merge app.
- Recommended for CI pipelines: Export the migration file via Contentful CLI with Merge app CLI
- Manually write a migration file.
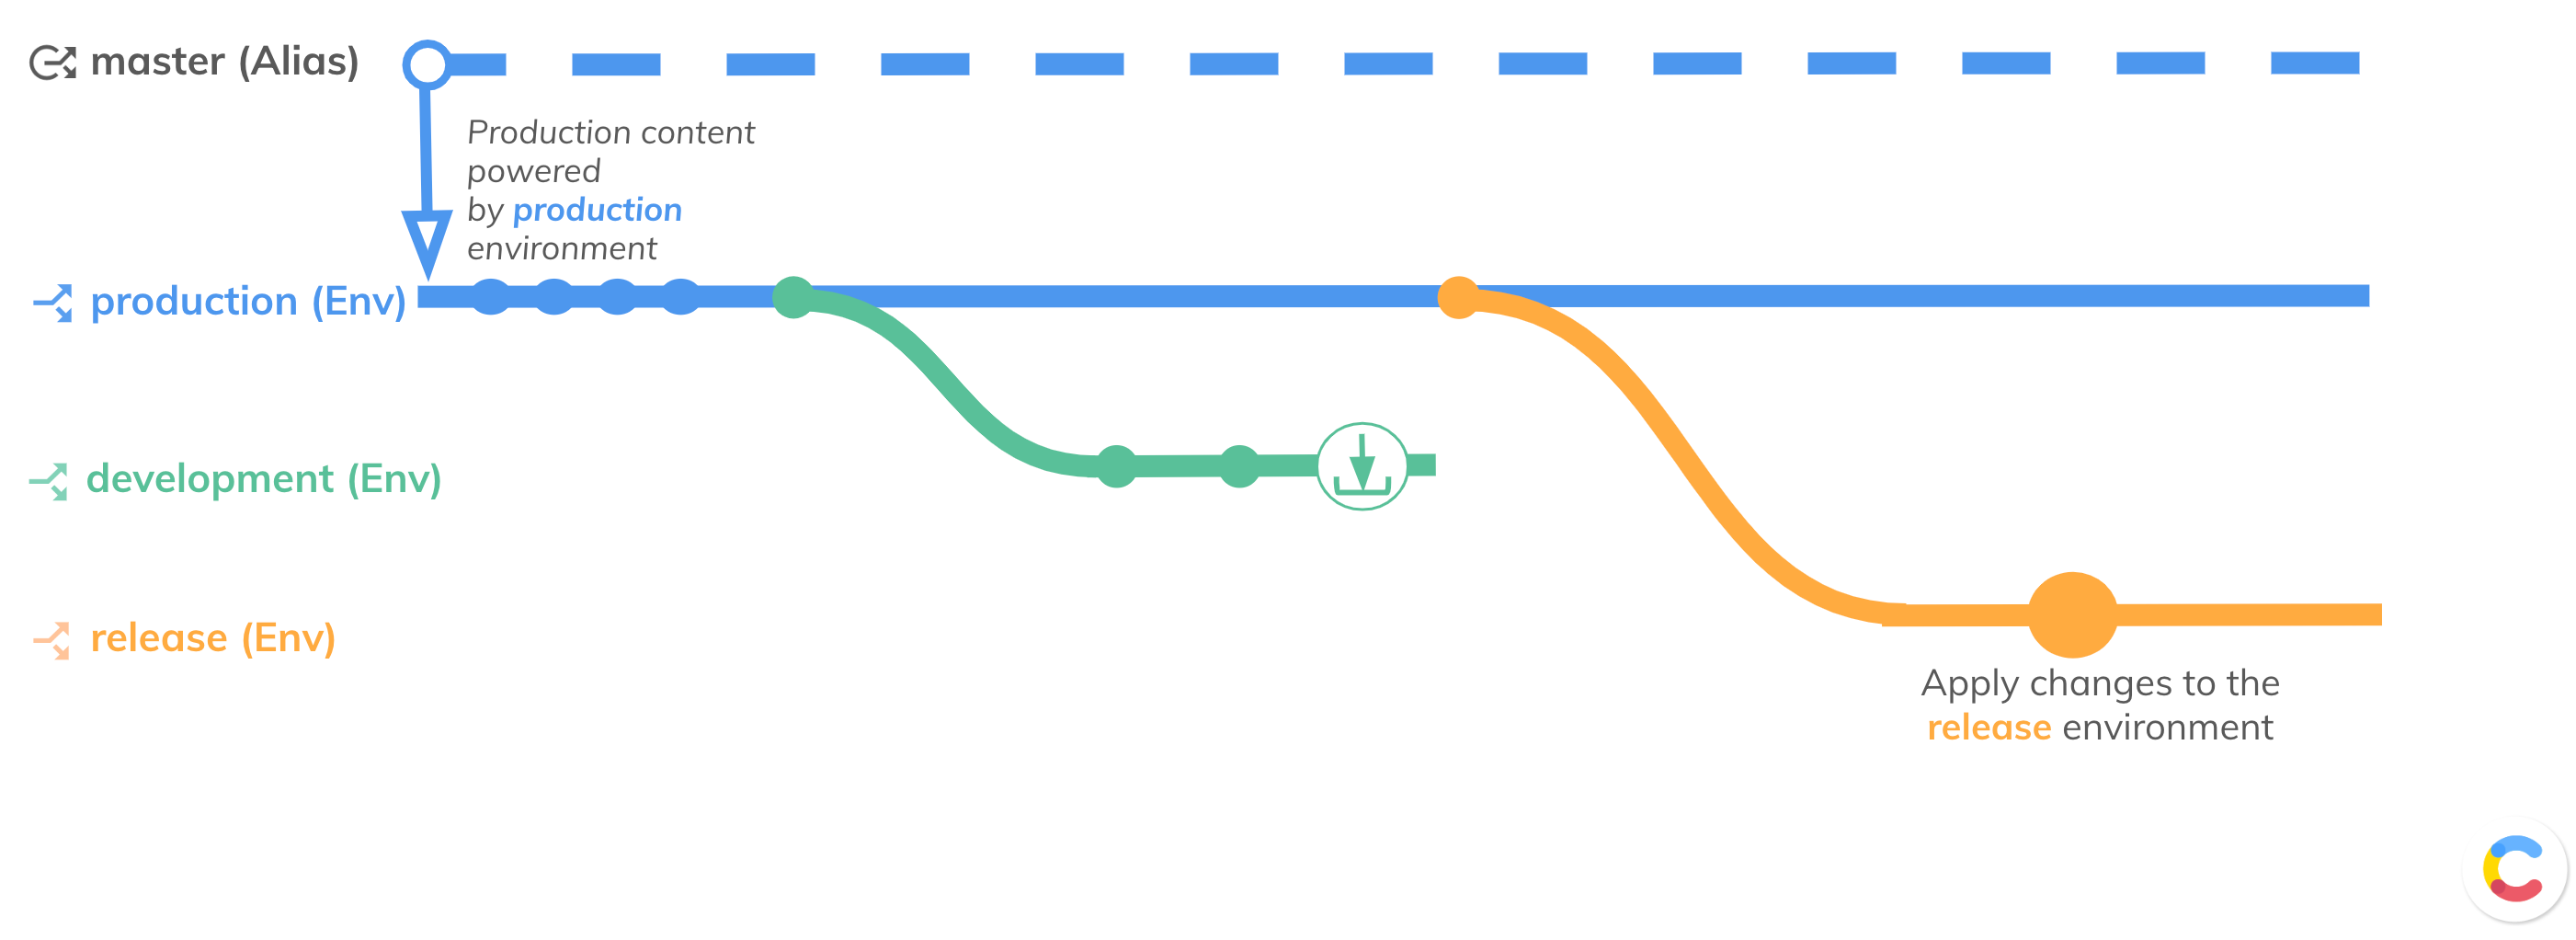
6. Apply content model changes.
In this step, merge to the release environment the content model changes you created in your development environment, as well as the changes made and tested by other developers in their development environments. Content model changes can be merged to the release environment according to the following options:
- Recommended: With the Merge app — Review and merge the changes from one environment to the other using simple developer’s UI.
- Recommended for CI pipelines: Run migrations via CI OR via Merge app CLI.
- Applying the migration scripts via the Contentful CLI.
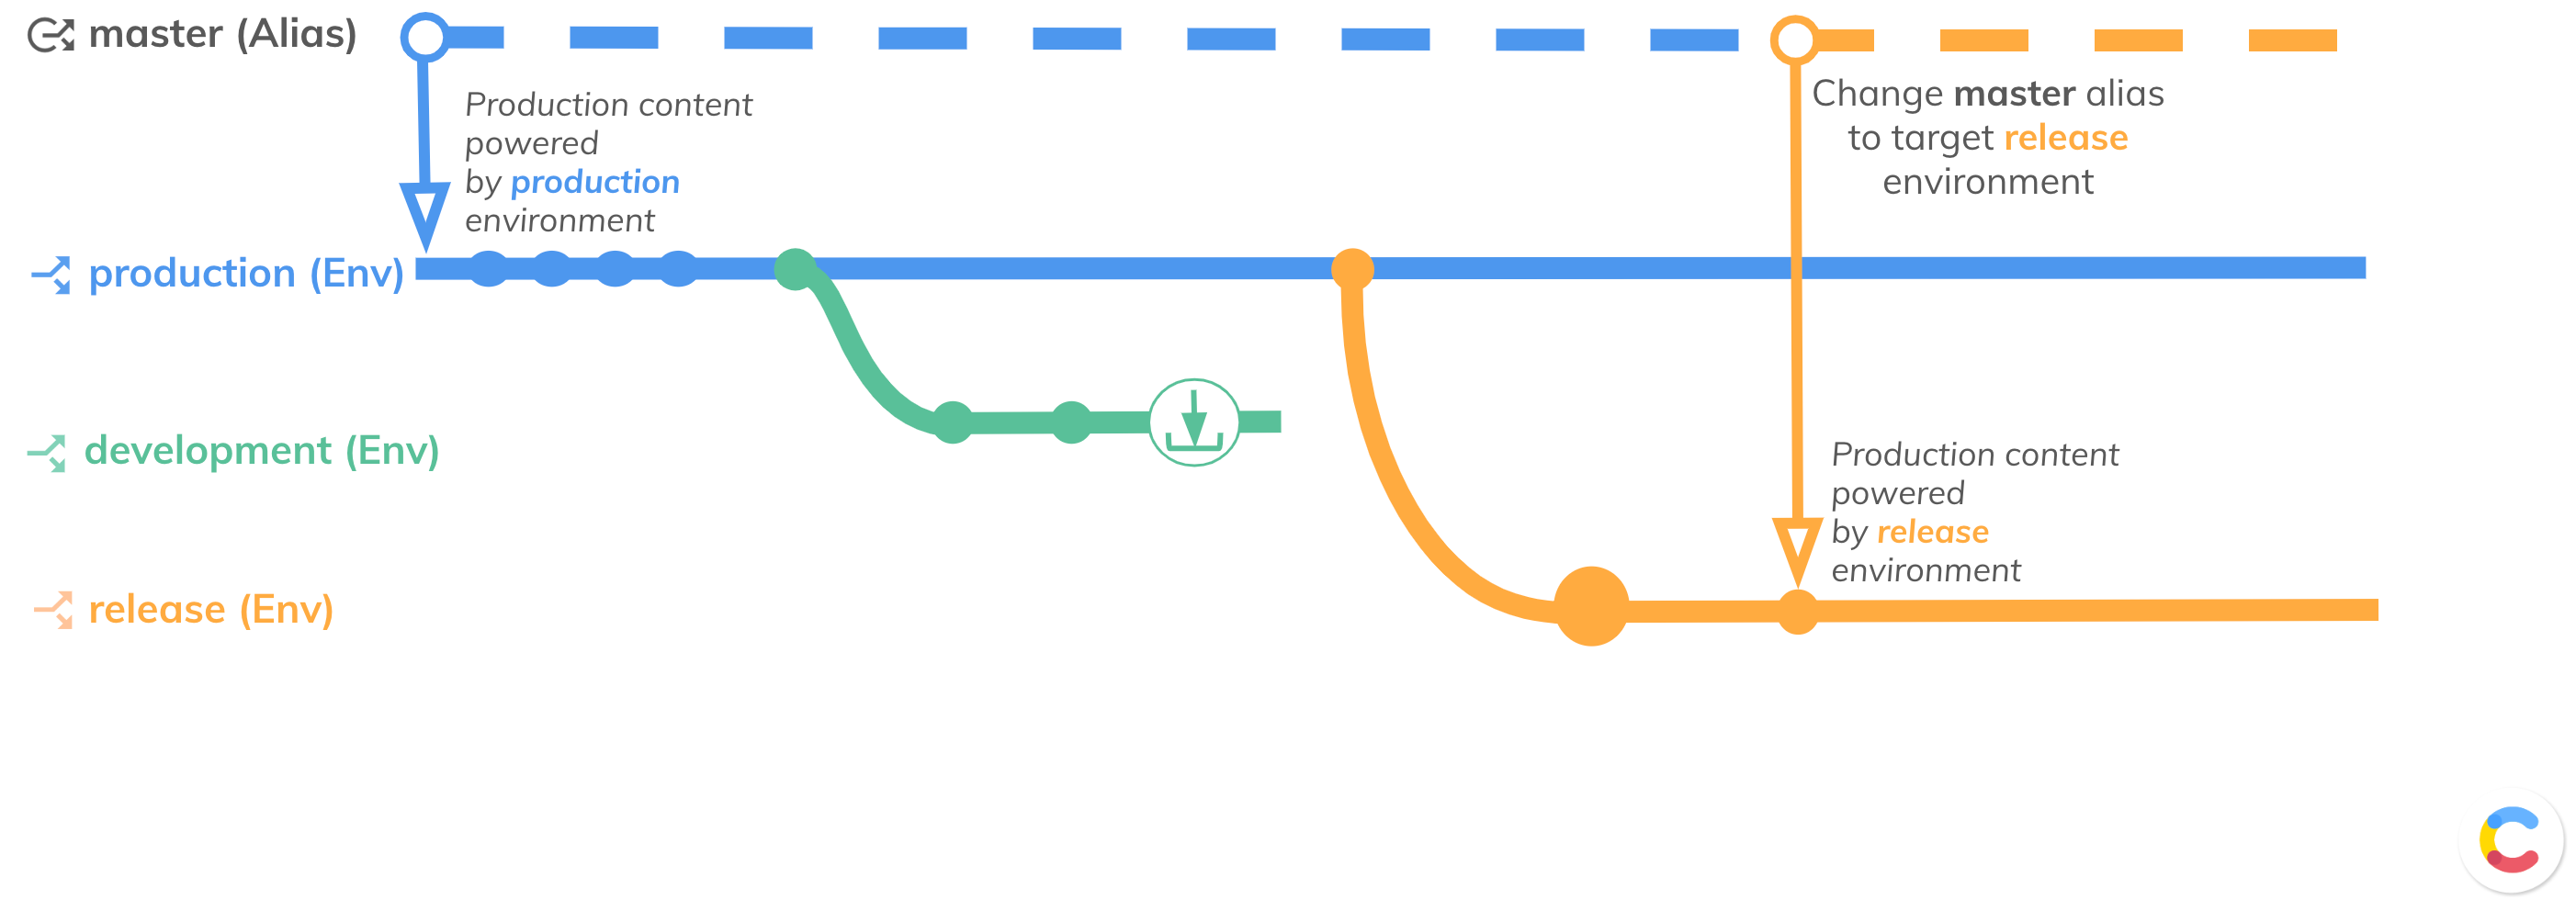
7. Change alias target.
Change your production alias target to point to the release environment, in which the changes were applied:
- Recommended: Using UI in the “Environments” page of the Contentful web app.
- Recommended for CI pipelines: By updating the alias in the migration file.
- Running the command to change the environment alias’s target in the Contentful CLI.
- By sending a request to CMA.
Your content model changes are deployed to production.
8. Optional: Roll back your changes in case of an error.
If you discover that the deployment breaks the production website or app, you can roll back the changes by switching the production alias to its previous target environment. To see the options on how to change the alias target, refer to step 7 of this tutorial.