Single sign-on (SSO)
How do I set up a single sign on access for my organization?
Organization admins and owners can create one SSO configuration for non-Enterprise plans, or up to five providers for Enterprise plans. Each configuration connects Contentful to an identity provider (IdP) and can be managed independently.
Step 1: Create an SSO configuration
Go to Organization settings → Single sign-on and select Configure new SSO.
Step 2: Configure your identity provider (IdP)
Configure your identity provider (IdP) using the service provider (SP) information provided by Contentful.
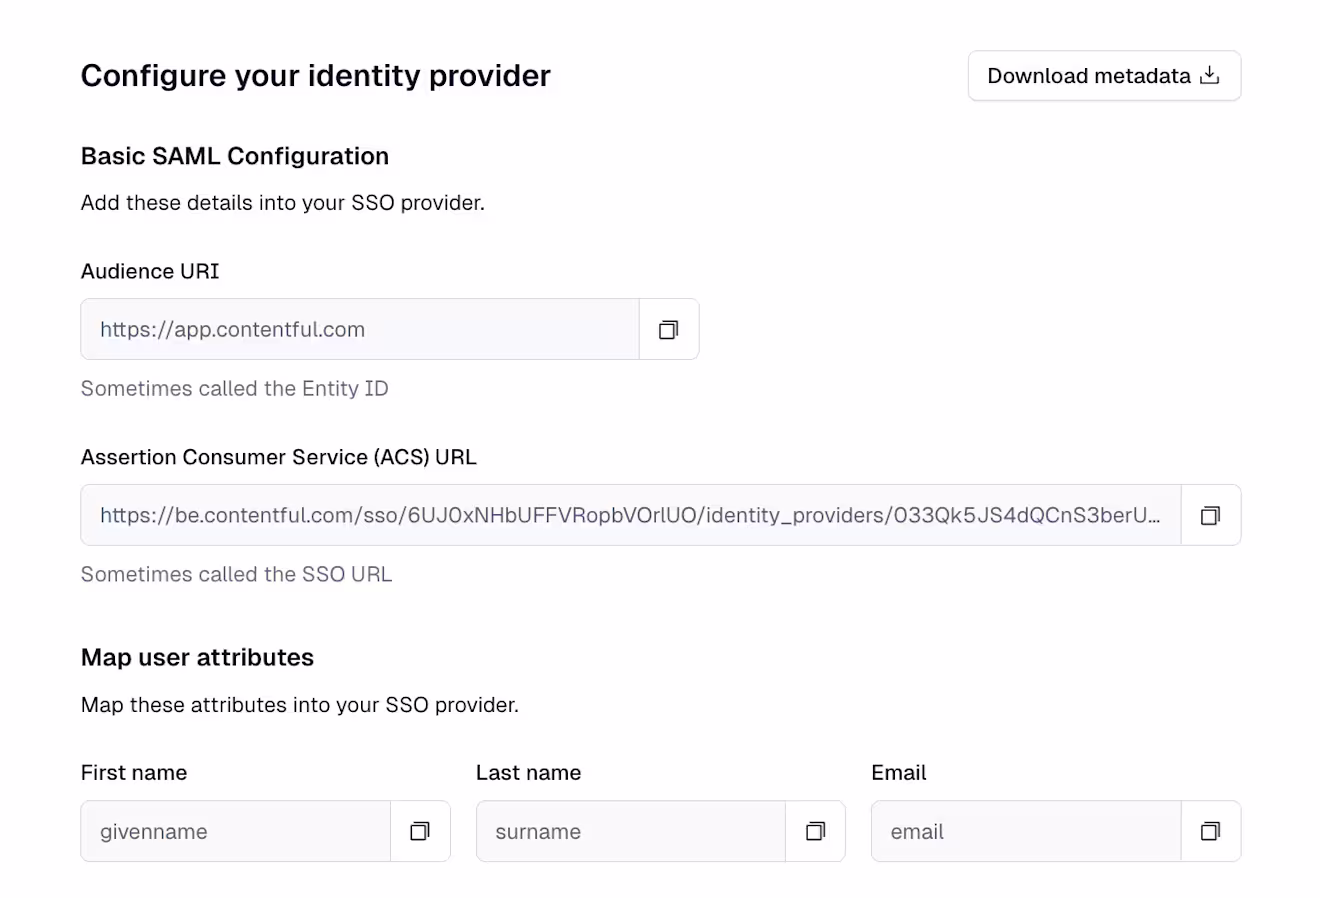
Add the Contentful service provider (SP) details
Enter the following values in your identity provider. Depending on your IdP, these fields may use different names.
Contentful fields
Audience URI - also may be called: Entity ID, Issuer ID, Identity Provider ID.
Assertion Consumer Service (ACS) URL - also may be called: ACS URL, SSO URL, Reply URL, Callback URL
NOTE: Most identity providers support importing a metadata file that contains the required service provider details. Contact your organization's SSO administrator if you need access to this file.
Configure user attribute mappings
Map the following required user attributes from your identity provider to Contentful. Read the following table for more details on these attributes:
Contentful attributes
givenname - The user's first name.
surname - The user's last name
email - The user's email address.
nameid - A unique identifier for the user, such as their email address, employee number, or another stable user ID. Contentful uses this value to identify returning users during subsequent SSO sign-ins.
NOTE: If you would like to set up a SHA fingerprint of your certificate, contact our customer support.
Step 3: Configure your SSO name and confirmation identity provider details to Contentful
To initiate the setup process it is required to create your SSO name. The SSO name is a unique identifier for the organization to log in via Contentful’s SSO. The SSO name has to conform to the following requirements:
Composed in lowercase.
Includes the following symbols: 0-9, a-z, and =_~\/
A unique name across all Contentful organizations.
NOTE: Contentful will be shifting away from SSO name-based login in favor of email as the primary login method. Users will first be asked for their email address; if the email can't be found, or another issue occurs, they will then be prompted for their SSO name as a fallback.
After configuring your identity provider, return to Contentful and complete the SSO configuration.
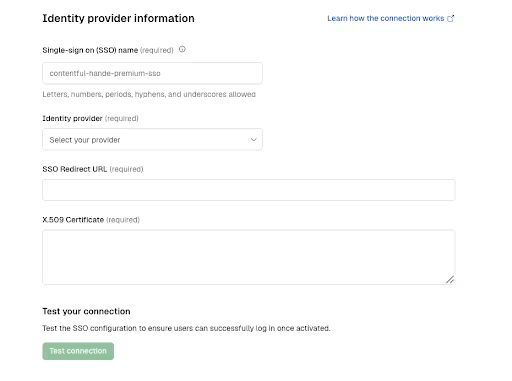
Provide the following information:
SSO Service URL: The SSO endpoint provided by your identity provider (for example, https://sso.connect.pingidentity.com/sso/idp/SSO.saml2?idpid=idpid).
Signing certificate: A valid X.509 public signing certificate from your identity provider that Contentful uses to validate SSO responses.
NOTE: If your organization manages multiple SSO configurations, repeat this process for each identity provider you want to connect. Each SSO configuration maintains its own identity provider details, signing certificate and settings.
Step 4: Test the connection
Before activating an SSO configuration, verify that it is working correctly.
Click Test connection.
Sign in through your identity provider when prompted.
After authentication, you'll be returned to Contentful where the test results are displayed.
If the test fails, review your identity provider configuration and verify:
The Audience URI and ACS URL match the values provided by Contentful.
The SSO Service URL is correct.
The X.509 signing certificate is valid and up to date.
The required user attributes are mapped correctly.
The Name ID is mapped to a unique, persistent user identifier.
NOTE: Re-test the connection whenever you update the signing certificate or make changes to your identity provider configuration.
Step 5: Activate SSO
If the test is successful, your SSO configuration will be ready, click Activate SSO at the top right corner.
Activating the configuration persists the SSO configuration and makes it available for authentication.
SSO configuration troubleshooting
Test connection failed: Verify SP values, certificate and attribute mappings.
Configuration disappeared: Configurations are only persisted after successful activation.
Users can still sign in without SSO: Verify Enforce SSO is enabled.
Signing certificate changed: Update the certificate and run test connection again.
How can I activate and deactivate SSO access for my organization?
To activate your SSO access for your organization, complete all required steps on the configuration page and when the test connection has successfully passed, click Activate SSO at the top right.
If you would like to deactivate SSO access for your organization, select Deactivate SSO in the dropdown next to the SSO provider.
Deactivating SSO will allow users in your organization to log in without SSO. Once deactivated, users in your organization can log in using other methods, such as their email and third-party services.
For additional assistance, please contact Contentful customer support.
Are org owners subject to SSO enforcement?
Yes. All users, including org owners, are subject to SSO enforcement by default.
Previously, org owners were automatically exempt from SSO enforcement. However, enterprise customers flagged this as a security risk. In response:
New organizations enforcing SSO will have no default exemptions, including for owners.
Admins can manually exempt specific users, such as break-glass accounts, from SSO enforcement.
Existing customers will retain their current exemptions temporarily via a migration script, but can opt into enforcing SSO for all users.
To change exemptions, go to your SSO settings and manage user access individually.
How does SSO Enforcement work?
Enforcing SSO prevents organization members from logging into Contentful via email or third-party services (Github, Google, and Twitter). Once enabled, the only permitted authentication method for logging in will be through SSO.
Setting up SSO enforcement comes with two caveats. Enforcing SSO will require users of your organization to log in via SSO. Once enforced, the following users will still be able to log into Contentful via email or third-party services:
Those who have been explicitly exempted from SSO enforcement.
Users who remain logged into Contentful prior to enforcing SSO can continue using Contentful without SSO enforcement. Only after their current session expires will they be forced to log in via SSO.
NOTE: Enforcing SSO is an optional feature. You can choose to activate this feature by switching the toggle on or off located in the login restrictions section of the edit user page.
How are invited users affected by the use of a single sign-on?
When a user with pending invitations from multiple Contentful organizations accepts an invitation from the organization with Enforced SSO, all other invitations are purged and the user is uninvited from other organizations. If the user wishes to be a member of multiple organizations, they have to accept the invitation from the non-SSO organization first or be manually exempted from the SSO enforcement in the SSO-enabled organization.
How do I deprovision users?
Deprovisioning a user on the IdP side will have an immediate effect of preventing the user from logging into Contentful. However, the user will still be listed as a member of the Contentful organization - and incur user fees - until they are manually removed by the organization admin.
NOTE: If your organization has not enabled SSO enforcement, users will be able to log in with their login credentials.
Is the single sign-on feature available for all customers?
The single sign-on feature (SSO) is available free of charge to all Premium customers. To enable SSO for your organization, navigate to the SSO configuration option under the “Access tools” tab in “Organization Settings & Subscriptions” and follow the guided setup process. This option is accessible by your organization admin.
Why do I get signed out of Contentful when using a single sign-on?
For security purposes, users accessing Contentful via SSO are confined to sessions of a limited duration. The standard SSO session time is set at 12 hours, but the administrator at your organization can extend or shorten this period, provided your identity provider supports the sessionNotOnOrAfter parameter, according to internal needs and security policies. If your Identity Provider does not offer this feature, contact our customer support for assistance in configuring a custom SSO session duration.
What Identity Providers (IdP) does Contentful support?
Contentful SSO works with all Identity Providers that support the SAML 2.0 protocol, including Okta, Microsoft Azure AD, OneLogin, Ping Identity, Auth0 and G Suite.
Predefined integrations
Search for predefined Contentful SAML 2.0 integrations in these IdPs:
Microsoft Azure AD
miniOrange
Okta
OneLogin
Ping Identity
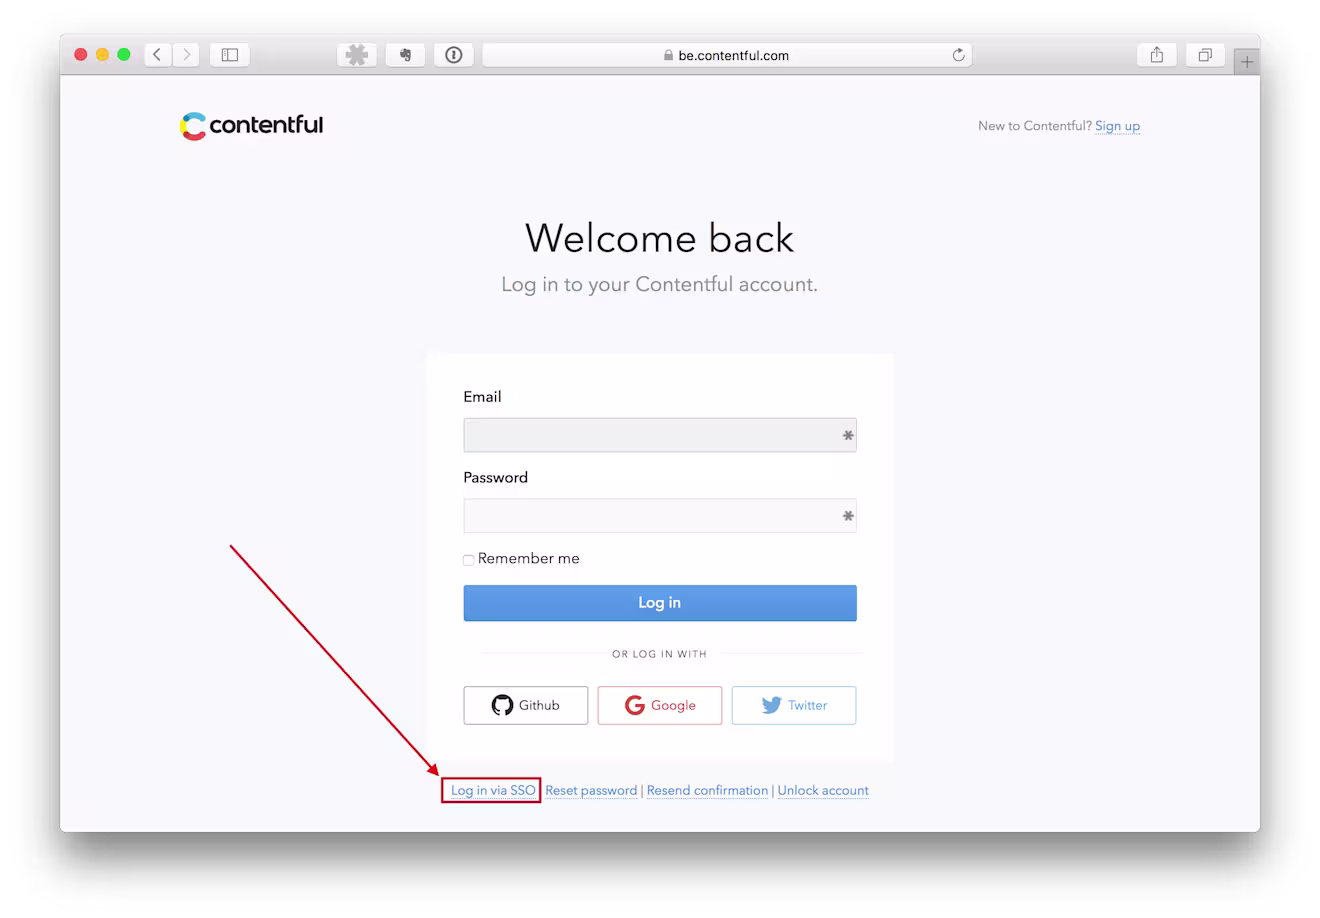
How do I sign into Contentful with my corporate credentials?
If your organization has the single sign-on (SSO) option enabled, on the Login page click on the "Login via SSO" link at the bottom.
Next, provide the SSO name of your organization. If you are not sure about the name, contact your organization administrator.
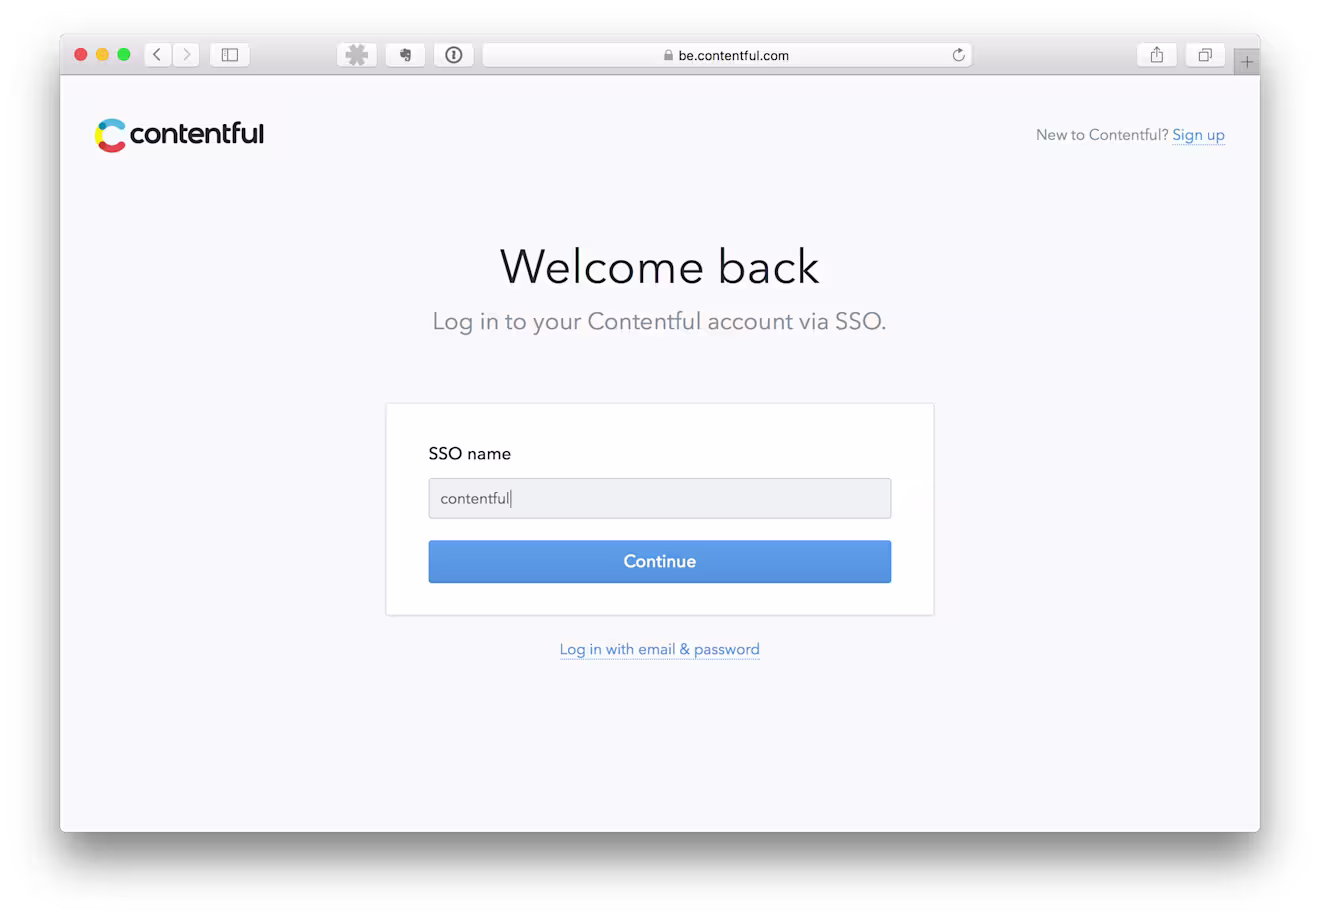
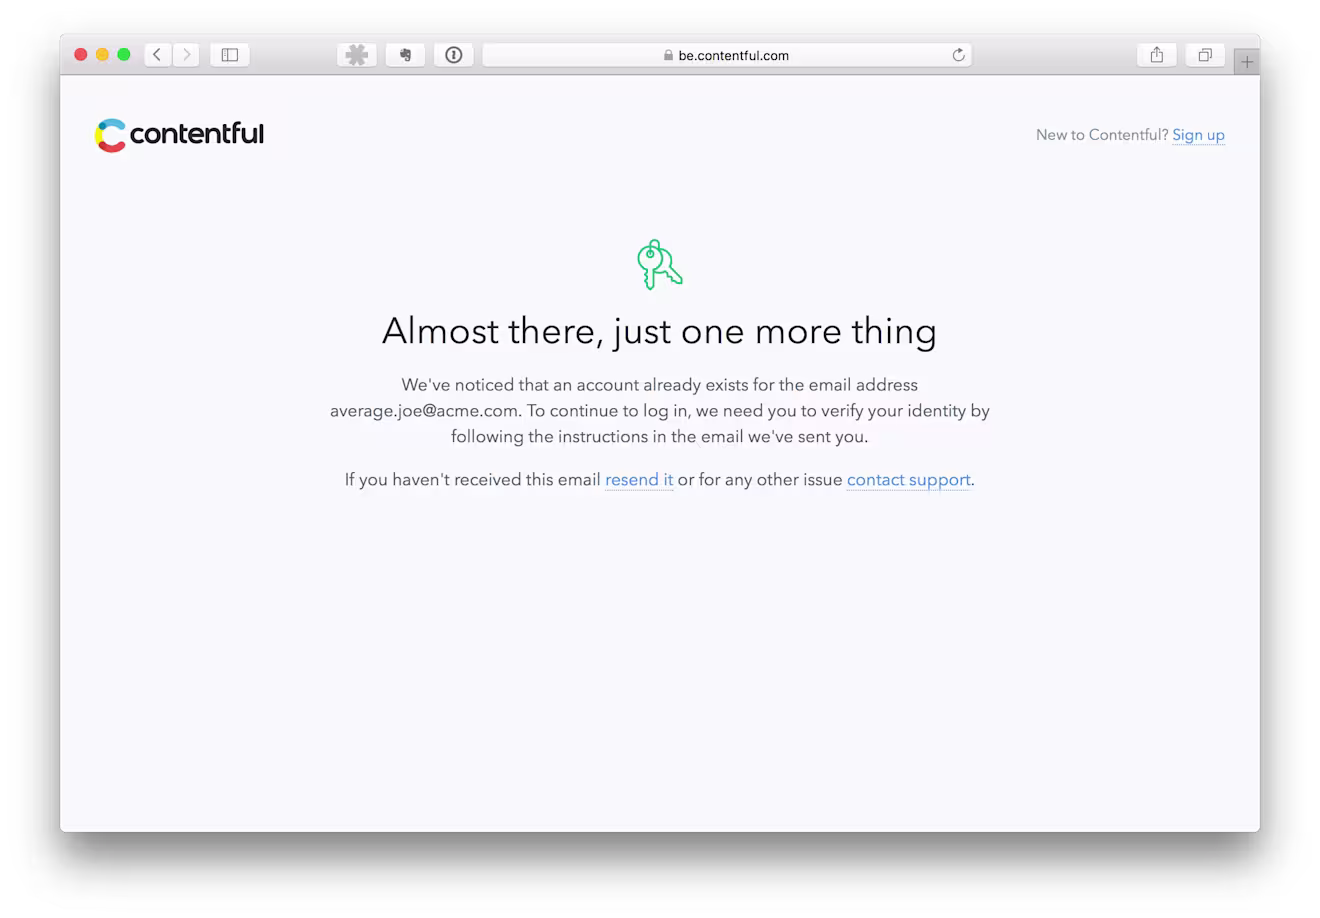
Log in via your corporate Identity Provider. Note that if you already had a valid Contentful account, at this point, you will be prompted to confirm your email by clicking a link. This step helps to bind your existing Contentful account to the corporate account.
After completing these steps, you should be successfully logged into Contentful. When you sign out of Contentful, you will be redirected to the Contentful log in screen. Bookmark this page for one-click access to Contentful in the future.