Request verification
Using app events and identities enables you to easily build backends for your app. However, configuring your app backend to listen to app events and requests from the app frontend also exposes it the public internet, allowing anyone to make requests to it. For security reasons, we recommend limiting requests to only those coming from Contentful and other trusted sources. Request verification allows you to easily verify that a request or event has come from Contentful by signing requests with a signing secret.
This article will walk you through establishing a signing secret, using this secret to sign requests, and finally verifying those requests in the app backend.
How it works
Using a signing secret, a signature can be generated for any request. This signature and some additional metadata is then added to the headers of the request before it is sent. The headers look like this:
{
  "X-Contentful-Signature": "<signature>",
  "X-Contentful-Signed-Headers": "<comma-separated-headers-in-signing-order>",
  "X-Contentful-Timestamp": "<timestamp-of-request-signing>",
  "X-Contentful-CRN": "<crn-of-signed-request>",
  "X-Contentful-Space-Id": "<space-id>",
  "X-Contentful-Environment-Id": "<environment-id>",
  "X-Contentful-User-Id": "<user-id>"
}
When an app backend receives a request, it can compute a signature in the same way. If the secret is the same, the signatures will match too, thus verifying that the sender knows the secret. For this reason, it is also important to not share the signing secret with any third party.
Establishing a signing secret
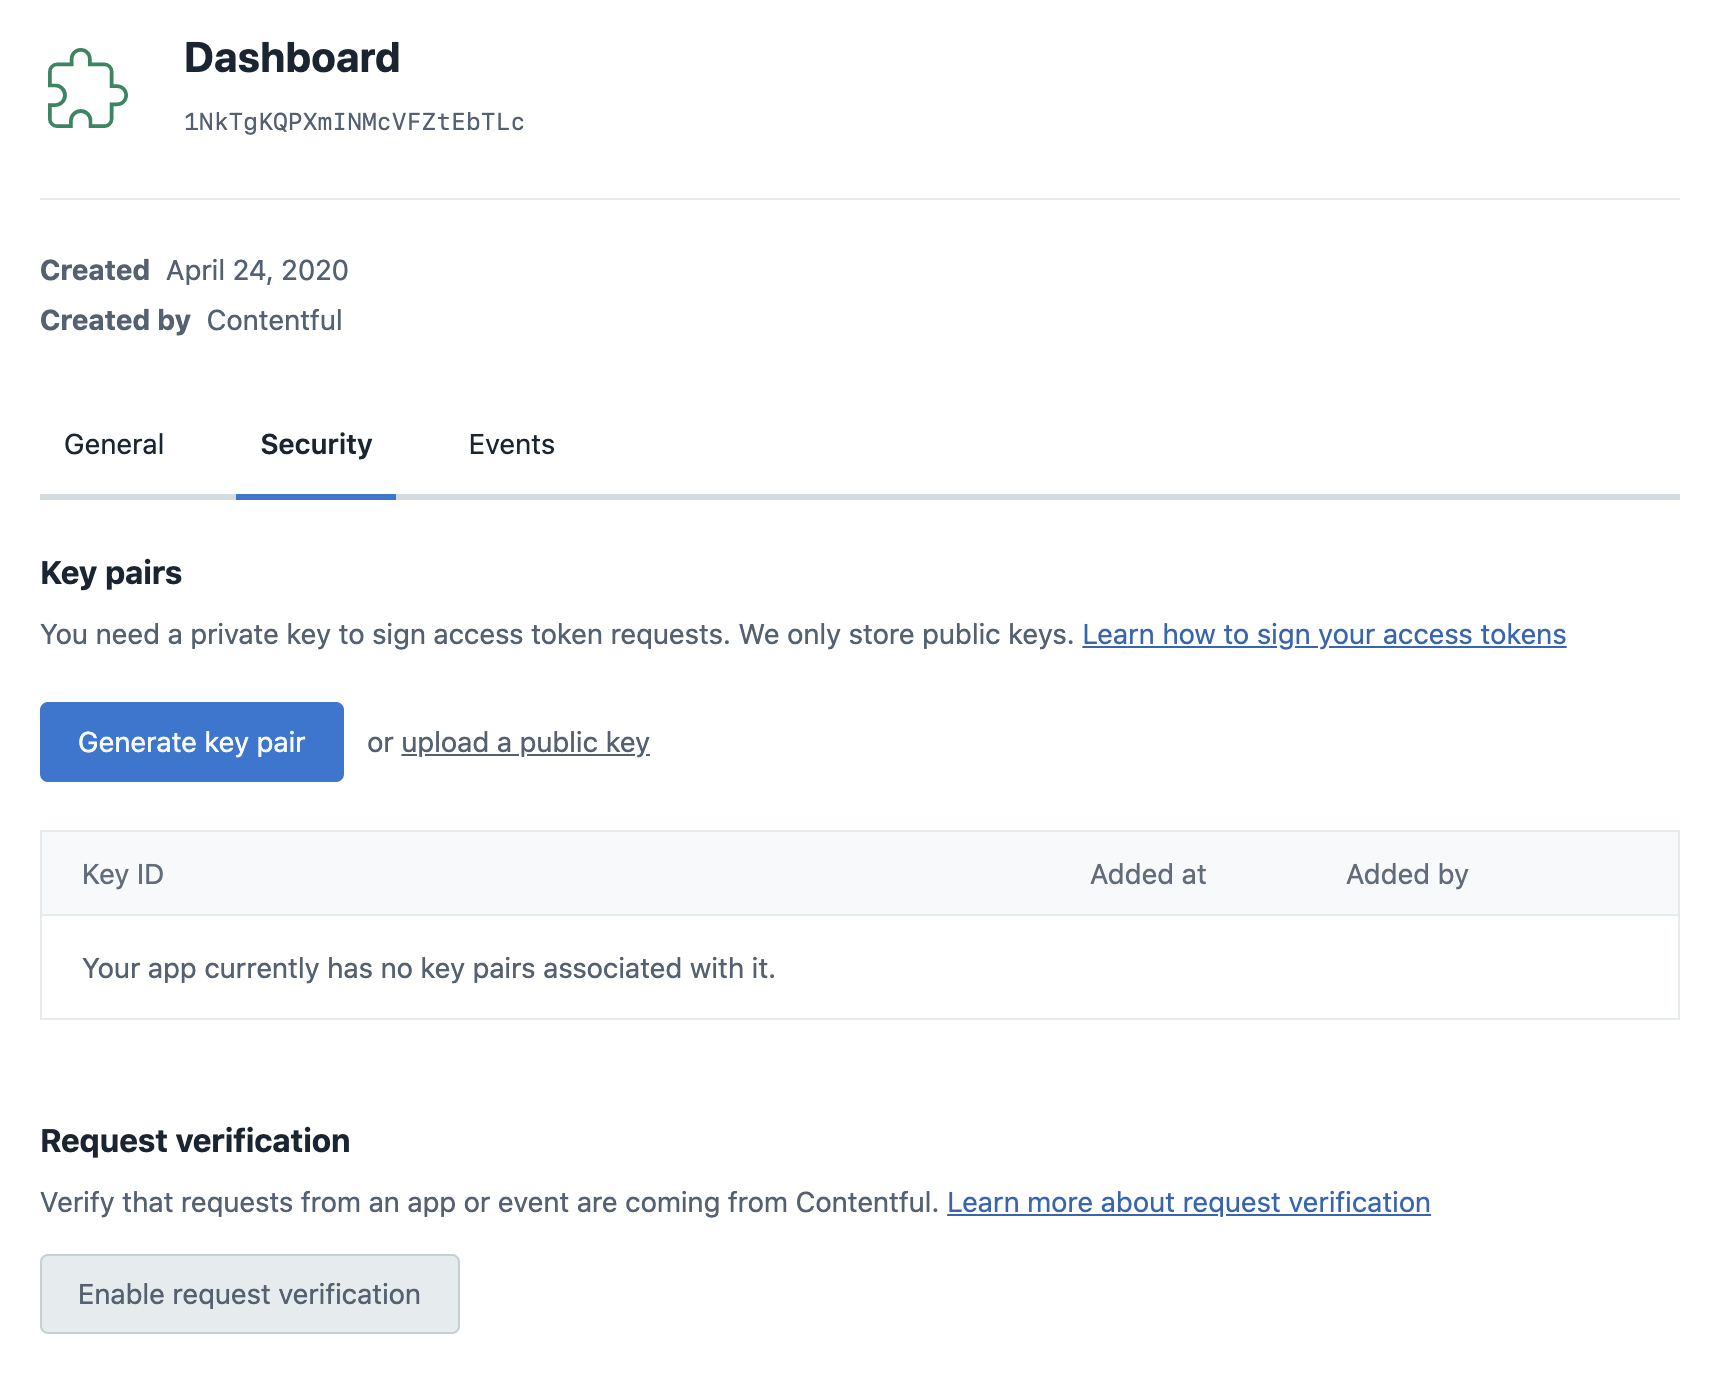
A signing secret can be generated in the security tab of the app definition page. Click on Enable request verification in this tab, and you will be prompted to generate a new secret or submit your own.
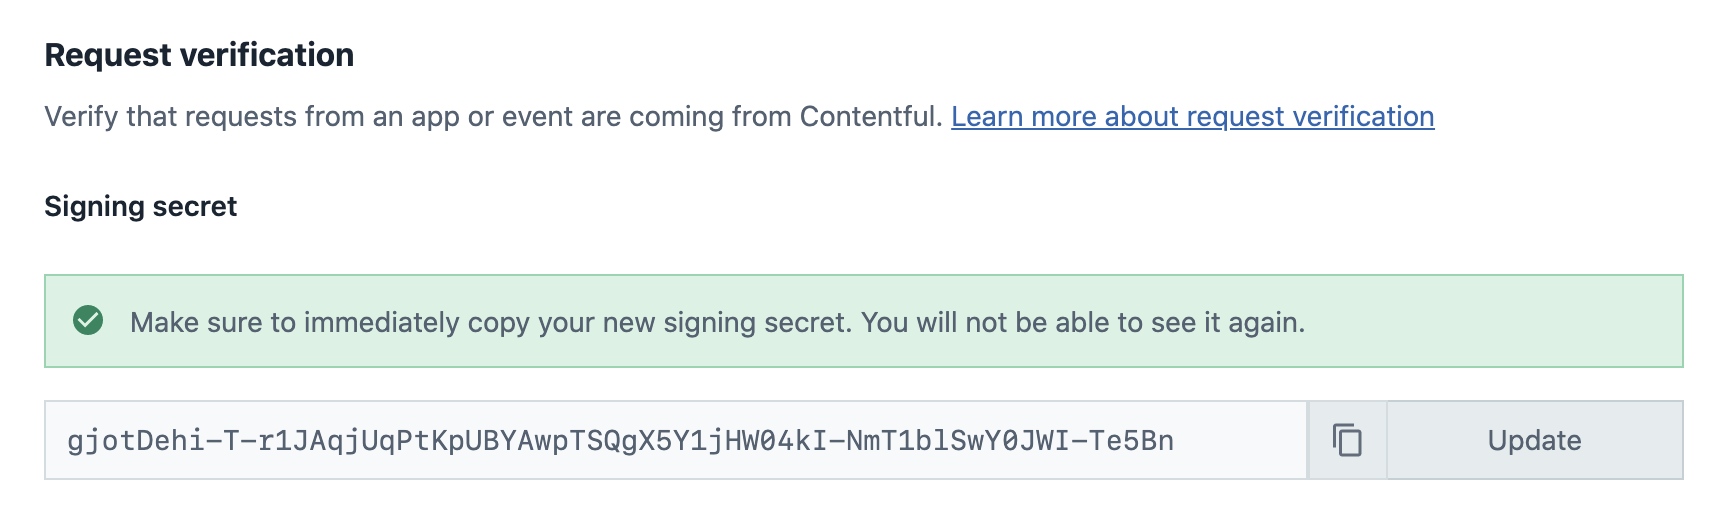
After generating a secret, be sure to immediately copy it to somewhere safe, as it can not be revealed again after the dialog disappears.
You can also manage secrets directly using the Content Management API (CMA). Visit the API documentation for details on how to manage the signing secret by using the API.
Signing requests
App Events
Once a signing secret has been created, all app events for the respective app will be automatically signed using it. You can directly proceed to verifying them on your backend.
App Frontend
Once a secret has been created, signing requests made by an app frontend is done by calling a method with the cma adapter.
Specifically, cma.appSignedRequest.create returns the signature headers that you can put onto your request in order for it to be recognized as signed, like so:
// Define your request
const req = {
  method: 'POST',
  url: 'https://your-app-backend.com/event-handler',
  headers: {
    'Content-Type': 'application/json',
    'X-some-header': 'some-value',
  },
  body: JSON.stringify({ user: 'id' }),
};

// Get and apply the signed headers
const { additionalHeaders } = await cma.appSignedRequest.create({
  appDefinitionId: sdk.ids.app,
}, {
  method: req.method,
  headers: req.headers,
  body: req.body,
  path: new URL(req.url).pathname,
});
Object.assign(req.headers, additionalHeaders);

// Send the request as you usually would
await fetch(req.url, req);
For more details, visit the App SDK documentation.
Verifying requests on the backend
Now that requests from your app contain the additional signature headers, your app backend can start to enforce signed requests. The following is an example server in Node.js using the Express framework:
const express = require('express');
const { verifyRequest } = require('@contentful/node-apps-toolkit');
const app = express();
app.use(
  express.json({
    type: ['application/json', 'application/vnd.contentful.management.v1+json'],
  })
);

// This is the secret key that was generated by you or Contentful.
// Note: it is not best practice to hardcode secret keys into code.
// We are doing it here for demonstration purposes only. Preferably
// it should come from an environment variable or a file.
const secret = 'your-64-char-secret';

// This can be the endpoint configured to be called for app events
app.post('/event-handler', (req, res) => {
  const canonicalRequest = {
    path: req.path,
    headers: req.headers,
    method: req.method,
    body: JSON.stringify(req.body),
  };
  try {
    const isValid = verifyRequest(secret, canonicalRequest);
    if (!isValid) {
      res.status(403).send('Unauthorized');
    }
  } catch (e) {
    console.error(e);
    res.status(403).send('Unauthorized');
  }

  // ... rest of handler code
});

const port = 9000;
app.listen(port, () =>
  console.log(`App listening at http://localhost:${port}`)
);
This example uses node-apps-toolkit, which contains tools to create app backends in Node.js.
The verifyRequest function will try to sign the contents of the incoming request and then compare them to the meta-information contained in the signing headers.
The function will throw an error if the incoming request is shaped incorrectly or is older than the specified time-to-live (TTL). You can pass the TTL in seconds as an additional argument, or disable it by passing 0. If nothing is passed, the TTL will be 30 seconds.
The documentation for node-apps-toolkit contains more detailed information on the signing and verification process.
verifyRequest function yourself.
There is a pseudocode implementation of the verification algorithm at the bottom of this page which can be used as a reference for your implementation.
Key rotation
Changing your secret while you are already enforcing secure requests requires some additional steps. This is because changing the secret on either side will cause verification to fail until the other side has been updated too. We can get around this by verifying against multiple secrets simultaneously in the app backend. The process looks like this:
- Generate a new secret locally
- Verify requests against both the old and the new secret in your app backend
- Submit the new secret to Contentful using the web app or the API, causing further requests to be signed with the new key
- Remove support for the old key from your app backend
The following sections will go into detail on how to generate a secret and how to add support for multiple secrets in an app backend.
Creating a secret
There are two constraints on the secret:
- It must be exactly 64 characters long.
- It must match this regular expression:
/^[0-9a-zA-Z+/=_-]+$/. This also means secrets using the hex or base64 character set are allowed.
To make full use of the security provided by secure requests, we recommend using cyptographic random number generators with high entropy to generate a secret. Here are some examples for how to do this using different languages and tools. All examples can be run on the command line:
# Node.js >6.0
node -e "console.log(require('crypto').randomBytes(32).toString('hex'))"
# Ruby
ruby -rsecurerandom -e 'puts SecureRandom.hex(32)'
# Python >3.6
python3 -c "from secrets import token_hex;print(token_hex(32))"
# OpenSSL
openssl rand -hex 32
Verify requests against multiple secrets
To properly test against multiple secrets, an attempt to verify the incoming request has to be made separately for each secret, as the request should only be rejected if none of the secrets can verify the request. The following is an example in Node.js using the Express framework:
const express = require('express');
const { verifyRequest } = require('@contentful/node-apps-toolkit');
const app = express();
app.use(
  express.json({
    type: ['application/json', 'application/vnd.contentful.management.v1+json'],
  })
);

// List multiple secrets, both the new and soon-to-be-disabled ones.
// Note: it is not best practice to hardcode secret keys into code.
// We are doing it here for demonstration purposes only. Preferably
// they should come from an environment variable or a file.
const secrets = ['old-64-char-secret', 'new-64-char-secret'];

app.post('/event-handler', (req, res) => {
  const canonicalRequest = {
    path: req.path,
    headers: req.headers,
    method: req.method,
    body: JSON.stringify(req.body),
  };
  try {
    const isValid = secrets.some((secret) =>
      verifyRequest(secret, canonicalRequest)
    );
    if (!isValid) {
      res.status(403).send('Unauthorized');
    }
  } catch (e) {
    console.error(e);
    res.status(403).send('Unauthorized');
  }

  // ... rest of handler code
});

const port = 9000;
app.listen(port, () =>
  console.log(`App listening at http://localhost:${port}`)
);
Using additional headers from verified requests
When request verification is enabled, additional headers are included in requests that contain metadata about the request. These headers are used as part of the request verification process - but can also be used in your application if you need this information. The headers are x-contentful-space-id, x-contentful-environment-id and x-contentful-user-id.
The following is an example in Node.js using the Express framework:
// This is the secret key that was generated by you or Contentful.
// Note: it is not best practice to hardcode secret keys into code.
// We are doing it here for demonstration purposes only. Preferably
// it should come from an environment variable or a file.
const secret = 'your-64-char-secret';

// This can be the endpoint configured to be called for app events
app.post('/path', (req, res) => {
  const canonicalRequest = {
    path: req.path,
    headers: req.headers,
    method: req.method,
    body: JSON.stringify(req.body),
  };
  try {
    const isValid = verifyRequest(secret, canonicalRequest);

    if (isValid) {
      // Use trusted headers received from Contentful
      const spaceId = req.header['x-contentful-space-id'];
      const environmentId = req.header['x-contentful-environment-id'];
      const userId = req.header['x-contentful-user-id'];
      // Do something with the headers
      logToCustomDatabase(canonicalRequest, spaceId, environmentId, userId);
    } else {
      res.status(403).send('Unauthorized');
    }
  } catch (e) {
    console.error(e);
    res.status(403).send('Unauthorized');
  }

  // ... rest of handler code
});
Submitting a locally generated secret
You can submit your own secret on the same page where you originally enabled request verification. Click on the Update button and paste in your secret, as shown in the image below.
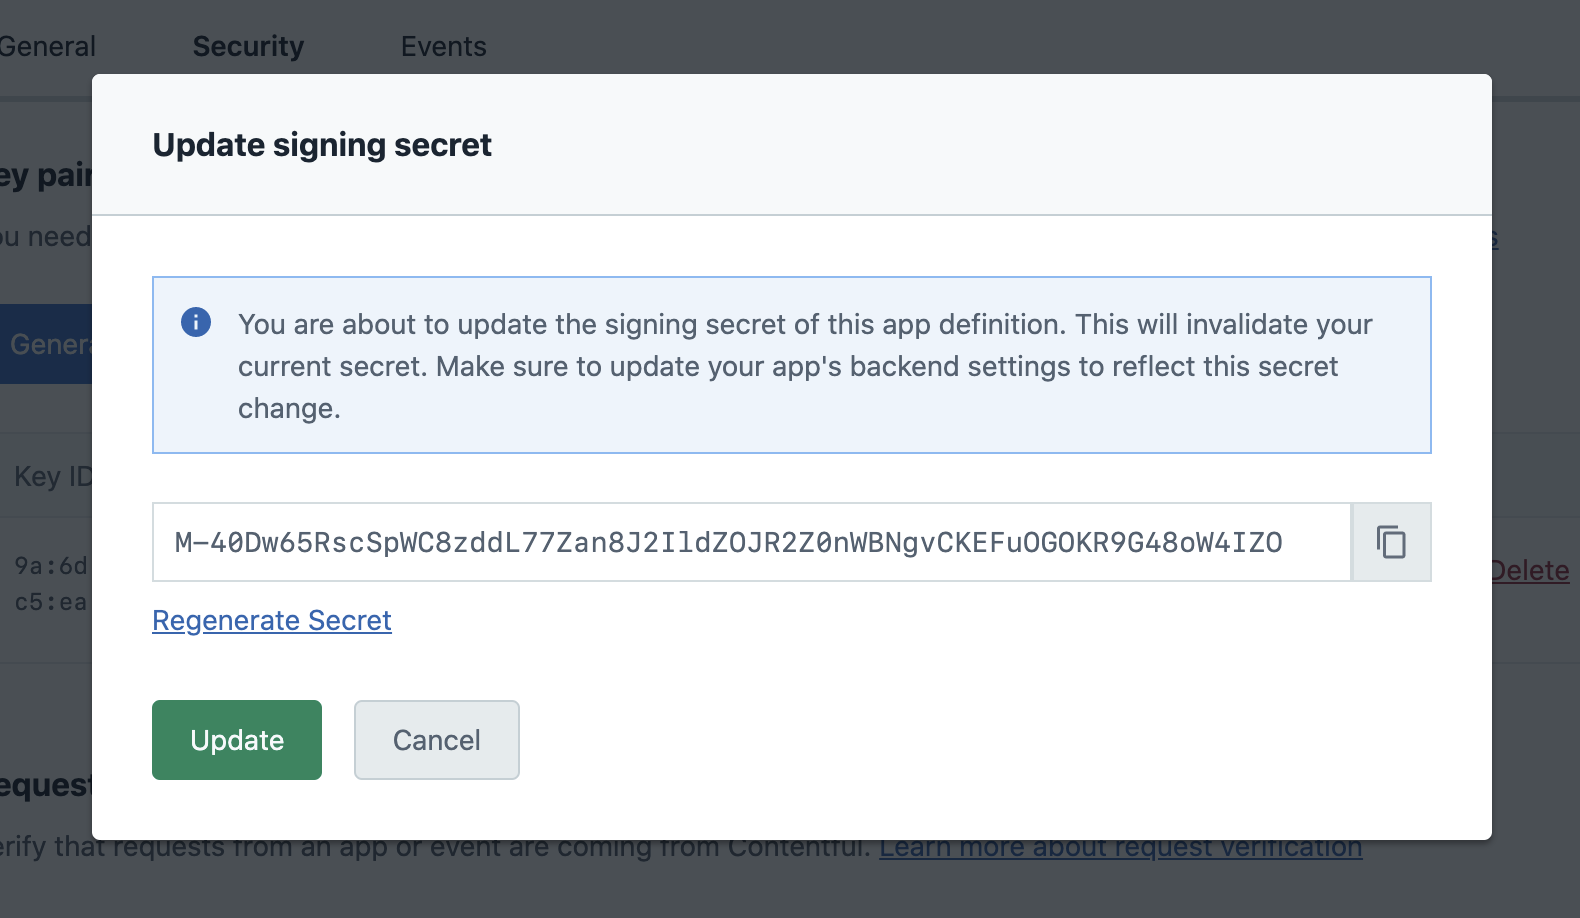
After confirming by clicking on Update again, Contentful will start signing requests with your submitted secret.
Verifying a signature
A working JavaScript implementation of signature verification can be found in the node-apps-toolkit. Additional working examples in C++, C#, Elixir, Go, Java, Kotlin, PHP, Python, Ruby, and Rust can be found in the request-verification-examples repository. If you need to verify a request in another programming language, you can use this pseudocode example of how signed requests can be verified as the basis for your implementation:
// The signing function takes a signing key and the request to be signed
function verifyRequest(signingKey, request) {
  // The signature, which we will be verifying the request against
  signature = getHeader('x-contentful-signature', request.headers)

  // The time when the request was signed, which can be used for a TTL check
  timestamp = getHeader('x-contentful-timestamp', request.headers)
  oneMinute = 60 * 1000
  if (Number(timestamp) + oneMinute < currentUnixTimeInMilliseconds) {
    return false
  }

  // one of GET, PUT, POST, DELETE etc.
  requestMethod = request.method

  // The request path excluding protocol, hostname, and port.
  // Any query strings should be url encoded, and the entire path
  // should be utf-8 encoded.
  [basePath, query] = request.path.split('?')
  query = urlEncode(query)
  requestPath = utf8Encode(query ? basePath + '?' + query : basePath)

  // The headers which have been signed
  signedHeaders = getHeader('x-contentful-signed-headers', request.headers)

  // The headers should be converted to lower case, and joined in a semicolon
  // separated list. The list should maintain the ordering from
  // 'x-contentful-signed-headers'
  requestHeaders = []
  for (headerName in signedHeaders.split(',')) {
    headerValue = getHeader(headerName, request.headers)

    requestHeaders.push(headerName.toLowerCase() + ':' + headerValue)
  }
  requestHeaders = requestHeaders.join(';')

  // The request body, exactly as it is in the HTTP body
  requestBody = request.body


  // The method, path, headers, and request body joined in a newline separated string
  canonicalRequestRepresentation = [
    requestMethod,
    requestPath,
    requestHeaders,
    requestBody
  ].join('\n')


  // HMAC_SHA256 hash digested as an hexadecimal string
  signature = createSignature(canonicalRequestRepresentation, signingKey)

  // We can now test for equality of the requestSignature, and the signature we
  // have generated and return the result
  return signature === requestSignature
}