Create a custom app
To go straight to app building, try out our quickstart guide.
Follow the steps below to get your app up and running almost immediately. For detailed explanations on a specific step, click the questionmark icon.
Set up project ?
- Run
- Select blank template.
- Select JavaScript.
- Wait for
create-contentful-appto finish generating your project.
Start development server
- Run
- Run
Open file
- Open
src/locations/Sidebar.jsxin your editor
Replace contents ?
Replace the contents of the file with the following code snippet:
Create your app definition ?
- Go to the management view, navigate to “Apps” and click “Create App”
- Enter “Blog Post Metrics” in the Name field.
- Enter
http://localhost:3000under “Frontend” area. - Check Entry Sidebar under the “Locations” area.
- Click Save.
Install your app to a space ?
- In the Contentful web app, navigate to the space in which you want to install the app.
- Click the Apps tab and select Custom apps.
- Click on the actions menu of your app and select Install.
- In the “Manage app access” window, click Authorize access.
Assign your app to a content type ?
- In the Contentful web app, go to the Content model tab and click the “Blog post” content type.
- Go to the Sidebar tab.
- Click the + button in the “Blog Post Metrics” card.
- Click Save to apply changes to the content type.
See your app in action ?
Your app is built. To see it in action, go to the Content tab and create an entry with the content type Blog post. You can see your app in the entry editor sidebar.
The example app you are about to build
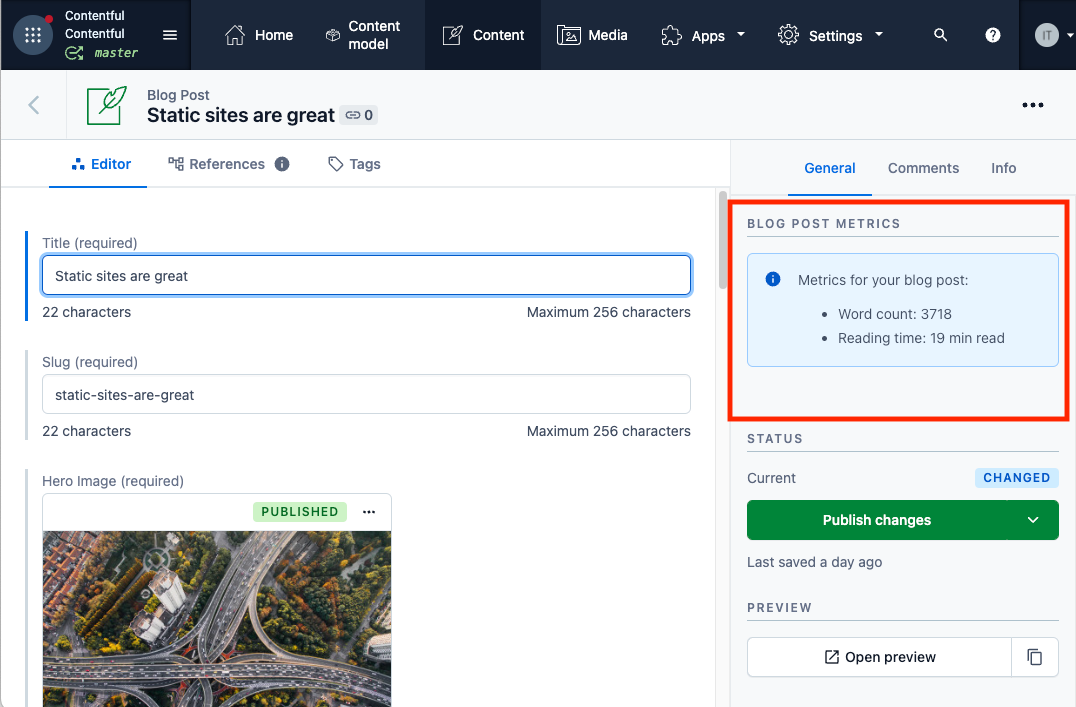
In this tutorial, we use an example of a custom app called Blog Post Metrics that provides the editors with word count and reading time indicator. These metrics are set to be displayed in the entry editor sidebar for a “Blog post” content type:
Prerequisites
Setup
- The latest LTS version of Node.js installed on your machine. If you don’t have
Node.jsinstalled, you can download it here. - Be logged in to your Contentful account and have a Contentful space. If you don’t have an account, sign up for it.
- Have a content type “Blog post” set up with fields of types “Text” and “Long text”. To learn how to create a content type, refer to Add a content type.
Knowledge
- Read and write JavaScript.
- Be familiar with basic React.
- Be familiar with Content modeling.
Create your project
To create a project for your app:
- In your terminal, run the following command:
create-contentful-app CLI tool, check Create Contentful app reference.After some time the script is ready and will ask you a couple of questions.
-
Select blank template.
-
Select the preferred programming language - either TypeScript or JavaScript.
The create-contentful-app CLI tool is initializing your new project.
- Navigate to the newly created folder and start the app by running the following command:
Your app is hosted on http://localhost:3000. But before we can use it we need to connect this to the Contentful web app which we will do in a later step
Retrieve, calculate and display metrics in your app
In this subtopic, we explain how to set up the “Blog Post Metrics” app to retrieve and calculate metrics and display it to users in an entry.
Our example “Blog Post Metrics” app is intended to run in the “Entry sidebar” location, this is why we edit src/locations/Sidebar.tsx. This file represents the sidebar location in the Contentful web app.
Interact with the data in the Contentful web app
In this step, we set up our “Blog Post Metrics” app to listen to the changes in an entry field of the Contentful web app using the App SDK. To interact with data in Contentful, we use the useSDK hook.
To retrieve a value from a field for further metrics calculation:
- Open
src/locations/Sidebar.tsx - Copy the following code:
JavaScript
TypeScript
In the component above, the following fields are used:
sdk.entry.fields— An object that holds all the fields that are in an entry.fieldId— An individual ID of a field that is defined for the app to listen to. In our example, the field ID isbodyas we specified it when creating our content type.
Use thegetValuemethod to retrieve the current value from the field.
Additionally, the following methods and/or data can be used:
onChange— Listen to the events from the field to calculate the wireframe metrics as soon as a user starts entering text in a “Blog post” entry.field API— Leverage it to listen for value changes the app needs. It is provided byuseSDK-hook.onValueChanged— Use this method to listen for any content updates on the landing page.readingTime— Call this method to take the value and calculate our desired metrics. The method is created in Add the reading-time method to our Sidebar component step of this tutorial.
Add metrics calculation to your app
In this step, we set up the blog post to be provided with the word count and the reading time metrics. To calculate those, run the following function:
JavaScript
TypeScript
Our methodreadingTime uses the value set in WORDS_PER_MINUTE to calculate the amount of minutes one spends to read the text. You can change this value in the Add the reading-time method to our Sidebar component step of the tutorial.
Add the reading-time method to our Sidebar component
In this step, we set the calculated metrics to be displayed in the entry sidebar. For this, we import the following Forma 36 components: List, ListItem and Note.
For the calculated metrics to be displayed in the entry sidebar:
- Open
src/locations/Sidebar.tsx. - Copy the following code:
JavaScript
TypeScript
Embed your app in the Contentful web app
To see your app running in the Contentful web app, you must create an app definition to expose the app to Contentful. An app definition is an entity that represents an app in Contentful and stores general information about it.
Create your app definition
To create an app definition:
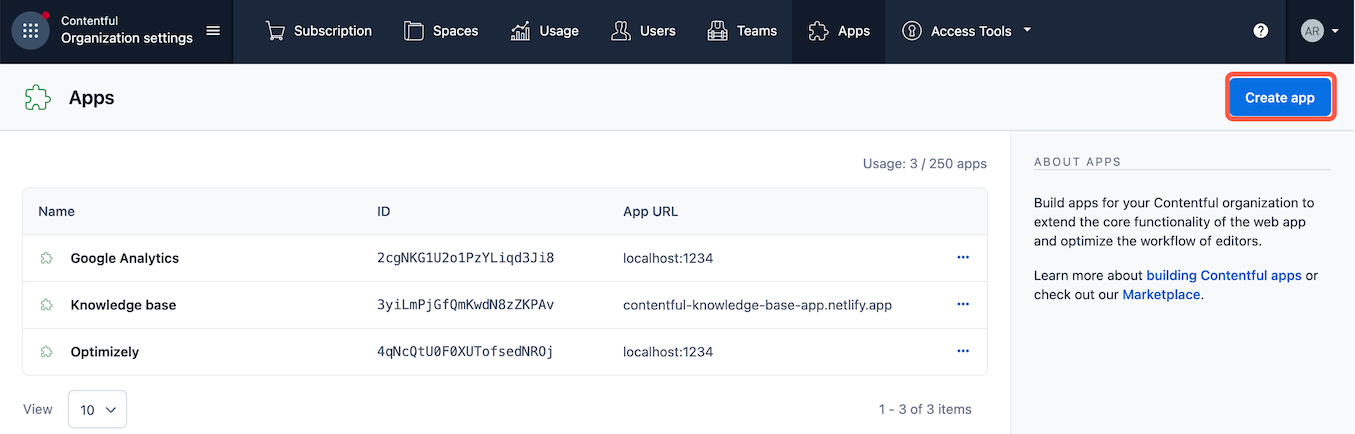
- Go to the Apps tab under your organization settings:
- Click Create app. The “App details” page is displayed.
-
In the Name field, enter a custom name for your app. For our example app, we use Blog Post Metrics as a name.
-
In the Frontend field, enter URL where your app is hosted. Our example app is hosted locally for now, so the URL for it is
http://localhost:3000.
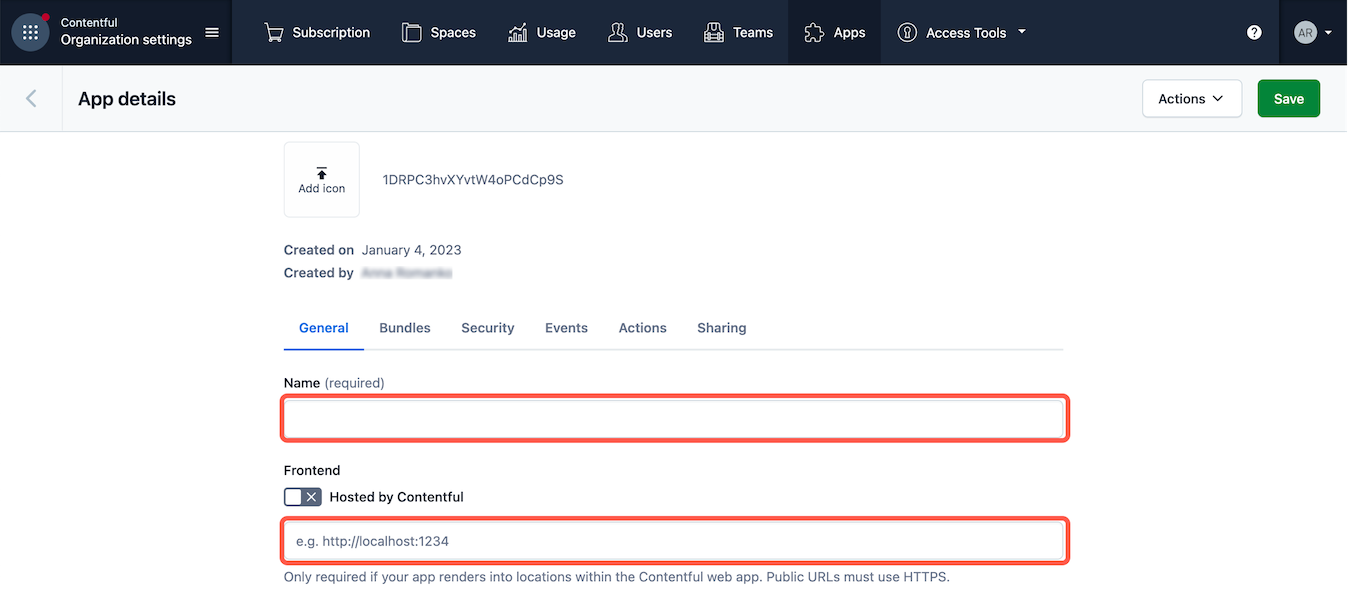
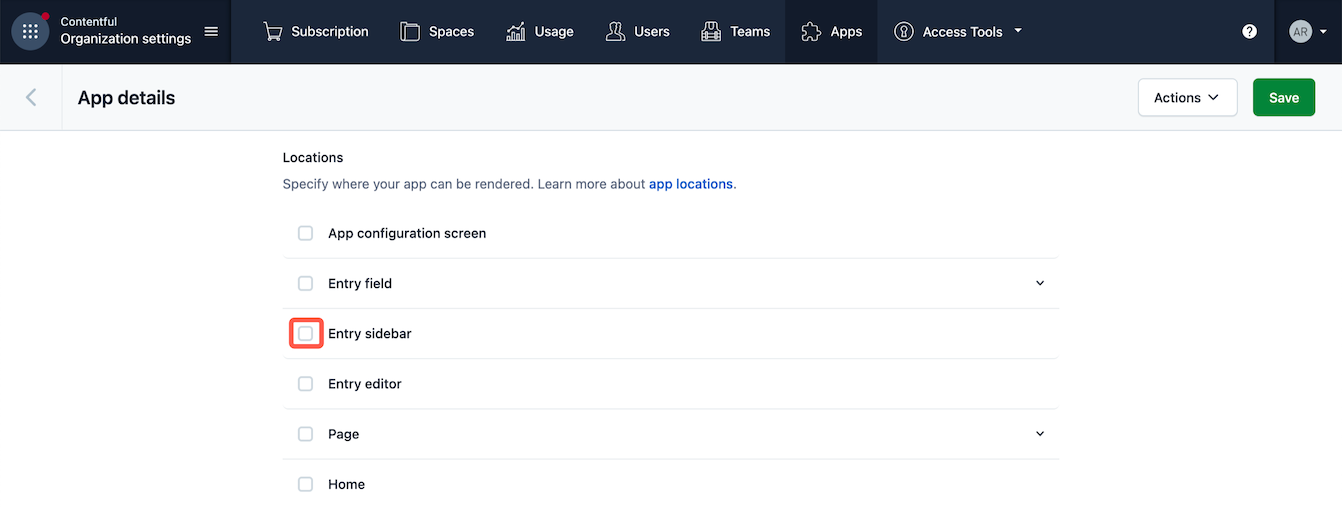
- Under the Locations area, select a checkbox against a location (one or multiple) for your app. For our example app, we would like the metrics for the blog posts to be displayed in the sidebar of the entry editor, so we select the location Entry sidebar.
- Click Save. Your app definition is saved.
Install your app to a space
After the app definition is created, install your app to a space:
-
In the Contentful web app, navigate to the required space.
-
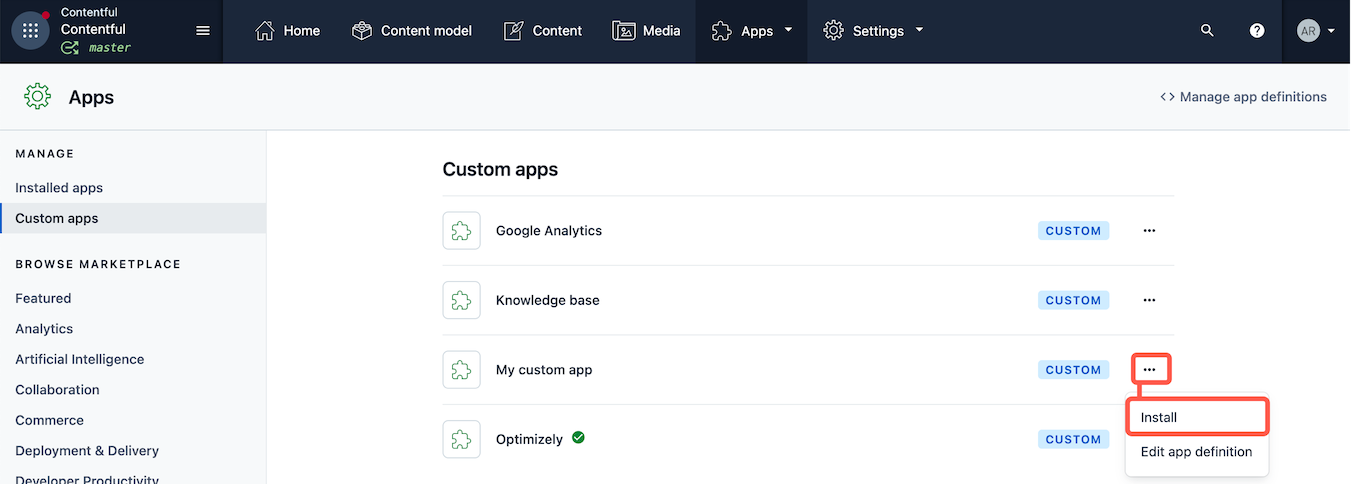
In the top pane, click Apps and select Custom apps. The “Custom apps” page is displayed.

- Go to your newly created app, click on the actions menu icon and select Install.
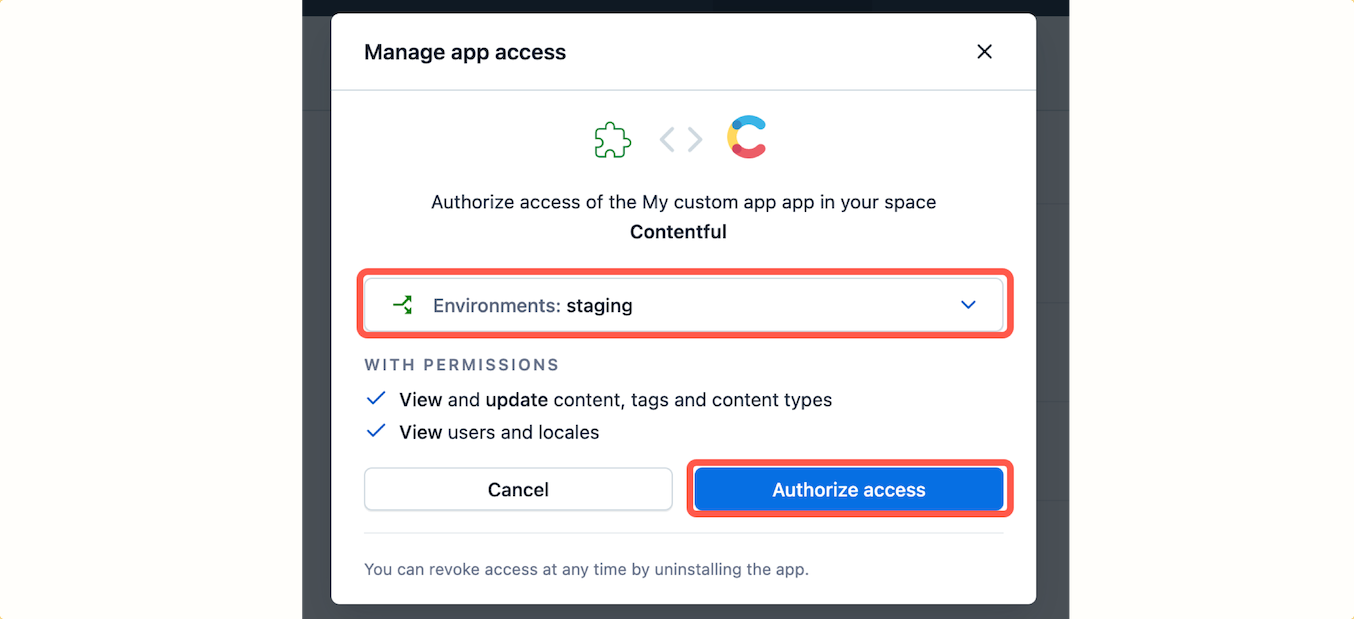
The “Manage app access” window is displayed.
- Click the Environments field and select the checkbox against an environment (one or multiple) in which you would like the app to be installed and click “Authorize Access”. Your app is installed to the selected environment (one or multiple).
Assign your app to a content type
After your app is installed, assign it to “Blog post” content type.
To assign an app to a content type:
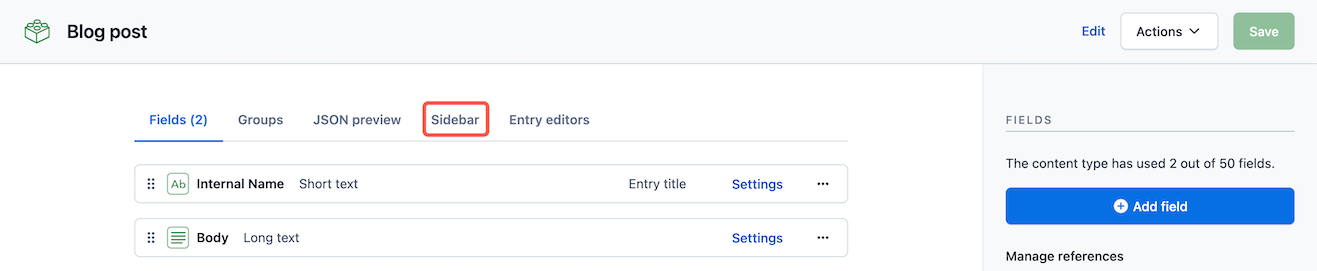
- Go to the Content model tab and click the “Blog post” content type.
- Go to the Sidebar tab.
- Under the “Available items” area, scroll down to the Blog Post Metrics card and click the + button. The app is added to the sidebar.
- Click Save to apply changes to the content type.
See your app in action
You have successfully created your custom app. Now, let’s see it in action.
Go to the Content tab and create an entry with the content type Blog post. You should see a sidebar app now in your entry editor.
Next steps
More custom app examples
Explore more custom app examples and templates on GitHub: Examples apps and Templates using App Framework on GitHub.
Read blog posts about building custom apps with the App Framework:
- Building a custom Contentful app for the Last.fm API.
- How to manage your March Madness fantasy league with Contentful