Beginner's guide to Contentful
Welcome to Contentful. No matter your role or what content you’re interested in managing — from an editor working on a marketing blog to a contributor working on a web app — Contentful has many powerful features to offer you.
Before you can start creating content, however, you need to create a content model. Think of a content model as the big-picture view of your content and the content types you want to create as the pieces that make up that big picture. The key to any successful Contentful project lies in creating a good content model.
For most people, the easiest way to get used to content modeling is with a practical example. This guide will walk you through the steps necessary to get up and running with your first project in Contentful, from creating a content model to filling it with content. For a more in-depth look at content modeling as a concept, see our guide to content modeling basics.
Our example project
We have a personal blog that we run in our spare time. Occasionally, we have guest posts from friends and people in our field that we admire. We need to add, edit, and manage all these posts.
The first thing you think of when it comes to blog content is blog posts. However, blog posts are not the only content in a blog. There are also images or other media, such as embedded videos, author bios, and pieces of SEO metadata, such as tags. All of these pieces of content can be managed in Contentful.
These pieces of content are the content types and the blog that is our content model.
Step 1: Get an account
If you don’t already have a Contentful account, go to https://www.contentful.com/sign-up/ to get one for free. Then go to https://app.contentful.com/ and log in.
NOTE: For organizations on EU data residency, the correct URL is https://app.eu.contentful.com/.
Step 2: Create a space
A space (short for workspace) is where all the content is created with Contentful. It's your place to keep all the content related to a project. For this example, our project space is where our blog entries will live.
To create a new space:
Click Add space. Select your plan from the list.
Click Continue. Select the space license.
Give the space a descriptive name. In this example, we’ll name the space the same as our blog title, “Content is King!”
Select “Create an empty space” from the list below the blog name, then click Proceed to confirmation.
Double-check your space details. Then, click Confirm and create when you’re ready.
Step 3: Create the content model
Now that our space is set up, it's time to create our content model. We do this by adding content types for each kind of content we want to have in our space: blog posts, images, author bios, SEO metadata, and videos.
You can create your content model in the web app using one of the following options:
Visual Modeler — Allows you to visually build your content model, view your content types and connections between them, and collaborate on the changes with your teammates.
Content model tab — Allows you to add and configure content types using the content type editor.
We’ll start by adding a content type for blog posts.
From your space home:
Go to the Content model tab.
Click +Create content type.
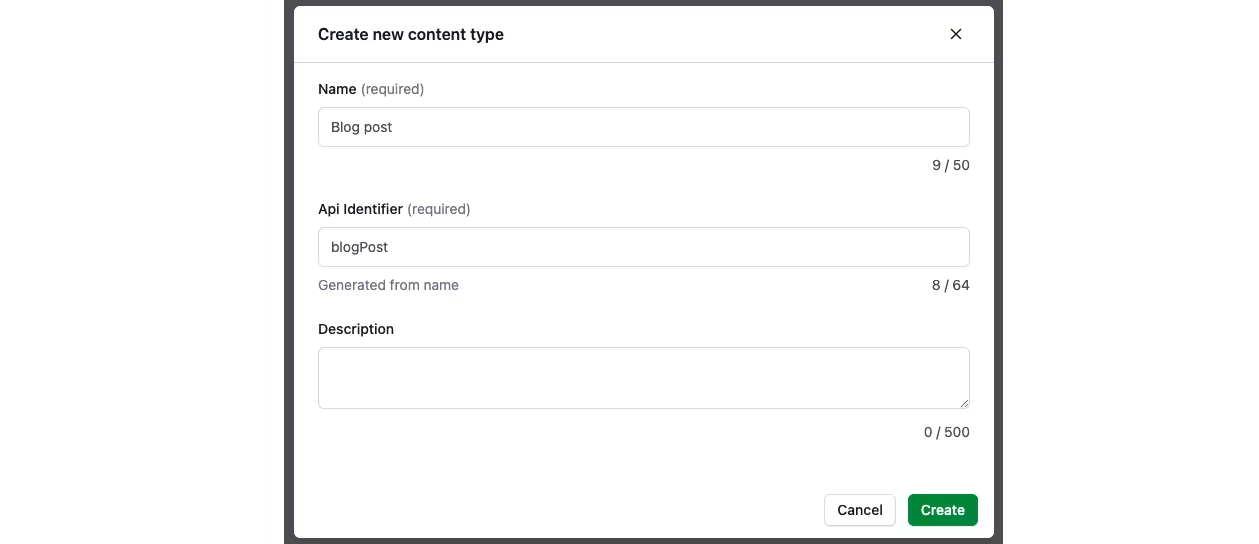
NOTE: If you already have at least one content type created, you can continue setting up your content model in the Visual Modeler. To switch to it, click Visual Modeler.Enter the name of the content type you’re creating (in this case, “Blog post”) and a short description. Then click Create when satisfied.
Now, we need to define what kind of information we want to include about the Blog post content type in our content model.
Step 4: Add information to the content model
So far, we have created a space for our blog (called "Content is King!"), and we’ve created a content type called Blog post. The next step is to define what type of information to store for each blog post in our blog. This is done by adding fields.
Contentful currently supports a number of fields:
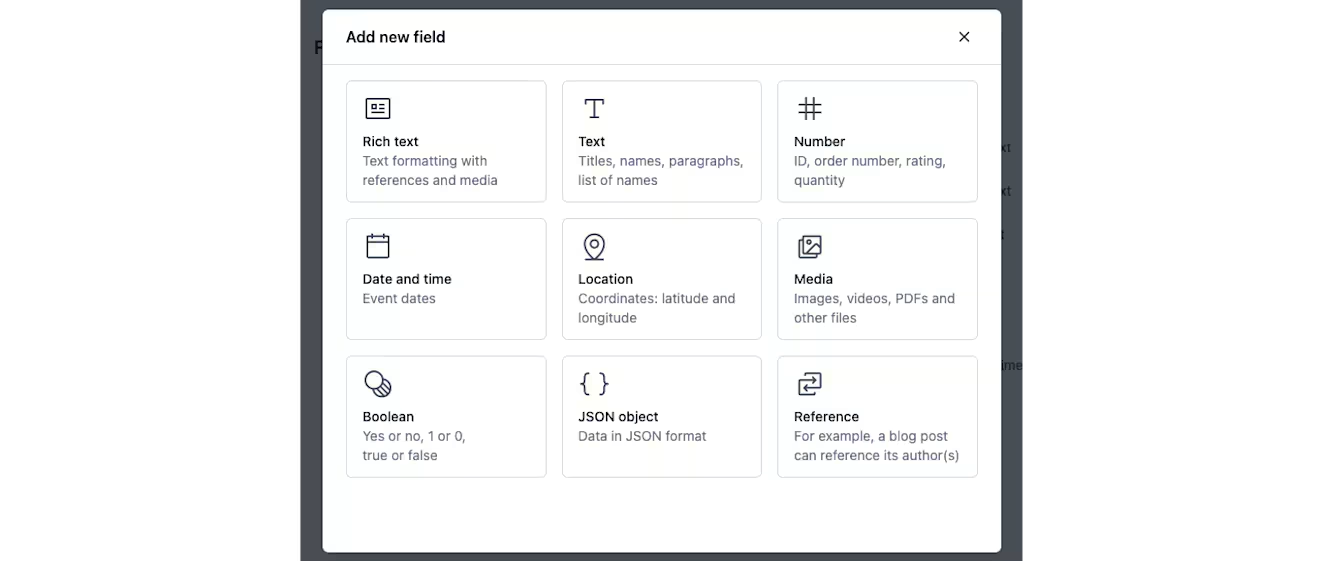
For our Blog post content type, we’ll be using the following types of fields:
Text
Rich text
Date and time.
To add fields:
Click + Add field and select Text. Give the new field the name of “Title” and click Save (if you’re working in the Visual Modeler) or Create and configure, and then Confirm (if you’re working in the content type editor).
Repeat for "Rich text" and "Date and time" fields.
When finished adding fields, click Save (if you’re working in the content type editor).
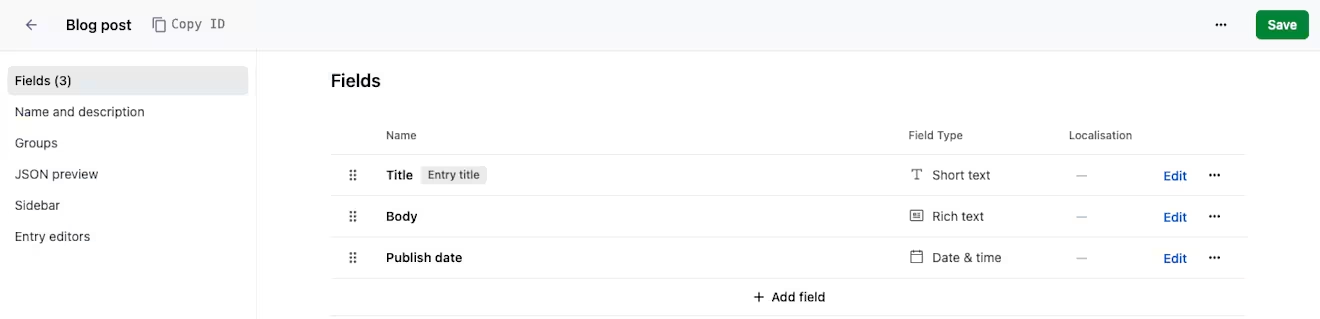
Your content type should look like this:
Step 5: Add content
Once all our fields have been added, our content type is finished! Now, let’s use it to create some content:
Navigate to the Content tab, and click Add Blog post.
Fill out the fields with your desired content.
When finished, click the Draft button and select Publish.
Step 6: Repeat
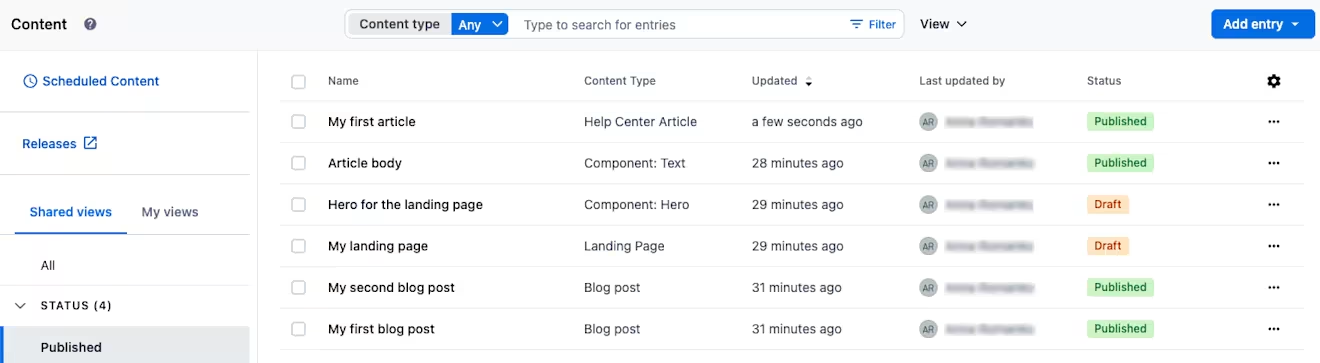
Remember, a blog is not just blog posts. We still have images, author bio, SEO metadata and videos to add to our space. Don’t worry though — the process remains the same. Follow steps 3 through 6 for the remaining content types, and our space will look like this:
Everything is now in place
By following this introduction to content modeling with Contentful, you:
Signed up for a free Contentful account.
Created your first space called “Content is King!”.
Put together a content type called “Blog post”.
Populated the “Content is King!” space with content based on the “Blog post” content type.
Next steps
Check out our other help center articles, or find out what we’re currently working on by visiting our Marketing blog.