Dynamic tags
Overview
Dynamic tags allow you to insert personalized and variable content into your communications, such as emails, notifications, or messages.
With dynamic tags, you can create messages that address recipients by their name, provide personalized recommendations, or include other dynamic information specific to each individual.
Create a dynamic tag
Before you can use a dynamic tag in your content, you have to create and configure one.
To create a Dynamic Tag:
Log in to the Contentful web app.
Navigate to the "Content" tab.
Click +Add entry, and select Dynamic Tag. The editor is diplayed.
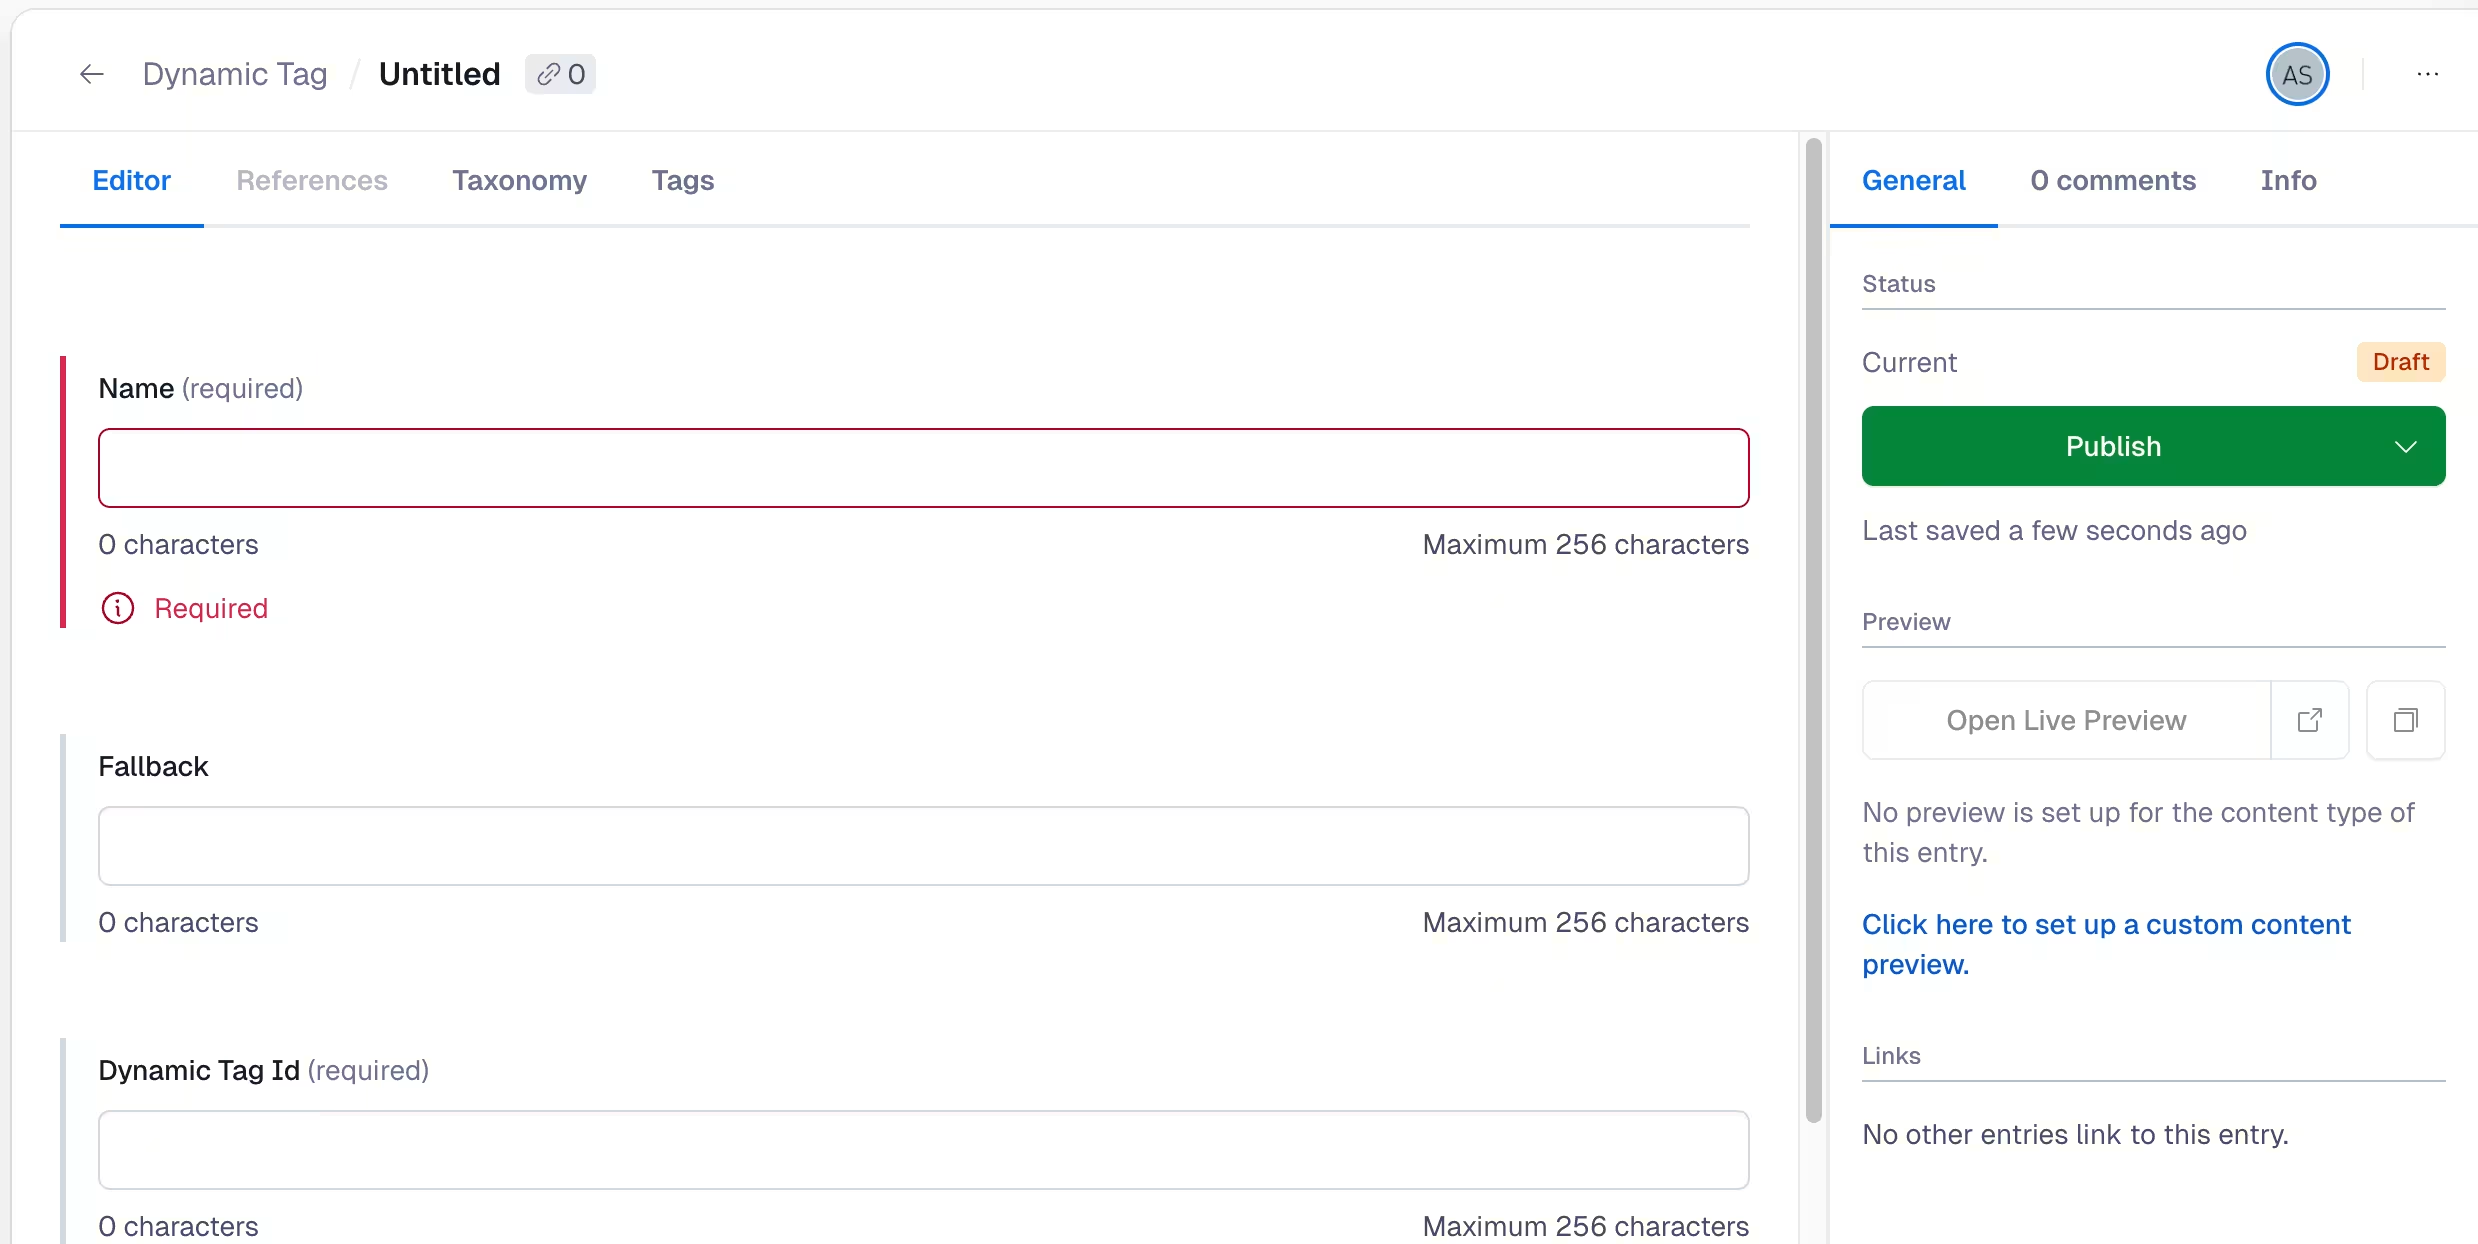
Enter a relevant name. This is title by which you can add the Dynamic Tag in your content.
Set the Fallback. This is the value that will be used in case no value is available.
Set the Dynamic Tag Id. This is the key from which the value will be retrieved
Keys can be accessed using dot.notation. For example, you might uselocation.cityas the Dynamic Tag ID to display the user's city. You can also access trait information if you collect it on profiles, such astraits.firstNameif you capture names.
NOTE: What keys and traits are available to you depends on what customer data is being sent to the respective profiles using the Experience API, SDK or upstream data flows.
Add Dynamic Tags to content
Dynamic tags are added to content as inline embedded entries within rich text fields. In this way, dynamic tags act as variables or placeholders for information that will be dynamically populated.
To use a Dynamic tag:
Configure a Rich Text field that supports inline embeds of the
Dynamic Tagcontent type.Create at least one Dynamic Tag.
Embed the Dynamic Tag within the rich text field of an entry.