Create tags
Overview
You can create new tags, rename or delete existing ones from the Tags page of the environment settings. When you rename or delete tags, all entries and assets containing the tag are automatically updated.
Important: You must have an admin role to create tags. However, admins can decide which roles can create tags by updating the roles and permissions in the space settings.
Tags can be either public or private, and their type cannot be changed after the tag is created. They are private by default.
How to create a tag
When creating a tag, you have to enter a custom name and ID for it. The ID is filled in automatically as you enter a tag name, but you can change it according to your preferences.
NOTE: The tag ID can contain only letters, numbers, periods, hyphens and underscores.
To create a tag:
Log in to the Contentful web app.
Click Settings and select Tags.

The Tags page is displayed.Click +Create Tag.

The Create tag window is displayed.Enter a custom name for your tag in the Tag name field.

Under Tag visibility, select Private (default), if you want this tag to be used solely by internal teams, or Public, if you want this tag to be used in customer-facing context.
This setting cannot be changed later.Optional: Change the automatically filled in value under the Tag ID field.
Click Save tag. Your tag is created and displayed on the Tags page. Alternatively, if you wish to add multiple tags, click Save and create another.
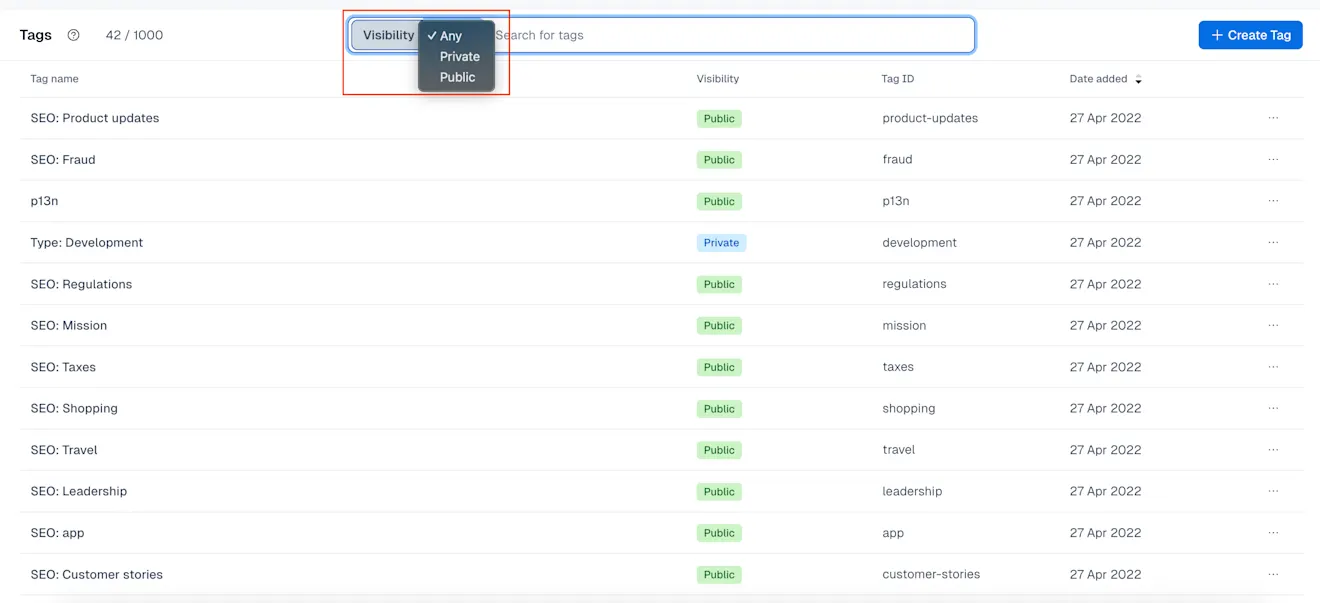
Filter by tag visibility
You can use the Visibility filter to sort the list of tags displayed on the Tags page by Public or Private.
Assign tags to entries and assets
Once a tag has been created, you can assign it to entries and assets. The ability to assign tags is defined by your space permissions. For more information, see the Content permissions article.
NOTE: A tag that is assigned to an entry doesn't propagate to entries or assets nested in its reference fields.
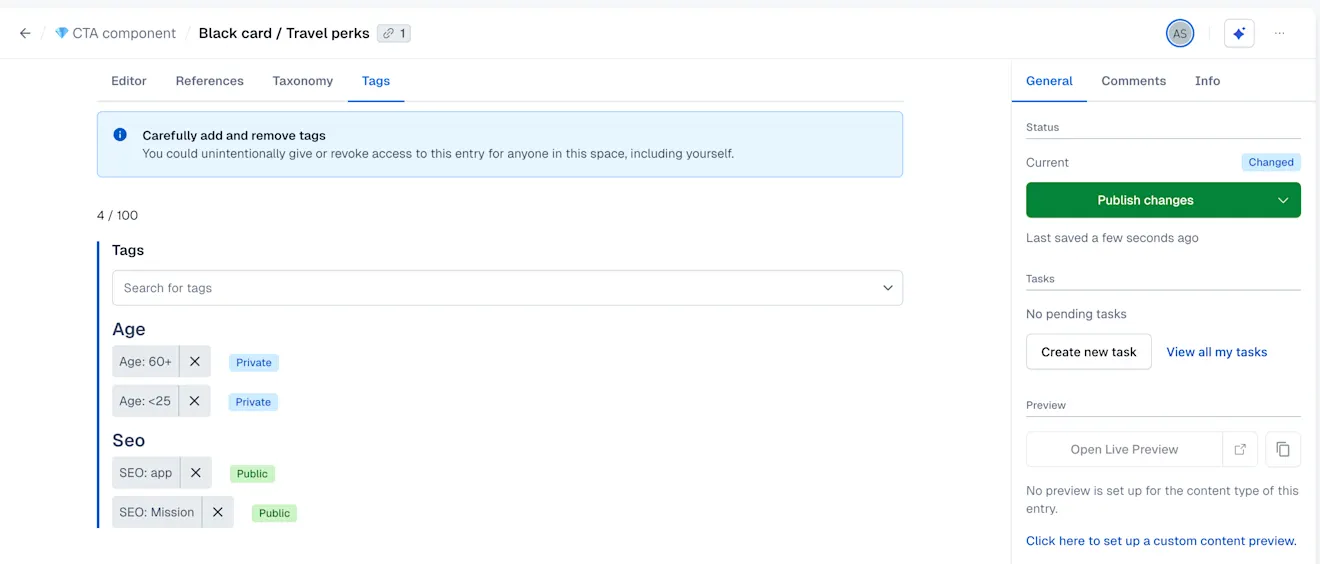
To add a tag to an entry or asset:
Open your desired entry or asset.
Select the Tags tab.

Click the Search for tags drop-down and select the desired tag. You can assign one or multiple tags to your entry or asset.

The tags are assigned.

You can remove a tag by clicking on the x to the right of the tag name.
Group tags
You can group your tags based on the prefix you include in the tag name. To have tags grouped by a prefix, add the same prefix to each tag name and separate it by a symbol (hyphen, colon, dot, underscore or hash). After you assign such a tag to an entry or asset, it gets displayed under the relevant group in the editor page.
For example, tags with names
"Age: 60+" and "Age: <25" will be displayed under the group "Age".