Workflows steps management
Workflow steps include changing step permissions (privileges of moving from one workflow step to the next step), canceling the workflow, and rules (the privileges of publishing or editing).
NOTE: A Workflow step does not require a Tasks app or Slack app to be installed in order for certain steps to function properly. For example, a step can consist of only setting the rules (permissions) of that workflow step.
To add a Workflow step:
Attention: By default, only admins can adjust the step settings and move from one step to another without restrictions.
Open Workflows in the sidebar under the "AI & Automations" tab.
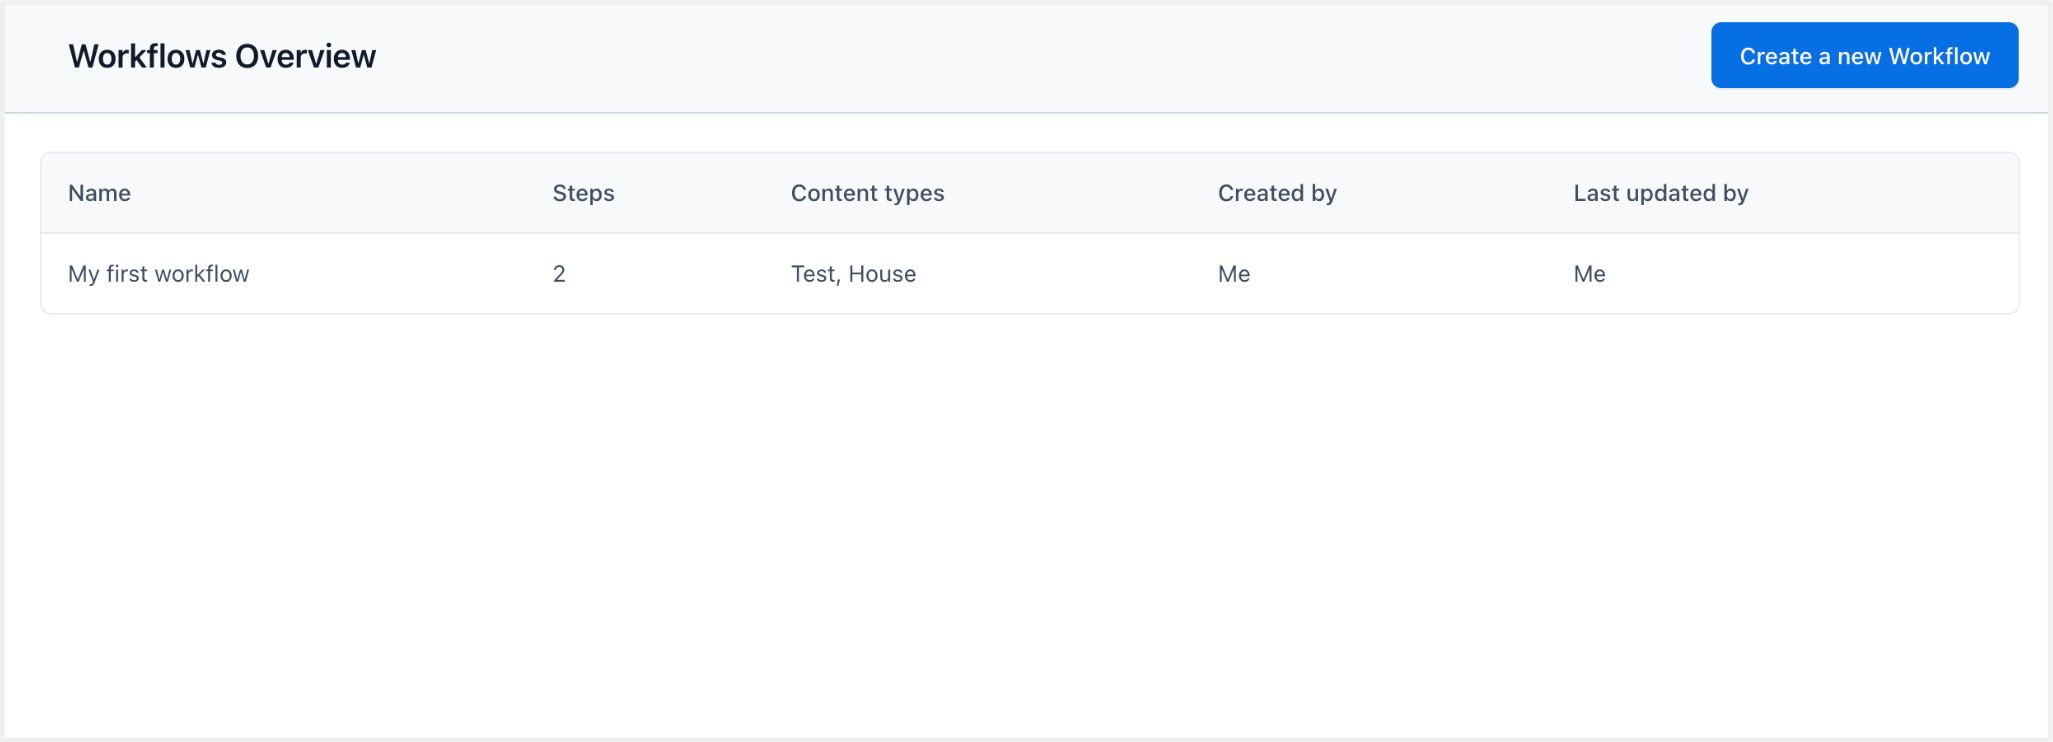
In the Workflows dashboard, click Manage Workflows at the top right corner.
In the workflow overview list, select the workflow you wish to make modifications to by clicking on the workflow name.
Click Add Step.
NOTE: There can be up to five tasks per step.
5. Add a name, description, and an indicating color to the Workflow step.
6. To add who can change the step, click Define who can change the step.
7. To add/remove automations for the step, click Rules and Actions.
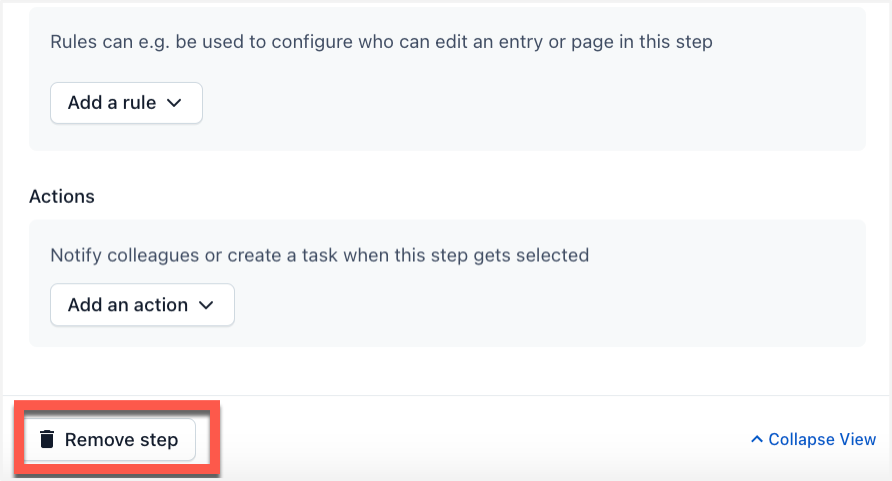
To remove a Workflow step:
Open Workflows in the sidebar under the "AI & Automations" tab.
In the Workflows dashboard, click Manage Workflows at the top right corner.
In the workflow overview list, select the Workflow you want to modify.
On the Workflow page, select the step you want to remove, click Remove step at the bottom left corner.
Workflows: Sequential vs. Flexible
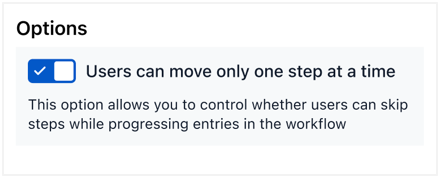
Enabling the sequential workflows option will enforce sequential completion of that workflow. Without selecting this option, users with appropriate permissions will be able to change between steps without restrictions.
To initiate this function, select “Users can move only one step at a time” in the Options section which can be found in the workflows details sidebar of the step editor page.
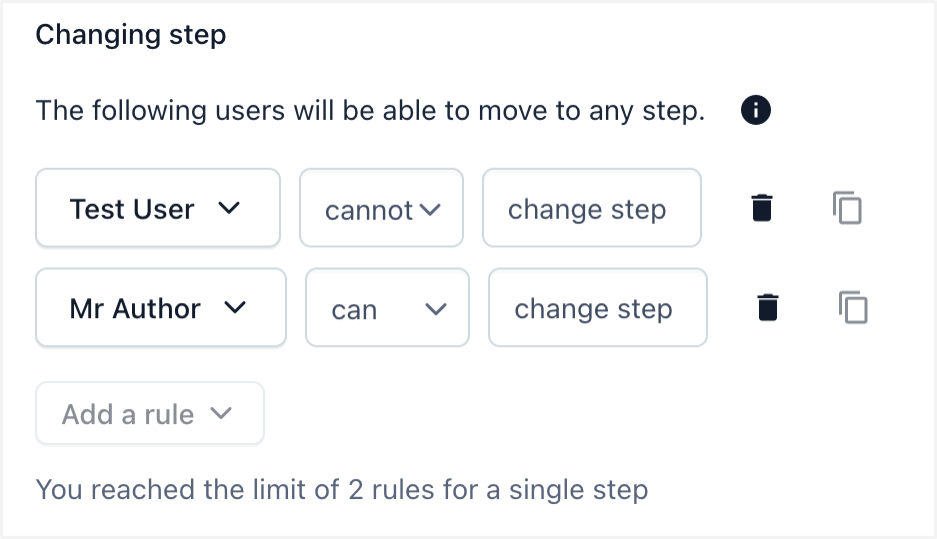
Workflow step change permissions
Workflow step permissions can be defined on a per-step basis, allowing you to specify which teams or users can move workflows from one step to the next step.
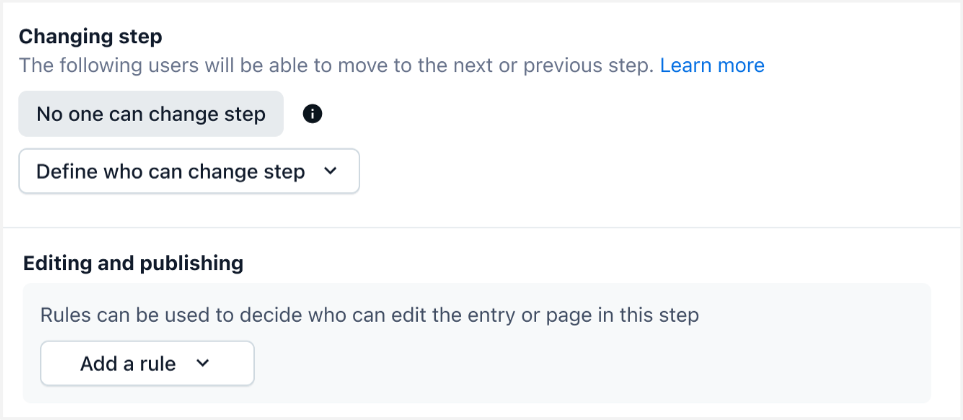
NOTE: The default permissions are set to ‘no one can change step.’ You can apply this setting to any user except admin roles.
Modify or select users who can change steps
To modify, select users and teams who can change between steps within this workflow:
Click the Define who can change step button.
In the drop-down, choose one of the following options:
All users with access can change step - enables all the users who have access to the workflow to change between steps.
Selected users can change step - choose which users and teams can move between the next and previous steps. Click apply to confirm your choices.

Once you have confirmed the ‘change step’ permissions of the selected users and teams, you can add limitations to each selection. Next to the selected user and team names, click the can or cannot options in the drop-down to adjust the ‘change step’ setting.
NOTE: A maximum of two ‘changing step’ rules can be applied to a single step: one rule option that allows every user or team who can make a change and another rule option for those who cannot make a change.
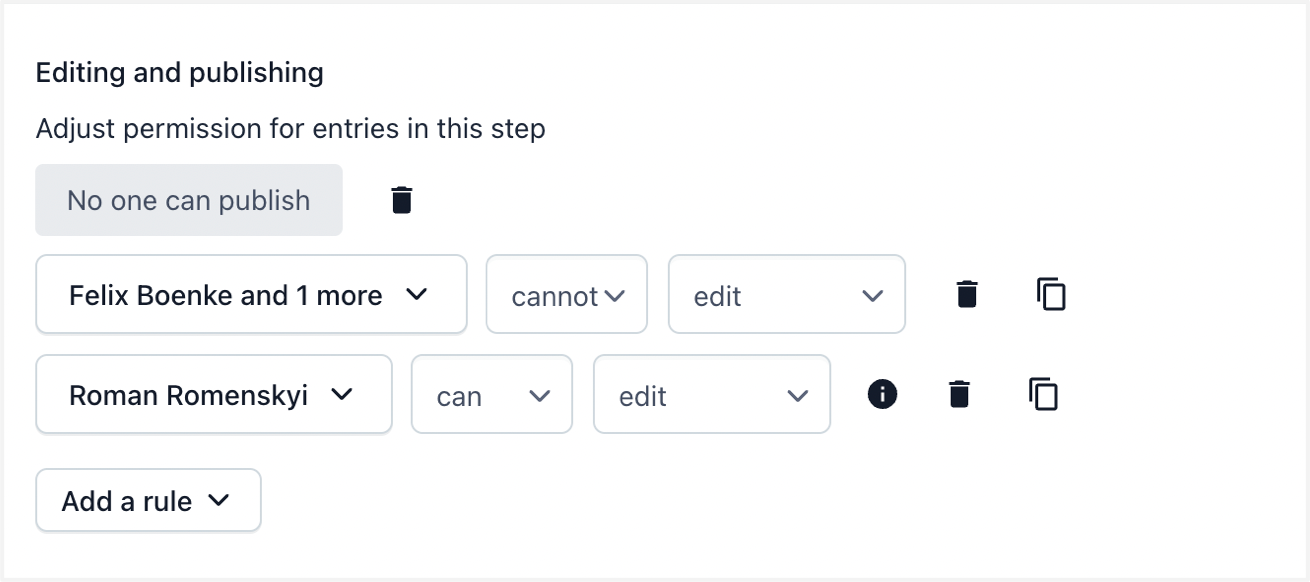
Adjust the permissions of the editing and publishing setting
To adjust the permissions of the editing and publishing setting:
To the right of the selected users and teams, click can or cannot from the drop-down to adjust the permissions for that rule.
Next to the can and cannot settings, select the action ‘edit’ or ‘publish’ to define the permissions of the selected user and team.
To duplicate the editing and publishing permission settings of a previously selected user, click on the icon on the far right.
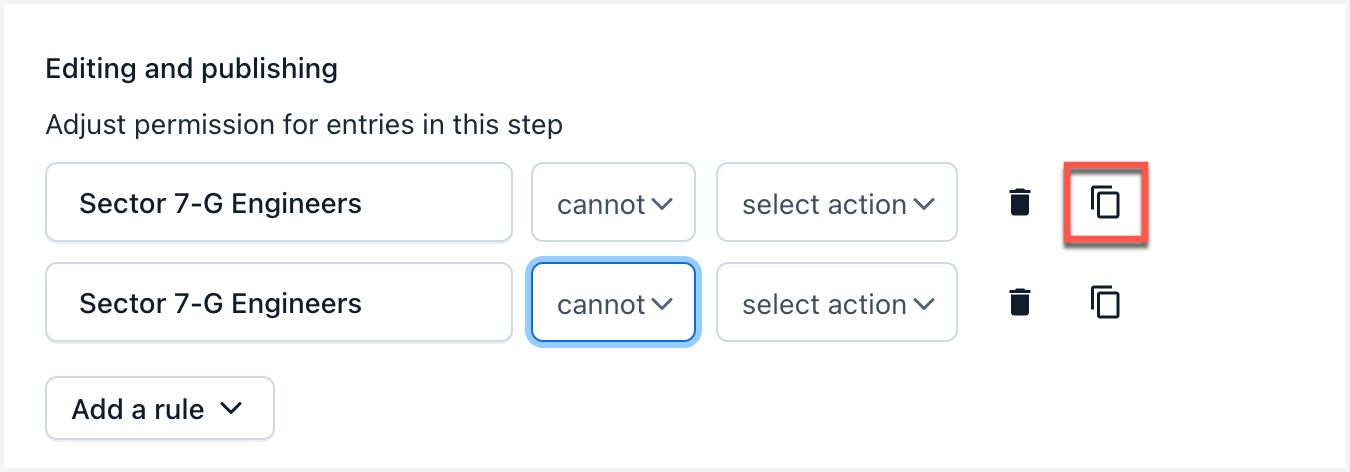
NOTE: A maximum of four ‘editing and publishing’ rules can be applied to a single step.
Workflow rules: editing and publishing permissions
As a section within a Workflow step, rules enforce governance by restricting the editing or publishing rights to authorized users or teams at certain stages of the content creation process.
User or team roles and permissions are based on the permissions granted on a space level.
NOTE: Your workflow permissions will complement the space-level permissions you have been granted in the organization system of Contentful. For example:
If a user or team is not explicitly allowed to perform editing or publishing actions on the space level, you can grant those permissions to a user or team in the Workflows app.
If a user or team is explicitly denied to perform editing or publishing actions on the space level, you cannot grant those permissions in the Workflows app. Creating an allow rule in the Workflows app will not change the behavior. An explicit deny action overrides an allow action in the Contentful system.
Assign a Workflow rule
To assign a Workflow rule:
Open the Workflows app.
In the Workflows dashboard, click Manage Workflows at the top right corner.
In the workflow overview list, select the Workflow you want to modify.
In the Workflow step editor page, click Add a rule.
Select the permission settings for that step from the drop-down.

Enter the name of team names and/or users to apply rules.

Assign an action to each team by selecting the drop-down arrow, specifying whether you want to allow (can) or prohibit (cannot) specific actions to the users (edit, publish).

Optional: You can duplicate a rule from a previous scenario (including the action) that can be implemented by clicking the far right copy icon.
8. To limit the actions for the selected teams and users, you can customize the parameters by selecting the drop-down menu.